LG Freezer Not Freezing? Fridge Working? Fix It Fast
Your LG refrigerator hums along normally, keeping milk and vegetables perfectly chilled, but when you open the freezer compartment, you discover puddles of melted ice cream and thawing meat. This frustrating scenario—where your LG freezer stops freezing while the refrigerator section continues working—is one of the most common appliance issues homeowners face. The good news is that this specific symptom pattern usually points to a fixable problem rather than complete system failure. Understanding why your LG freezer not freezing but fridge is working can save you costly service calls and prevent food waste.
This temperature imbalance occurs because LG refrigerators use a single cooling system that serves both compartments. When your refrigerator stays cold but the freezer warms up, it typically indicates an airflow restriction or component failure affecting only the freezer section. By following this targeted troubleshooting process, you can identify the root cause and determine whether a simple DIY repair will restore proper freezing temperatures.
Diagnose Airflow Restrictions Between Compartments

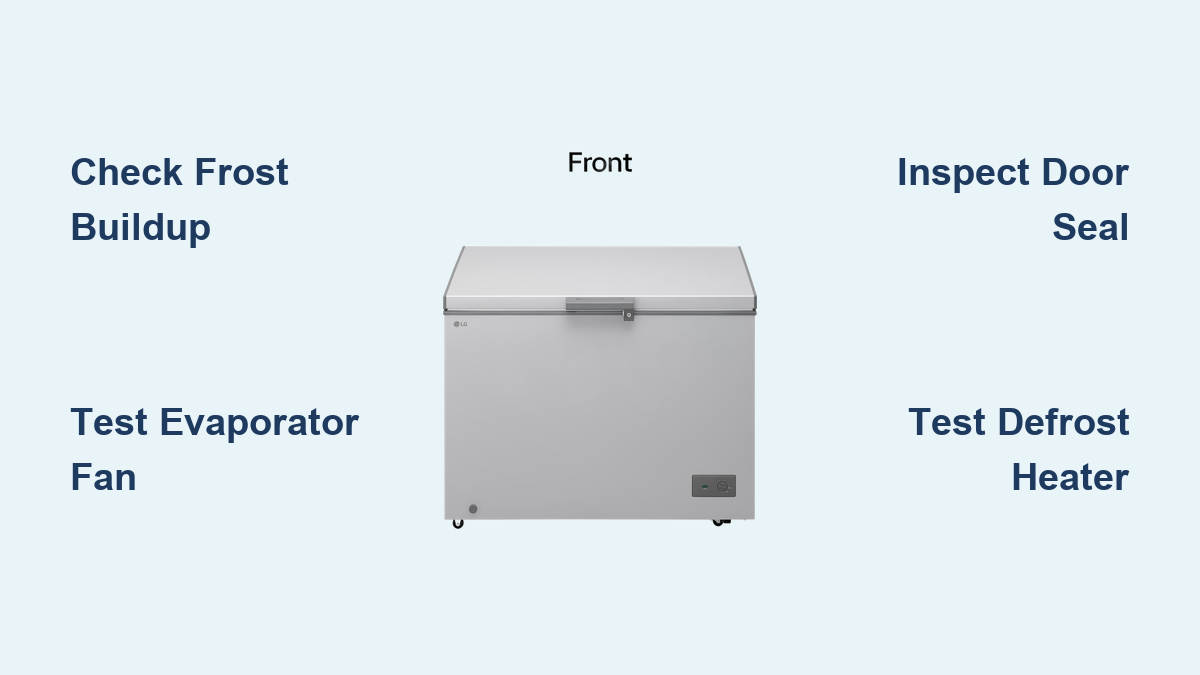
Check for Frost Buildup on Evaporator Coils
Excessive frost accumulation on the evaporator coils is the most common culprit when your LG freezer not freezing but fridge is working. These coils, located behind the rear panel inside the freezer, should remain relatively frost-free thanks to the defrost system. When frost builds up beyond a quarter-inch thickness, it blocks airflow to the freezer compartment while still allowing sufficient cold air to reach the refrigerator section.
To inspect the coils, remove all freezer contents and shelves, then locate and remove the rear panel (typically secured with Phillips-head screws). Shine a flashlight to examine the coils. If you see significant ice buildup, your defrost system has likely failed. Before proceeding with component testing, manually defrost the unit by unplugging the refrigerator and leaving both doors open for 24-48 hours, placing towels to catch melting water.
Test the Evaporator Fan Operation
The evaporator fan circulates cold air from the freezer to both compartments. When this fan fails, the freezer loses its primary cooling source while the refrigerator may still receive residual cold air through passive vents. With the freezer door open and interior light on, listen for the distinctive sound of the fan running. A healthy fan produces a steady, quiet whirring noise.
If you hear no fan operation, check for obstructions first—sometimes ice or food packaging blocks the fan blades. Remove any visible blockages and test again. If the fan still doesn’t run, the motor may have failed or lost power. Accessing the fan requires removing the rear panel, then checking the electrical connector for secure attachment. A multimeter test across the fan terminals (with power disconnected) should show continuity; no continuity indicates a failed motor requiring replacement.
Inspect Critical Door Sealing Components
Perform the Dollar Bill Seal Test
A compromised freezer door seal allows warm, moist air to enter the compartment, forcing the cooling system to work harder while struggling to maintain freezing temperatures. This problem often manifests as frost buildup specifically around the door perimeter, while the refrigerator section continues functioning normally due to its less demanding temperature requirements.
Conduct the dollar bill test to verify seal integrity: Close a dollar bill in the freezer door at various points around the perimeter. Properly functioning gaskets should grip the bill firmly, requiring noticeable resistance when pulling it out. If the bill slides out easily at any point, that section of the seal has failed. Pay special attention to corners and vertical sections where seals commonly deteriorate first.
Clean and Realign Door Gaskets
Accumulated food residue, grease, or hardened debris can prevent proper door sealing even with intact gaskets. Clean the entire gasket surface using warm water and mild dish soap, paying special attention to the magnetic strip area. For stubborn buildup, use a soft toothbrush to gently scrub crevices without damaging the rubber. After cleaning, apply a small amount of petroleum jelly to the gasket to maintain flexibility and improve sealing.
If your LG freezer not freezing but fridge is working problem persists after cleaning, check for door alignment issues. Misaligned doors often result from overloaded shelves or frequent slamming. Adjust the door alignment by loosening the hinge mounting screws slightly, then gently repositioning the door to ensure even contact with the cabinet. Tighten the screws while holding the door in proper alignment, then retest the seal.
Examine the Defrost System Components

Test the Defrost Heater Functionality
The defrost heater, positioned beneath the evaporator coils, activates periodically to melt frost accumulation. When this component fails, frost builds up cycle after cycle until airflow becomes completely restricted, causing the freezer to warm while the refrigerator remains cold. With the refrigerator unplugged, locate the heater (typically a black tube running along the coil base) and disconnect its wiring harness.
Using a multimeter set to the ohms setting, test for continuity across the heater terminals. A functioning heater shows a resistance reading between 15-50 ohms, while infinite resistance (OL on most meters) indicates an open circuit and failed heater. Visually inspect the heater for obvious damage like burn marks or broken sections, though internal failures often show no external signs. Replacement involves removing the evaporator assembly and transferring mounting brackets to the new unit.
Verify Defrost Thermostat Operation
The defrost thermostat monitors evaporator coil temperature and signals the heater to activate when frost accumulation reaches a critical level. This component commonly fails in the open position, preventing the defrost cycle from initiating while allowing normal cooling operation—exactly the symptom pattern where your LG freezer not freezing but fridge is working.
With the thermostat disconnected from the wiring harness, test for continuity using a multimeter. A properly functioning thermostat shows continuity when cold (below 32°F/0°C) and no continuity when warmed above its cutoff temperature (typically 45-55°F/7-13°C). To test this transition, place the thermostat in a freezer for 15 minutes, check for continuity, then warm it with your hands while monitoring the meter. If continuity doesn’t break when warmed, the thermostat has failed and requires replacement.
Evaluate Temperature Control Components

Check the Freezer Thermistor Readings
Modern LG refrigerators use electronic thermistors instead of mechanical thermostats to monitor temperatures. The freezer thermistor, usually mounted near the evaporator coils or air duct, provides critical temperature feedback to the control board. When this sensor fails or drifts out of specification, it can cause the system to misjudge cooling needs—maintaining refrigerator temperatures while allowing the freezer to warm.
Locate the thermistor (typically a small probe with two wires) and disconnect it from the control board. Using a multimeter in resistance mode, measure the thermistor’s resistance at room temperature. Compare this reading to the manufacturer’s specifications (usually available in service manuals). A significant deviation (more than 10%) indicates a faulty sensor. For accurate testing, you’ll need a temperature-resistance chart specific to your LG model, as thermistor specifications vary between refrigerator series.
Test the Adaptive Defrost Control Board
The control board manages all cooling functions, including defrost cycle timing. When this component malfunctions, it often disrupts the defrost cycle while maintaining basic cooling functions—resulting in your LG freezer not freezing but fridge is working scenario. Modern LG models display diagnostic fault codes through LED flashes or digital displays that can pinpoint control board issues.
To access diagnostic mode, consult your specific model’s service manual for button combinations (often involving the freezer temperature buttons). If fault codes indicate defrost system problems but component testing shows good heater and thermostat function, the control board is likely faulty. Replacement requires matching the exact part number, as control boards are model-specific and often require programming after installation.
When to Seek Professional Repair Assistance
Some repairs require specialized tools and expertise that exceed typical DIY capabilities. Refrigerant system issues—including leaks or compressor failures—demand EPA-certified technicians due to environmental regulations and safety concerns. If you’ve verified proper airflow, defrost system operation, and temperature controls but still experience cooling problems, professional diagnosis becomes necessary.
Consider the age of your appliance when deciding between repair and replacement. LG refrigerators typically last 10-15 years with proper maintenance. For units over 10 years old experiencing major component failures, replacement often proves more cost-effective than investing in expensive repairs. However, for newer models with simple fixes like gasket replacement or defrost heater repair, DIY solutions can extend your refrigerator’s lifespan significantly.
Prevent future occurrences by implementing regular maintenance habits: clean condenser coils every six months, check door seals quarterly, and ensure proper air circulation around the unit. When your LG freezer not freezing but fridge is working issue is resolved, maintain optimal performance by keeping the freezer at least 75% full—the thermal mass of frozen items helps stabilize temperatures during door openings.