How to Fix Midea Upright Freezer Not Freezing
Your Midea upright freezer has stopped freezing, and you’re staring at defrosted food while the fan runs normally but the compressor stays silent. This frustrating issue with your MRU14F2AWW model typically stems from a failed start relay, thermostat problem, or compressor issue—and the random clicking sound you hear is your key diagnostic clue. Don’t rush to replace your $500-$600 freezer just yet. This guide delivers the exact troubleshooting steps to diagnose why your Midea upright freezer not freezing, with specific fixes for your second-hand unit that’s only 2-3 years old. You’ll learn how to test components with your multimeter, bypass the thermostat safely, and determine whether a $20 relay replacement will solve your problem.
Why Your Midea Freezer Clicks But Won’t Freeze
When your Midea upright freezer fails to maintain freezing temperatures despite the fan circulating air, the random clicking sound reveals what’s happening inside. This inconsistent noise comes from the start relay repeatedly attempting—and failing—to engage the compressor. The relay clicks because it receives the start signal from the control board but can’t establish the connection needed to spin the compressor. Without compressor operation, the refrigeration cycle never begins, causing your food to gradually defrost while the interior remains merely cool.
The clicking pattern tells a critical story: if it occurs at random intervals, this indicates the relay is trying to start the compressor, failing, then waiting for the overload protector to cool down before trying again. This protective cycling happens because either the start relay has failed internally, the overload protector has opened the circuit due to detected problems, or the compressor itself has developed an internal fault preventing startup. The fact that your evaporator coils appear clean and the fan operates confirms power reaches the appliance but fails to activate the critical cooling component.
Verify Power Reaches Critical Components

Before testing components, confirm electricity flows to the compressor circuit. Your freezer’s working interior light and operational fan prove basic power delivery, but these positive indicators don’t guarantee power reaches the compressor. With the unit plugged in, open the lower rear panel to access the compressor compartment. Locate the connector where wiring meets the compressor terminals—this is usually a multi-pin plug near the black cylindrical compressor housing.
Use your multimeter in voltage mode (set to AC 250V) to test between the compressor connector terminals while the freezer attempts to start. Warning: This involves live voltage—never touch metal probes with bare fingers. If you measure proper voltage (110-120V) at the connector but the compressor doesn’t run, the problem lies with the compressor or its immediate protection components. If you get no voltage reading, the issue exists upstream in the control circuitry. The small spark you noticed when reconnecting the compressor plug confirms power reaches the connector, but doesn’t verify whether it successfully energizes the compressor windings.
Bypass the Thermostat Properly

The thermostat monitors internal temperature and signals the compressor to start when warming occurs. A faulty thermostat can prevent compressor activation entirely. On your MRU14F2AWW model, the thermostat connects to the temperature control dial inside the freezer compartment—typically behind a removable panel near the upper rear wall.
Perform this bypass test correctly: Unplug the freezer, locate the thermostat’s two wires (usually white and red), and disconnect them from the thermostat housing. Do not cut wires—use wire nuts to connect the two conductors together. Reconnect power and listen for compressor operation. If the compressor starts immediately, you’ve confirmed a bad thermostat. Your previous attempt caused flashing lights because cutting the thermostat wires disrupted the control circuit rather than creating a proper bypass connection. Reattach any severed wires carefully before attempting this test again.
Diagnose the Clicking Sound Pattern
That random clicking you hear is your most valuable diagnostic clue. A healthy compressor produces a single distinct click followed by a steady low hum when starting. Your inconsistent clicking pattern indicates the start relay is attempting to engage the compressor but failing to establish a complete circuit. This happens because either:
- The start relay’s internal contacts have burned out
- The overload protector has opened due to detected problems
- The compressor windings have failed internally
Shake the start relay gently—if you hear rattling inside, the relay has failed and needs replacement. This component costs $15-$40 and is the most common cause of your exact symptoms. The random clicking interval (rather than continuous buzzing) suggests the overload protector is cycling properly, which actually indicates the compressor might still be functional if you replace the faulty relay.
Test and Replace the Start Relay
The start relay and overload protector work together to start your compressor safely. Access these components by unplugging the freezer and removing the lower rear panel to expose the compressor compartment. You’ll see a small rectangular or square housing (the start relay) plugged directly onto the compressor terminals, with a disc-shaped overload protector usually attached to it.
Test the relay with your multimeter set to continuity mode: Disconnect the relay from the compressor, then check for continuity between the S and R terminals on the relay itself. You should hear a beep indicating continuity. No beep means the relay has failed internally. Also check for continuity between any terminal and the relay housing—there should be none. If your test shows failure or you hear rattling when shaking the relay, replace it immediately. Installation takes minutes: simply unplug the old relay and push the new one onto the compressor terminals, ensuring it clicks securely into place.
Perform Correct Compressor Testing

If replacing the relay doesn’t solve the problem, test the compressor windings directly. Unplug the freezer and disconnect the start relay from the compressor terminals (labeled S, R, and C). Set your multimeter to the lowest resistance setting (200 ohms) and test between all terminal combinations:
- S to R: Should show low resistance (5-30 ohms)
- R to C: Should show slightly higher resistance
- S to C: Should equal the sum of S-R and R-C readings
Critical failure signs: Infinite resistance (open winding) between any terminals, zero resistance (shorted winding), or continuity between any terminal and the compressor housing (ground fault). Your previous “small zap” occurred because you tested while the unit was plugged in—always verify the freezer is completely unplugged before testing compressor windings. If all windings test good but the compressor still won’t start, you likely have a start capacitor issue (though many Midea models don’t use separate capacitors).
Execute a Complete Defrost Cycle
Even with clean-looking evaporator coils, hidden frost behind the interior wall can prevent proper cooling. The expert recommendation that 75% of freezing issues resolve with a proper defrost is crucial—your six-hour unplugged period only counts if you left the door fully open. Remove all food, prop the door wide open, and allow 12-24 hours for complete defrosting at room temperature.
While defrosting, clear the drain hole located above the crisper drawer using a drinking straw or flexible wire. Water on your floor during defrosting indicates a clogged drain—clearing it prevents future condensate buildup that can trigger false temperature readings. After complete defrosting, plug in the freezer and wait two hours before checking for cooling—this allows the system to stabilize before evaluation.
Replace Components Based on Test Results
Your repair path depends on test outcomes:
– Failed start relay: Replace for $15-$40 (most likely solution)
– Faulty thermostat: Replace for $20-$35
– Bad overload protector: Replace for $10-$25 (often sold with relay)
– Failed compressor: Professional repair costs $300-$600
For your 2-3 year old MRU14F2AWW model, replacing the start relay and overload protector as a pair makes economic sense—they cost less than $50 combined versus a new $500-$600 unit. Install new components by photographing existing connections, disconnecting the old parts, and replicating the wiring on the replacements. Always unplug the freezer for 15 minutes after installation before testing to allow the control system to reset.
Prevent Future Cooling Failures
Extend your freezer’s lifespan with these maintenance steps:
– Clean condenser coils every 6 months using a brush or vacuum
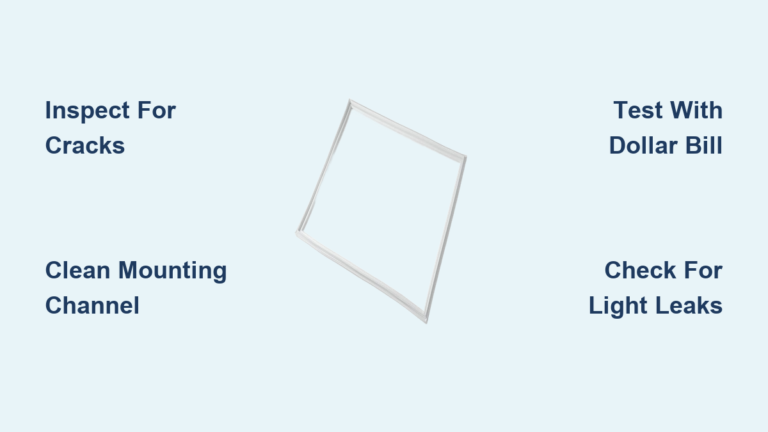
– Check door seals monthly by closing a dollar bill in the door—if it pulls out easily, replace the gasket
– Ensure proper clearance of at least 2 inches around the unit for airflow
– Never plug in immediately after transport—let the freezer sit upright for 24 hours
– Test the drain monthly by pouring 1/4 cup water into the drain hole
For second-hand units like yours, monitor performance closely for the first year. If cooling problems return within 6 months of repair, consider professional refrigerant system inspection—the original owner may have transported the unit improperly, causing undetected compressor damage.
Your Midea upright freezer not freezing almost certainly stems from a failed start relay, given the random clicking pattern you’ve described. This $20 component replacement offers the highest success rate for your specific symptoms and should be your first repair attempt before considering thermostat or compressor issues. For a 2-3 year old MRU14F2AWW model, this simple fix makes far more economic sense than replacing your $500-$600 freezer. If replacing the start relay doesn’t restore freezing operation, proceed to thermostat bypass testing and complete defrosting before concluding compressor failure. Remember that proper maintenance after repair—including coil cleaning and door seal checks—will prevent most future cooling failures and extend your freezer’s service life well beyond its current age.