How to Fix Amana Freezer Door Handle
A loose or broken freezer door handle isn’t just an annoyance—it can lead to improper sealing, frost buildup, and energy waste. Fortunately, most Amana freezer door handle problems fall into two categories: handles that simply need tightening, and stripped screw holes that require more extensive repair. This guide walks you through both scenarios with detailed instructions, multiple solutions for damaged mounting hardware, and guidance on identifying your specific handle style. Whether your handle wobbles when you pull it or has come completely detached, you’ll find step-by-step instructions to restore proper function without calling a service technician.
The procedures outlined here apply to most Amana refrigerator and freezer models, including common bottom-freezer and side-by-side configurations. Before you begin any repair, take a moment to identify which handle style your appliance uses—each design requires a different approach to removal, tightening, and reinstallation. With the right tools and techniques, most handle repairs take under an hour and require only basic hand tools.
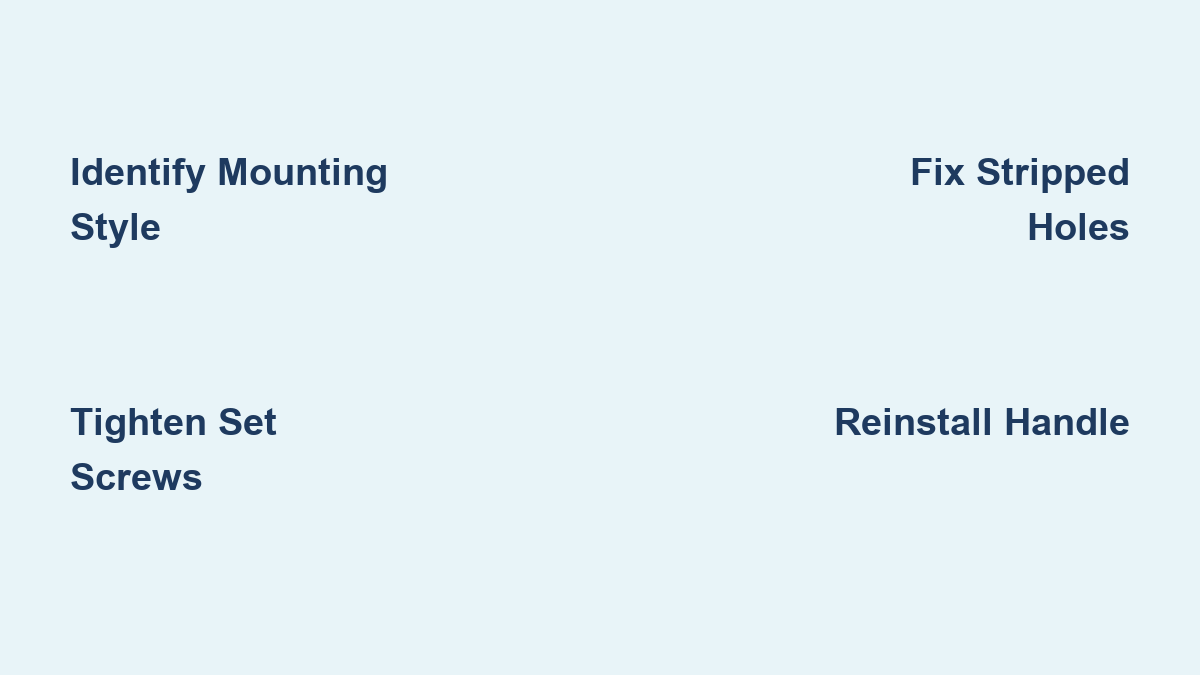
Identify Your Amana Handle Mounting System
Amana uses three distinct handle mounting systems across their refrigerator and freezer product lines. Knowing which type you have determines everything from the tools you’ll need to the specific steps you’ll follow for repair.
The first style features a set screw concealed by a small decorative cap that sits flush with the handle surface. These caps press-fit into place and can be pried out carefully with a flat-head screwdriver or plastic trim tool. Once removed, you’ll reveal a hex head screw that tightens with an appropriately sized hex key. This design appears on older Amana models and some budget-friendly current lines.
The second style has mounting screws accessible from the ends of the handle rather than the face. The end caps on these handles may be located on the vertical ends (for vertical handles) or on the face of the handle ends (for horizontal pulls). These caps typically snap into place and can be removed by gently prying with a screwdriver. Some models use small screws to secure the end caps, which must be removed first before you can access the mounting hardware.
The third and most common style on modern Amana freezers is the slotted design. This system features a handle that slides onto a mounting base attached to the door. The base has a protruding tab that fits into a corresponding slot in the handle. Once positioned correctly, a set screw—often hidden or accessible from below—secures the handle to the base. This style typically requires a rubber mallet to fully seat the handle onto the mounting base, followed by set screw tightening.
Locate Hidden Set Screws Before Starting
Before attempting to tighten or remove your handle, check for hidden set screws that might be concealed under decorative caps. Many homeowners waste time trying to force a handle off without realizing there’s a hidden screw holding it in place. Gently press on any suspicious spots on the handle surface—caps that cover set screws will often have a slight give. Use a plastic trim tool to carefully pry these caps off without damaging the finish. Keep these caps safe; you’ll need to reinstall them after your repair is complete.
Tighten Loose Amana Freezer Handles Properly
Before attempting complex repairs, verify whether simple tightening resolves your wobbling handle. Most Amana freezer handle issues stem from set screws that weren’t fully tightened during initial installation or have gradually loosened over time.
Locate the set screws on your handle—they’re typically accessible from the bottom or sides, though some designs hide them behind decorative caps. Insert a 1/8-inch hex key fully into the screw head, ensuring it sits deep enough to engage all six sides of the hex socket. This specific size is crucial; using the wrong size can strip the screw head, creating the exact problem you’re trying to fix.
Tighten each set screw fully by turning clockwise until you feel significant resistance. However, this initial tightening alone doesn’t meet Amana’s installation specifications. After the screw feels tight, continue turning the hex key an additional quarter-turn (90 degrees). This extra quarter-turn is critical—the handle isn’t properly installed without this additional tightening, which ensures the screw seats fully and maintains tension over time.
Check for Dual Screw Alignment Issues
If your handle has two set screws (common on longer handles), tighten both partially first, then return to fully tighten each one with the additional quarter-turn. This sequential approach prevents the handle from shifting out of alignment. After completing the process, grasp the handle firmly near each end and attempt to wiggle it—there should be absolutely no movement. If you notice the handle leaning to one side after tightening, one screw is likely overtightened; loosen both slightly and restart the tightening process.
Gather Essential Tools for Handle Repair
Having the right materials before you start saves time and ensures quality results. The primary tool for most Amana handle repairs is a 1/8-inch hex key (Allen wrench) in SAE/imperial size rather than metric. Keep several on hand—hex keys can round at the tips, and a longer handle provides better leverage for stubborn screws.
A rubber mallet is essential for handles that won’t slide off freely or need help seating fully onto their mounting base. Pair this with a wooden block or thick cardboard to protect the handle surface from direct impact. Soft cloths protect both the door surface and handle finish during work.
For stripped hole repairs, gather your choice of filler: JB Weld epoxy, automotive body filler, or wood filler all work for this application. You’ll need fine-grit sandpaper (220 grit or higher) for smoothing cured filler, isopropyl alcohol for cleaning surfaces, and a drill with appropriate bits if you’re creating a new pilot hole.
Repair Stripped Handle Screw Holes in Stainless Steel
If proper tightening doesn’t eliminate the wobble, the set screw hole may be stripped. This problem occurs particularly often in stainless steel doors, where the softer metal can deform under repeated stress or improper installation force.
Remove the handle completely to diagnose a stripped hole. If the screw spins freely without catching when you try to tighten it, the threads in the hole are damaged beyond grip. Another indicator: the mounting plate moves or wobbles even when the screw is tight—this suggests the plate itself has shifted because its mounting hole can’t hold the screw securely.
Apply Thread-Locking Compound for Minor Stripping
For lightly stripped holes where the screw still has some grip, applying a thread-locking compound can restore holding power without extensive repair. Loctite and similar products are paste-like compounds that coat screw threads before installation. As the compound cures, it hardens and fills gaps between the screw threads and hole threads, creating a secure bond that resists vibration-induced loosening.
Begin by cleaning both the screw and the hole with isopropyl alcohol to remove oil, debris, or old compound. Apply the thread-locking compound generously to the screw threads, ensuring full coverage of all threads that will engage the hole. Insert the screw and tighten fully with the additional quarter-turn specified in Amana’s installation instructions.
Fill and Re-tap Severely Stripped Holes
For severely stripped holes where the screw spins freely with no grip whatsoever, you’ll need to fill the existing hole and create a new one. This approach provides the most permanent repair but requires more materials and patience.
Remove the mounting plate completely from the door to access the hole. Clean the area around the stripped hole thoroughly, removing debris, old adhesive, and loose material. Mix your chosen epoxy or filler according to package directions and apply it generously into the stripped hole, slightly overfilling to account for shrinkage during drying.
Allow the filler to cure completely—rushing this step compromises the repair. Most epoxies require 24 hours for full cure, though some fast-setting varieties may be ready in one to two hours. Once fully cured, sand the filled area flush with the surrounding surface using fine-grit sandpaper. You want a perfectly flat surface for the mounting plate to seat against.
After sanding, create a new pilot hole for the screw. The original hole position should work, but you may need a slightly smaller drill bit to ensure the new hole engages fresh, unfilled material. Drill the new pilot hole to the appropriate depth and diameter for your mounting screw, then reattach the mounting plate. The screw should now have solid grip in the fresh hole.
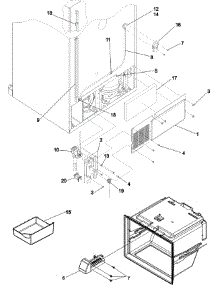
Remove and Reinstall Your Amana Freezer Handle

When basic tightening doesn’t resolve the issue, complete handle removal allows access for proper diagnosis and repair. This process varies by handle style but follows general principles across most Amana designs.
Ensure you have adequate workspace and good lighting before beginning. Lay down a soft cloth or towel to protect the door surface and handle finish. For vertical handles, the handle typically slides upward to remove. For horizontal handles, it slides to the right (assuming it wasn’t installed upside down).
If the handle is stubborn and doesn’t slide off easily, don’t force it—you may damage the mounting system or door surface. Instead, use a rubber mallet to gently encourage movement. Place a wooden block or soft cloth against the handle surface to distribute the blow, then tap firmly but carefully in the direction of removal. The rubber mallet provides enough force without marring the handle finish.
Complete Handle Reinstallation Process
Reinstallation is essentially the reverse of removal, but with additional steps to ensure a wobble-free, secure installation. Begin by positioning the mounting base if you removed it for repair—ensure it’s fully adhered and the adhesive has cured completely before proceeding.
Slide the handle onto the mounting base, aligning the slot or mounting points carefully. Go slowly and verify alignment at each step—if the handle doesn’t slide on easily, stop and check your positioning rather than forcing it. For slotted designs, you should hear or feel a distinct click as the handle seats fully onto the base. If it doesn’t seat completely on its own, use the rubber mallet with a protective block to tap it into place, striking near the mounting points.
Once the handle is fully seated, insert the set screws and tighten using the 1/8-inch hex key. Tighten fully until resistance is felt, then add the critical quarter-turn. Test the handle for stability by grasping it firmly and attempting to move it in all directions—there should be absolutely no wobble or movement.
Troubleshoot Common Amana Handle Problems
Several issues can arise during handle repair that require specific solutions. If a handle won’t slide off despite tapping with a rubber mallet, first verify you’re pushing in the correct direction—vertical handles slide up, horizontal handles typically slide right. Also ensure all set screws are fully removed; a partially engaged screw prevents sliding.
If the hex key keeps slipping and the screw head appears rounded, the screw is damaged and must be replaced. Remove the damaged screw with pliers if possible, or use an extraction kit that drills out the screw center and uses a reverse-threaded extractor to remove the remainder. Choose a higher-quality replacement if the original was cheaply made.
When the handle hole won’t align with the mounting screw, the mounting base has likely shifted position or the handle wasn’t fully seated before beginning installation. Remove the handle completely and check the mounting base position. If the base has shifted, reposition and re-adhere it to the door with construction adhesive. If the base is secure, ensure the handle slides all the way onto the base before attempting to tighten—the rubber mallet technique helps seat the handle fully.
Prevent Future Amana Freezer Handle Issues
Once your handle is repaired and secure, a few preventive measures help ensure lasting performance. When opening the freezer door, pull the handle directly outward rather than twisting or jerking sideways. This reduces stress on the mounting system and prevents the gradual loosening that leads to wobble.
Periodically check the set screws for tightness—every few months, give them a quick check with your hex key. Apply the additional quarter-turn if needed. This simple maintenance takes moments but prevents the cumulative loosening that eventually causes handle problems.
Keep the handle and mounting area clean. Dust and debris accumulating around the mounting base can interfere with proper seating and add stress to the mounting system. A quick wipe with a damp cloth every few months keeps the area clean without requiring disassembly. For stainless steel doors, use a dedicated stainless steel cleaner to maintain the finish and prevent corrosion around the mounting points.
With these techniques, you can confidently fix an Amana freezer door handle that’s loose, wobbly, or completely detached. The key to success is identifying your specific handle style, using the correct tools, and following the proper tightening procedure with that critical extra quarter-turn. Most handle repairs can be completed in under an hour with basic tools, saving you the cost of a service call while restoring your freezer’s functionality.