Criterion Fridge Not Cooling but Freezer Works: Quick Fix Guide
Your Criterion refrigerator sits there, its freezer compartment frozen solid, but the refrigerator section sits warm—leaving your milk, cheese, and leftovers at risk of spoilage. This frustrating scenario affects countless Criterion owners, and the good news is that most causes don’t require a costly service call. Understanding why your fridge stopped cooling while the freezer continues working properly puts you in control of the repair process and helps you decide whether this is a DIY fix or a job for a professional technician.
The temperature split between your freezer and refrigerator compartments points to a specific set of components that control air circulation between these two sections. Unlike complete refrigerator failures where both compartments warm up, your situation indicates that the cooling system itself functions—the compressor runs, refrigerant circulates, and the freezer maintains its temperature. The problem lies somewhere in the pathway that delivers cold air from the freezer to the refrigerator section. This guide walks you through every major cause, provides diagnostic steps you can perform yourself, and helps you understand repair costs before you spend a single dollar on parts or service.
Identify Why Your Fridge Stops Cooling
When your Criterion refrigerator fails to cool but the freezer works perfectly, you’re dealing with an airflow problem rather than a cooling system failure. The root cause always involves something preventing cold air from reaching the refrigerator compartment or something causing the refrigerator section to warm faster than cold air can replace it. Understanding this fundamental distinction saves you time and money by directing your troubleshooting efforts at the right components from the start.
Several components work together to move cold air from the freezer into the refrigerator section. The evaporator fan pushes air across the cold evaporator coils and through a series of ducts and vents. A damper control assembly regulates how much cold air enters the refrigerator based on temperature settings. Thermostats and control boards monitor temperatures and signal the system to run. The defrost system prevents ice buildup that would block airflow. When any of these components fail or become obstructed, your refrigerator section suffers while the freezer continues operating normally.
Before diving into specific components, check your temperature settings first. A simple accidental adjustment can leave your refrigerator running warmer than intended. Your refrigerator should maintain temperatures between 35 and 38 degrees Fahrenheit, while your freezer should sit between 0 and 5 degrees Fahrenheit. If settings have shifted or someone accidentally bumped the temperature control, you might simply need to adjust settings back to the correct range. This takes less than a minute and eliminates the simplest explanation before you proceed with more involved troubleshooting.
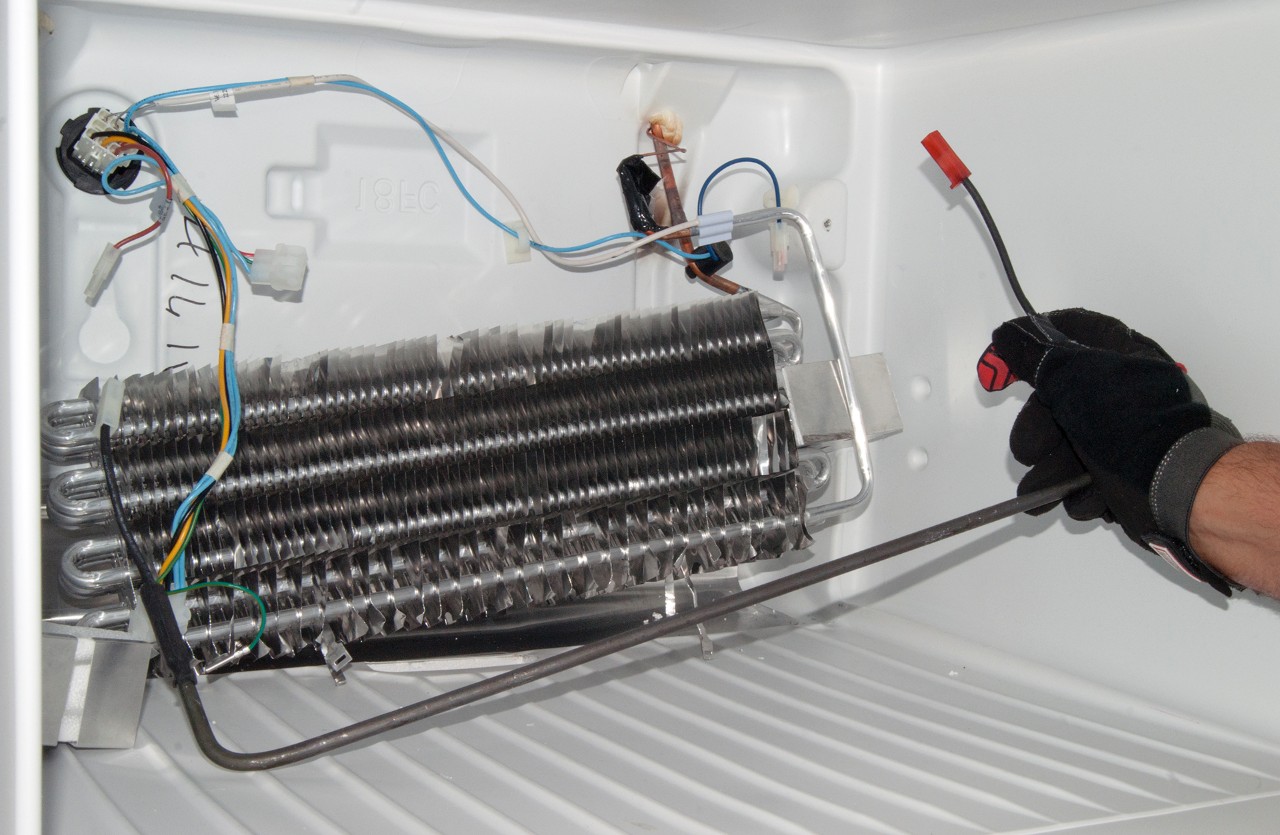
Evaporator Fan Motor Failure Explained
The evaporator fan motor represents the most common culprit when your Criterion refrigerator won’t cool but the freezer works fine. This fan sits inside the freezer compartment, typically behind a rear panel, and its job is to circulate cold air from the evaporator coils into the refrigerator section through a series of ducts and vents. When this fan fails, the freezer stays cold because the evaporator coils still freeze—but the refrigerator section receives no cold air, causing temperatures to rise steadily.
Symptoms of evaporator fan failure extend beyond a warm refrigerator section. Listen carefully when you close the freezer door. You should hear a constant, quiet humming sound as the fan runs. If you hear nothing or hear clicking sounds that indicate the fan trying to start and failing, the motor has likely failed. Some owners report hearing the fan run intermittently—starting, stopping, starting again—which suggests a failing motor that’s on its way out completely. Another telltale sign involves frost buildup on the back wall of your freezer compartment, which occurs when the fan fails to circulate air properly and moisture freezes directly on the coils.
Testing your evaporator fan requires accessing the motor inside the freezer. Start by unplugging your refrigerator completely for safety. Remove the rear panel inside your freezer—typically secured with screws along the edges. Once removed, you’ll see the evaporator coils and the fan mounted nearby. Check for obvious obstructions like ice buildup or debris caught in the fan blades. Clear any blockage you find and see if the fan spins freely by hand. If the fan binds or won’t turn smoothly, it needs replacement. For a more definitive test, use a multimeter set to continuity mode. Remove the fan’s electrical connector and touch the multimeter probes to the fan’s wire terminals. No continuity indicates a burned-out motor that requires replacement.
Damper Control Assembly Problems

The damper control assembly, sometimes called the air damper or damper door, regulates airflow from the freezer to the refrigerator section. This component opens and closes automatically based on temperature readings, allowing more cold air in when the refrigerator needs cooling and restricting airflow when temperatures reach the set point. If this damper sticks closed or fails to open, cold air cannot reach your refrigerator section regardless of how well your freezer operates.
Detecting damper problems requires attention to airflow patterns in your refrigerator. Open your refrigerator door and locate the vents—typically found on the back wall or between the refrigerator and freezer compartments. With the refrigerator running, feel for cold air flowing from these vents. If you feel little or no airflow when the freezer is clearly cold, the damper might be closed or blocked. Some owners hear a faint clicking sound coming from the damper area as it attempts to open and close—this clicking indicates the motor is trying to operate but might be jammed or stripped internally.
Temperature readings provide another diagnostic clue. If your refrigerator thermometer shows temperatures significantly higher than your set point while your freezer maintains proper temperatures, the damper isn’t allowing adequate airflow. Some Criterion models have a visible plastic damper door between the compartments that you might be able to see by removing a cover panel. Inspect this door for ice buildup, physical damage, or obstructions that prevent it from opening properly.
Thermostat and Control Issues
Your refrigerator’s temperature control system consists of multiple components that signal the cooling system to run and regulate how long it operates. The main thermostat or temperature sensor monitors refrigerator temperatures and tells the compressor and fans when to cycle on and off. In modern Criterion refrigerators, this function might be handled by a control board rather than a simple mechanical thermostat. When these control components fail, they might allow the freezer to maintain temperature while failing to signal adequate cooling for the refrigerator section.
Start your troubleshooting by verifying that temperature settings haven’t been accidentally changed. Check the control panel or dial inside your refrigerator and confirm it’s set to the recommended range. If you have a digital display, ensure it shows the correct temperatures and hasn’t been reset to a warmer setting. Some Criterion models have separate controls for refrigerator and freezer sections—ensure both are set correctly. Wait 24 hours after any adjustment to let temperatures stabilize before concluding that settings weren’t the issue.
Mechanical thermostats can be tested with a multimeter to verify they’re functioning correctly. The thermostat is typically located inside the refrigerator section, often near the temperature control dial. When you turn the dial through its range, you should hear clicking sounds as the thermostat makes and breaks electrical contacts. With the multimeter set to continuity, test across the thermostat terminals at various settings—no continuity in any position indicates a failed thermostat that needs replacement.
Defrost System Failures
The defrost system prevents ice from accumulating on your evaporator coils, which would block airflow and reduce cooling efficiency. This system operates automatically, cycling on periodically to melt any frost that develops on the coils. Components include the defrost heater, defrost thermostat, defrost timer or control board, and a drain system to carry away water. When any part of this system fails, frost accumulates on the coils, eventually creating a thick ice layer that blocks the evaporator fan and prevents cold air from reaching your refrigerator section.
Watch for specific signs that point to defrost system failure. Excessive frost buildup on the back wall of your freezer compartment indicates the defrost system isn’t operating properly. You might notice your refrigerator gradually warming over several days or weeks as ice accumulates and restricts airflow. Some owners hear unusual sounds like bubbling or hissing when the defrost heater activates—though this is normal, the absence of these sounds might indicate the heater isn’t turning on. Water pooling on the floor near your refrigerator suggests a clogged drain, which often accompanies defrost system failures.
The defrost heater melts frost from the coils during defrost cycles. This heater can burn out over time, especially if the defrost system cycles more frequently than designed. Test the heater by unplugging your refrigerator and checking continuity across the heater terminals with a multimeter. No continuity means the heater has burned out and needs replacement.
Step-by-Step Diagnostic Process
Following a systematic diagnostic process helps you identify the root cause efficiently without replacing unnecessary parts. Work through these steps in order, as each step helps eliminate possible causes and narrow your focus.
Begin by verifying temperature settings and waiting for the system to stabilize. Set your refrigerator to 37 degrees Fahrenheit and your freezer to 0 degrees Fahrenheit if you haven’t already. Close all doors and wait four to six hours before checking temperatures with an accurate thermometer. If temperatures improve, you simply needed to adjust settings. If not, continue troubleshooting.
Next, listen for the evaporator fan. Open your freezer door and press the door switch to activate interior lights and signal the refrigerator that the door is closed. You should hear a quiet, continuous humming from the fan. If you hear clicking or no sound at all, the fan might be failing. Check for obvious obstructions in fan blades and clear any debris you find.
Test airflow from refrigerator vents. With the refrigerator running, hold your hand to vents inside the refrigerator section. You should feel a steady stream of cold air. Weak or absent airflow suggests a blocked vent, failed damper, or obstructed evaporator fan. Trace airflow pathways for blockages and ensure the damper is opening properly.
Inspect the freezer compartment for frost patterns. Uniform light frost indicates normal operation. Heavy frost buildup on the back wall, especially in patterns that cover more than half the coil area, suggests defrost system failure. Ice in air ducts or vents points to defrost problems that need attention.
Estimated Repair Costs

Understanding typical repair costs helps you decide whether to hire a professional or tackle the repair yourself. These estimates reflect average prices and may vary based on your location, model age, and specific part requirements.
| Component | DIY Parts Cost | Professional Repair |
|---|---|---|
| Evaporator Fan Motor | $30-80 | $150-300 |
| Damper Assembly | $25-60 | $150-250 |
| Thermostat | $15-40 | $100-200 |
| Defrost Heater | $20-50 | $150-300 |
| Control Board | $50-150 | $200-400 |
DIY repairs require purchasing only the replacement part, though you might need basic tools you don’t already own. Factor in your time and comfort level with appliance repair when comparing DIY to professional service.
Prevent Future Cooling Problems
Regular maintenance extends your refrigerator’s lifespan and prevents the frustration of unexpected breakdowns. Incorporate these simple tasks into your routine to keep your Criterion refrigerator running efficiently for years to come.
Clean condenser coils at least twice yearly, or more often if you have pets or dusty floors. Dirty coils force your refrigerator to work harder, increasing energy consumption and accelerating wear on components. Vacuum coils carefully using a brush attachment, or use a coil cleaning brush for stubborn debris. Coil cleaning takes fifteen minutes and significantly impacts overall performance.
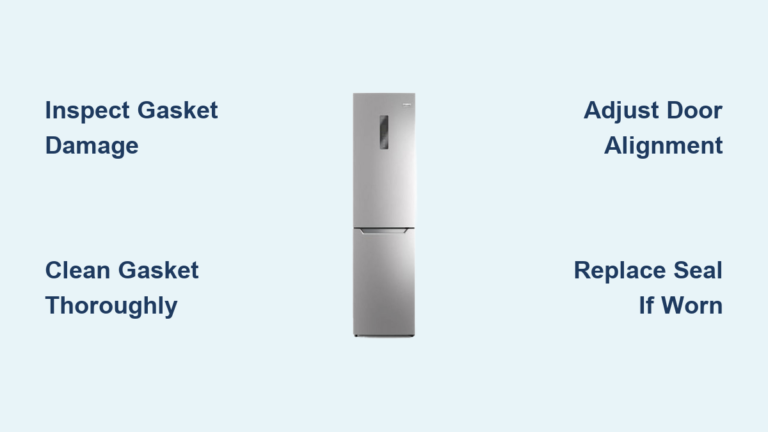
Check door seals regularly for damage or debris. Worn door gaskets allow warm air to infiltrate the refrigerator, forcing the cooling system to work overtime. Clean gaskets with mild soap and water, and inspect for cracks, tears, or deformation. Replace damaged gaskets promptly—most gasket replacements cost under 50 dollars and take less than an hour.
Monitor temperatures periodically using an accurate thermometer. Sudden shifts in temperature might indicate developing problems before you notice food spoilage. Catching issues early often means simpler, less expensive repairs.
Your Criterion refrigerator can provide years of reliable service when properly maintained and promptly repaired when problems arise. The key lies in understanding that a warm refrigerator with a working freezer almost always points to airflow problems—specifically involving the evaporator fan, damper control, or defrost system. By working through this guide systematically, you can diagnose the exact cause, decide whether DIY repair makes sense, and take action to restore proper cooling before food spoilage becomes an issue.