Crosley Upright Freezer Troubleshooting Guide
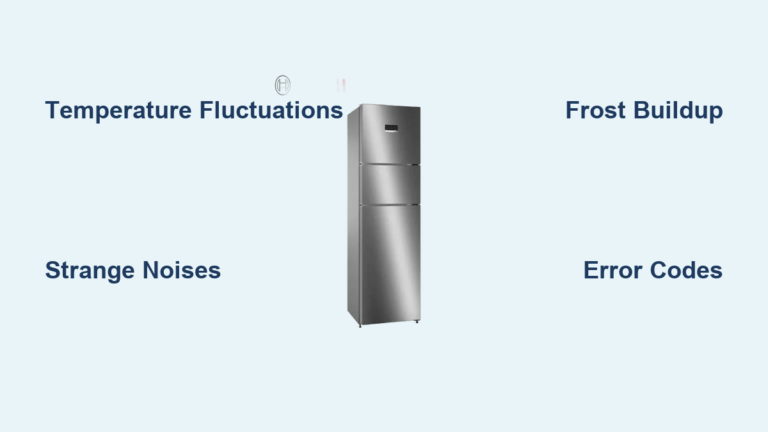
Your Crosley upright freezer suddenly stops maintaining proper freezing temperatures, leaving ice cream soft and meats at risk of spoilage. This frustrating scenario affects thousands of homeowners each year as critical components fail without warning. Understanding how to diagnose and address these issues yourself can save you hundreds in service calls while preventing costly food loss. This Crosley upright freezer troubleshooting guide delivers step-by-step solutions for the most frequent problems, empowering you to restore reliable freezing performance in under an hour for many common issues.
Temperature inconsistencies, mysterious ice buildup, and alarming beeping sounds all indicate specific component failures that, once identified, often require simple fixes rather than expensive professional service. Whether you’re dealing with a freezer that won’t cool, excessive frost accumulation, or electrical control malfunctions, this guide provides the precise diagnostic steps and repair procedures tailored specifically for Crosley upright models. By following our systematic approach, you’ll eliminate guesswork and restore your freezer to optimal condition.
Freezer Not Cooling Properly

When your Crosley upright freezer fails to maintain freezing temperatures, several critical components require immediate evaluation—starting with the most accessible before moving to complex systems. The cooling process depends on multiple parts working in perfect sequence, and failure in any single component can disrupt the entire system. Identifying the specific problem saves you from unnecessary part replacements and gets your freezer back to preserving food properly.
Test the Thermistor with Multimeter
Your Crosley upright freezer’s thermistor constantly monitors internal temperature and sends readings to the control board, which regulates compressor and fan operation accordingly. When this sensor fails, your freezer essentially becomes “blind” to actual temperature conditions, causing inadequate cooling performance despite the compressor running normally.
Here’s how to test your thermistor:
1. Unplug the freezer and locate the thermistor (typically protruding into the freezer compartment)
2. Disconnect it from the wiring harness
3. Set your multimeter to resistance (ohms) mode
4. Place the thermistor in ice water while measuring resistance
5. A functioning thermistor will show decreasing resistance as temperature drops
If resistance remains static or the multimeter shows no continuity, replace the thermistor immediately. This affordable component ($15-$25) is one of the most common failure points in Crosley upright freezer troubleshooting scenarios. Warning: Never test the thermistor while the freezer is plugged in—always disconnect power first.
Diagnose Evaporator Fan Motor Failure
The evaporator fan motor circulates cold air over the evaporator coils and throughout your freezer compartment. When this fan fails, even with a working compressor, cold air doesn’t distribute properly—resulting in warm spots and spoiled food despite the freezer appearing to operate normally.
To confirm fan motor failure, open the freezer door and manually press the door switch (usually located near the top hinge). You should hear the fan start immediately. If the switch activates but the fan doesn’t run, check for these common issues:
– Ice blocking the fan blades (defrost for 24 hours)
– Corroded or loose wiring connections (clean and secure)
– Burnt motor windings (requires replacement)
A functioning evaporator fan should produce a consistent humming sound during operation. If you don’t hear this sound but the compressor is running, fan motor replacement ($40-$75) is likely necessary. Pro tip: Before replacing the motor, clean any ice buildup around the blades—this solves the problem in nearly 30% of reported cases.
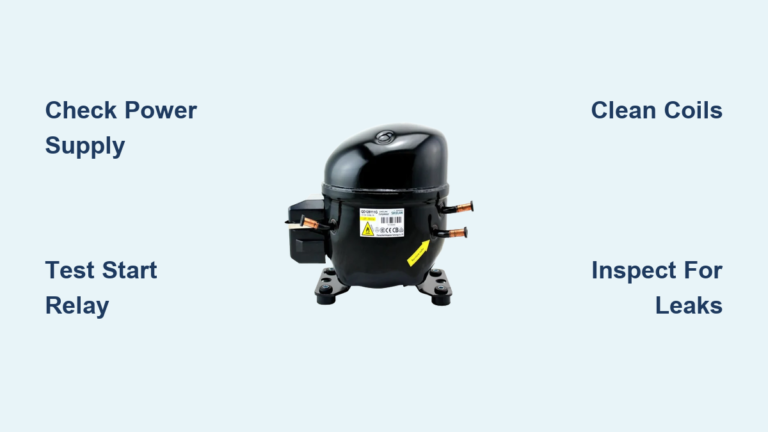
Check Start Relay and Compressor Function
The start relay provides critical power to your Crosley upright freezer’s compressor and represents one of the most frequent failure points in cooling system breakdowns. A malfunctioning start relay causes intermittent compressor operation or complete failure, leaving your freezer unable to produce cold air regardless of how long it runs.
Testing the start relay requires:
1. Unplugging the freezer
2. Locating the relay (mounted directly on the compressor)
3. Removing it from its position
4. Checking continuity between terminals with a multimeter
A functional start relay shows proper continuity between specific terminals. If you detect a burnt smell, visible damage, or no continuity, replace the relay immediately ($20-$40). Important: This component is inexpensive and should always be tested before diagnosing more expensive compressor issues. Many homeowners unnecessarily replace compressors when a simple relay replacement would have solved the problem.
Temperature Fluctuation Solutions
Erratic temperature swings in your Crosley upright freezer—alternating between freezing solid and becoming too warm—typically indicate defrost system failure rather than compressor problems. This frustrating issue often develops gradually, causing food spoilage before homeowners realize something’s wrong. Understanding which defrost component has failed helps you implement the precise fix without unnecessary part replacements.
Identify Defrost System Component Failure
Your Crosley upright freezer’s defrost system consists of three critical components working in sequence: the defrost timer (initiates defrost cycles), defrost thermostat (monitors coil temperature), and defrost heater (melts accumulated frost). When any single component fails, ice progressively builds up on evaporator coils, eventually insulating them and preventing proper cooling.
To diagnose which component has failed:
1. Unplug the freezer and remove the rear panel
2. Locate the defrost timer (typically behind the kick plate)
3. Manually advance the timer to enter defrost mode
4. During defrost mode, the compressor and fan should shut off
5. The defrost heater should become hot within 5-10 minutes
If the heater doesn’t activate during defrost mode, test the heater and thermostat with a multimeter. A functional defrost heater shows continuity (typically 15-30 ohms), while the thermostat should show continuity when cold and open when warmed. Replace any component failing these tests with Crosley-specific replacements.
Clear Ice Blockages Under Freezer Baskets
Ice accumulation specifically under your freezer baskets or drawers indicates a clogged defrost drain—a common issue in Crosley upright frost-free models like the WCF16/w3. This problem develops gradually over 1-3 weeks, eventually causing temperature instability as water from defrost cycles cannot properly drain away.
To clear a clogged defrost drain:
1. Unplug the freezer and remove all food
2. Locate the drain hole at the bottom of the freezer compartment
3. Insert a pipe cleaner or flexible wire into the drain tube
4. Move it back and forth to break up blockages
5. Flush with warm water using a turkey baster
6. Repeat until water flows freely through the drain
Pro tip: Prevent future clogs by pouring 1 cup of distilled vinegar down the drain every 3 months. This natural cleaner dissolves mineral deposits before they can accumulate. For severe ice blockages, allow 24 hours for natural defrosting before attempting to clear the drain.
Electrical Control Issues

Non-responsive control panels, persistent beeping alarms, and erratic temperature displays on your Crosley upright freezer often indicate electrical problems that can be resolved with simple troubleshooting steps—without requiring expensive professional service. These issues frequently stem from moisture exposure, power surges, or component failures that affect the control board’s ability to communicate with freezer systems.
Fix Unresponsive Control Panel Buttons
When your Crosley upright freezer’s control panel buttons stop responding, follow this systematic approach before assuming you need expensive component replacement:
- Unplug the freezer for 10 minutes to reset the control system
- Dry any visible moisture around the control panel with soft cloths
- Check for ice buildup around buttons that might physically block operation
- Verify power supply at the wall outlet using another appliance
- Inspect for blown fuses in your home’s electrical panel
In many cases, simply unplugging the unit allows capacitors to discharge and resets temporary glitches in the control board. If moisture has penetrated the control panel (common in humid environments), thorough drying often resolves the issue. Warning: Never use compressed air to dry electrical components—this can force moisture deeper into sensitive areas.
Stop Persistent Beeping Alarms
Audible alarms on your Crosley upright freezer signal critical system faults that require immediate attention. Three primary causes trigger these warnings:
– Defrost timer malfunction (most common)
– Door left open or improperly sealed
– Temperature sensor failure
To stop beeping:
1. Ensure the freezer door is completely closed and sealed
2. Manually advance the defrost timer through a complete cycle
3. Check the thermistor connection and test with a multimeter
4. Reset the unit by unplugging for 10 minutes
If alarms persist after these steps, the temperature sensor likely requires replacement. Test the sensor by comparing its resistance readings to manufacturer specifications at various temperatures. A faulty sensor ($25-$35) is a much more affordable fix than replacing the entire control board.
Door and Seal Maintenance

A poorly sealing door on your Crosley upright freezer allows warm, humid air to infiltrate the compartment, causing excessive frost buildup, temperature fluctuations, and increased energy consumption. This common issue often develops gradually as door gaskets deteriorate or hinges become misaligned, making early detection critical for preventing more serious problems.
Test and Replace Worn Door Gaskets
Door gaskets lose flexibility over time, creating gaps that compromise your freezer’s ability to maintain proper temperatures. To test your gasket’s effectiveness:
1. Close the door on a dollar bill at various points around the seal
2. If you can pull the bill out easily with minimal resistance, the seal has failed
3. Inspect for cracks, tears, or areas where the gasket has pulled away from its channel
To replace a worn gasket:
1. Unplug the freezer
2. Remove the old gasket by gently prying it from its channel
3. Clean the channel thoroughly with warm, soapy water
4. Install the new gasket starting at the top center
5. Work your way around the door, ensuring the gasket seats properly
High-quality replacement gaskets ($30-$50) restore proper sealing and can save up to 15% on energy costs while preventing frost buildup. Pro tip: Apply a thin coat of petroleum jelly to new gaskets to maintain flexibility and extend their lifespan.
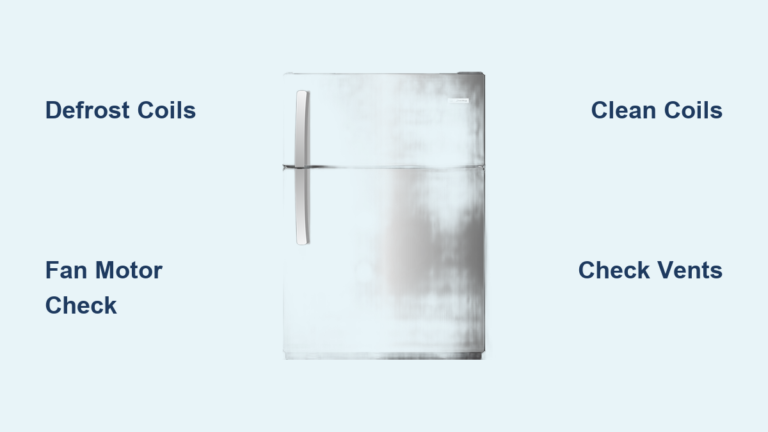
Airflow and Ventilation Solutions
Restricted airflow within your Crosley upright freezer causes uneven cooling, excessive frost accumulation, and temperature inconsistencies that can spoil food despite the compressor running continuously. Proper air circulation is essential for maintaining consistent temperatures throughout the compartment and preventing localized ice buildup that strains the entire system.
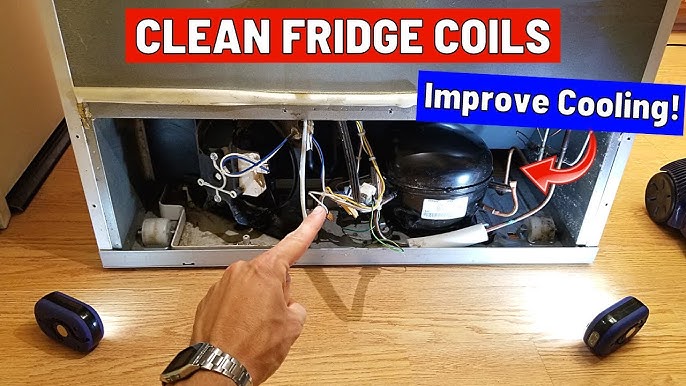
Clear Airflow Obstructions and Clean Coils
Airflow problems often result from simple issues that homeowners can resolve in under 30 minutes:
– Overloaded shelves blocking air vents
– Ice accumulation on evaporator components
– Dirty condenser coils reducing heat dissipation
To restore proper airflow:
1. Rearrange contents to ensure at least 2 inches of clearance around all sides
2. Clean condenser coils every 6-12 months using a soft brush
3. Vacuum dust from coils and surrounding areas
4. Remove any ice blocking evaporator fan blades
5. Verify the evaporator fan runs consistently during operation
For models with accessible condenser coils (typically located beneath or behind the unit), regular cleaning prevents the compressor from working harder than necessary. Warning: Never use metal tools to remove ice from interior components—this can puncture refrigerant lines and cause costly damage requiring professional repair.
Maintenance Best Practices
Implementing a simple maintenance schedule for your Crosley upright freezer prevents most common problems before they develop, extending the appliance’s lifespan while ensuring reliable food preservation. Consistent care reduces the frequency of Crosley upright freezer troubleshooting scenarios and saves you money through improved energy efficiency and reduced repair costs.
Monthly and Quarterly Maintenance Checklist
Monthly tasks:
– Check door seal integrity using the dollar bill test
– Remove visible frost accumulation exceeding ¼ inch
– Wipe interior surfaces with mild cleaner
– Verify temperature settings are appropriate
Quarterly tasks:
– Clean door gaskets with warm, soapy water
– Inspect defrost drain for early clogs
– Check condenser coils for dust buildup
– Listen for unusual sounds during operation
Pro tip: Keep a freezer thermometer visible at all times to monitor actual temperatures. Your freezer should maintain 0°F to 5°F for optimal food preservation—adjust settings if actual temperatures deviate more than 2°F from your control setting.
When to Call a Professional
While many Crosley upright freezer problems can be resolved with DIY troubleshooting, certain issues require professional expertise to avoid safety hazards or further damage. Recognizing when to call a technician saves you time, money, and potential frustration from attempting repairs beyond your skill level.
Seek professional service for:
– Refrigerant leaks (requires EPA certification to handle)
– Compressor replacement (involves sealed refrigeration system)
– Complex electrical issues involving direct wiring
– Structural damage to cabinet or door frames
– Problems persisting after thorough component testing
Warning: Never attempt to repair refrigerant lines yourself—this violates environmental regulations and poses serious safety risks. Most warranty coverage also requires professional service for refrigerant-related issues.
Final Note: Consistent maintenance and prompt attention to developing problems extends your Crosley upright freezer’s service life while ensuring reliable food preservation. By following this troubleshooting guide, you’ll resolve most common issues yourself while knowing when professional help is necessary. Keep this guide accessible for quick reference whenever your freezer shows signs of trouble—your wallet (and your frozen food) will thank you.