How to Fix Crack in Fridge Freezer
Discovering a crack in your fridge freezer can send any homeowner into a panic. One moment your food is perfectly preserved, and the next you’re staring at a potential disaster that could lead to spoiled groceries, water damage to your floor, or even complete appliance failure. The good news is that not every crack means you need to rush out and buy a new refrigerator. Many cracks—particularly small ones in accessible areas—can be repaired effectively with the right approach, materials, and techniques. This comprehensive guide walks you through everything you need to know about diagnosing crack severity, selecting appropriate repair methods, and preventing future damage to your refrigerator.
Before you grab any random adhesive or attempt a quick fix, understanding what you’re dealing with is crucial. Refrigerator cracks vary significantly in their cause, location, and potential impact on your appliance’s performance. A hairline crack in the outer door panel differs entirely from a fracture in the internal liner that could compromise your food’s temperature. The repair approach that works for a small cosmetic blemish might fail completely against a structural crack exposed to constant temperature fluctuations and moisture. By taking the time to properly assess your situation before beginning any repair, you’ll save yourself frustration, wasted materials, and potentially costly mistakes that could void your warranty or cause further damage.
Diagnose Your Fridge Freezer Crack Severity

The first step in fixing a crack in your fridge freezer requires careful assessment of the damage. Begin by examining the crack with a flashlight, noting its precise location, length, width, and depth. Run your finger gently along the fracture to determine if it’s merely surface-level or penetrates completely through the material.
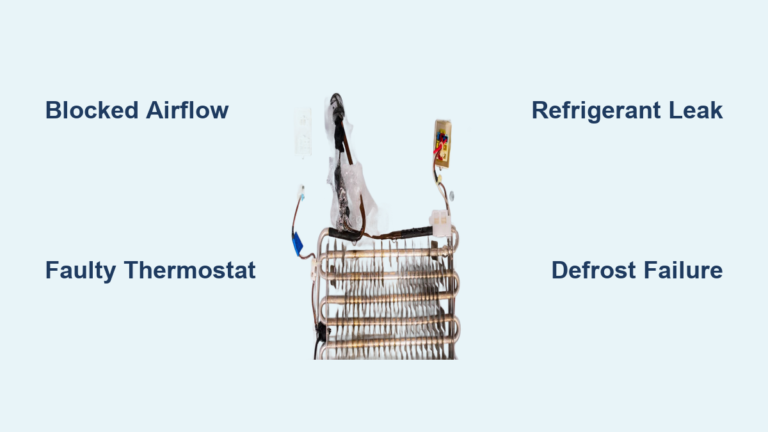
Hairline cracks under 1mm wide typically appear as thin, spiderweb-like fractures in the interior plastic liner. These often develop from thermal stress as your refrigerator cycles between cooling and defrosting phases. While they may seem harmless, even microscopic cracks allow moisture to seep into the insulation layer, causing frost buildup and reducing cooling efficiency over time. Check for condensation around the crack area—this indicates air leakage that forces your compressor to work harder.
Cracks between 1-3mm wide represent moderate damage that requires immediate attention. These fractures often result from impact damage or stress points developing around shelf supports. Look for visible gaps when viewing the crack from different angles, and test for air movement by holding a piece of tissue paper near the crack while the door is closed. Significant airflow suggests compromised temperature control that will increase your energy bills.
Severe cracks wider than 3mm or those with visible gaps when the door is closed indicate structural compromise. These often develop from years of thermal stress or major impact events. Check for frost accumulation directly around the crack—this confirms moisture infiltration into the insulation layer. If you hear unusual compressor noises or notice temperature fluctuations in your food compartments, the crack has likely progressed to a point where temporary fixes won’t suffice.
Gather Refrigerator-Specific Repair Materials

Fixing a crack in your fridge freezer requires specialized materials designed for cold, moist environments. Standard household adhesives will fail quickly when exposed to refrigerator conditions, so invest in products specifically formulated for appliance repair.
Food-grade silicone sealant rated for freezer temperatures (-20°F/-29°C) is essential for interior repairs. Look for NSF-certified products labeled as safe for food contact surfaces. Purchase a small tube (2.8-ounce) of clear or white silicone specifically designed for refrigerator repairs—avoid bathroom or kitchen sealants that contain mold inhibitors unsafe for food environments.
For cracks wider than 1mm, you’ll need a two-part epoxy formulated for plastic repairs in cold environments. Ensure the product specifies compatibility with ABS plastic (the material used in most refrigerator interiors). Some appliance repair kits include both epoxy and reinforcing mesh patches for added strength in larger cracks.
Surface preparation materials make the difference between a lasting repair and one that fails within weeks. Isopropyl alcohol (90% or higher concentration) removes oils and residues that prevent proper adhesion. Fine-grit sandpaper (220-400 grit) creates the slightly rough surface needed for optimal bonding. Have lint-free microfiber cloths ready for cleaning and a plastic putty knife for applying sealants without scratching surrounding surfaces.
Apply Temporary Fixes for Immediate Protection
When you discover a crack in your fridge freezer, temporary solutions can prevent immediate damage while you arrange permanent repairs. These quick fixes buy you time without requiring specialized tools or materials.
For hairline cracks less than 0.5mm wide, petroleum jelly provides an effective short-term barrier. Clean the area thoroughly with isopropyl alcohol, then work the jelly deep into the crack using a cotton swab. The jelly’s hydrophobic properties repel moisture while remaining flexible at freezer temperatures. This solution typically lasts 2-4 weeks, giving you time to purchase proper repair materials.
Plastic wrap creates an immediate moisture barrier for cracks in accessible areas. Clean and dry the affected area completely, then cut a piece large enough to extend 2 inches beyond the crack in all directions. Press the wrap firmly against the surface, smoothing out air bubbles. For added security in freezer compartments, use cold-rated HVAC tape around the wrap’s edges—standard tape will lose adhesion in cold, humid conditions.
For exterior cracks or those in non-food-contact areas, apply a small piece of aluminum foil over the crack. Clean the surface thoroughly, then press the foil firmly into place, overlapping the crack by at least 1 inch on all sides. The foil creates an immediate vapor barrier that prevents moisture infiltration while you prepare for permanent repair. This method works particularly well for cracks in the freezer compartment where condensation causes the most damage.
Execute Permanent Food-Safe Repairs
For lasting results when fixing a crack in your fridge freezer, follow these precise steps to ensure a repair that withstands temperature fluctuations and moisture exposure.
Begin with thorough surface preparation—this accounts for 70% of repair success. Remove all food from the affected compartment and unplug the refrigerator. Clean the cracked area with warm soapy water, rinse thoroughly, then wipe with 90% isopropyl alcohol. Allow to dry completely (at least 30 minutes). Lightly sand the area around the crack (1 inch beyond edges) with 220-grit sandpaper to create a slightly rough surface that improves adhesion.
For hairline cracks under 1mm, apply food-grade silicone sealant using a small applicator tip. Cut the nozzle at a 45-degree angle to create a narrow opening, then squeeze a thin bead directly into the crack. Use a plastic tool or cotton swab dipped in soapy water to smooth the sealant into the crack, removing excess material. Allow 24 hours to cure before plugging in the refrigerator.
For cracks wider than 1mm, use a two-part epoxy system with reinforcing mesh. Mix the epoxy according to manufacturer instructions, then apply a thin layer to the cleaned surface. Cut a piece of fiberglass mesh slightly larger than the crack and press it into the epoxy. Apply additional epoxy over the mesh, feathering the edges to blend with surrounding surfaces. Allow 48 hours for complete curing before restoring power.
Prevent Future Refrigerator Cracks
After successfully fixing a crack in your fridge freezer, implement these preventative measures to avoid recurrence and extend your appliance’s lifespan.
Eliminate temperature shock by allowing hot foods to cool to room temperature before refrigeration. Placing steaming dishes directly in the refrigerator creates thermal stress on interior surfaces that leads to cracks over time. Similarly, avoid placing extremely cold items (like ice packs) directly against plastic walls—use a protective barrier like a towel.
Install protective shelf liners made from food-grade silicone or rubber. These cushions absorb impact from heavy containers and prevent stress points that initiate cracks around shelf supports. Replace these liners every 2-3 years as they degrade from constant exposure to temperature changes.
Maintain proper refrigerator leveling to prevent structural stress. Use a bubble level to check front-to-back and side-to-side alignment, adjusting the leveling feet as needed. An unlevel refrigerator creates uneven weight distribution that stresses internal components and initiates cracks over time.
Schedule quarterly inspections of interior surfaces during routine cleaning. Run your hand along walls and shelves to detect early-stage hairline cracks before they become visible. Early detection allows for simpler, more effective repairs that prevent moisture infiltration into insulation layers.
When to Replace Rather Than Repair

Knowing when to fix a crack in your fridge freezer versus replacing the entire appliance saves money and prevents recurring problems. For refrigerators under five years old with isolated cracks in accessible areas, repair is almost always the economical choice. However, multiple cracks, rust around the fracture site, or cracks in structural components often indicate it’s time for replacement.
If repair costs exceed 50% of a comparable new model’s price, replacement makes financial sense. Factor in energy savings from newer models—refrigerators over 10 years old consume 30-50% more electricity than Energy Star models. The long-term savings often justify replacement even when repair seems cheaper upfront.
Structural cracks that compromise door alignment or cause uneven cooling across compartments typically indicate systemic issues beyond simple repair. If your refrigerator shows multiple signs of age (excessive frost, unusual noises, inconsistent temperatures), a single crack might be the first symptom of broader deterioration that will lead to more expensive repairs soon.
For refrigerators under manufacturer warranty, unauthorized repairs can void coverage for future issues. Review your warranty terms before attempting significant repairs—many manufacturers cover structural defects that cause cracking, making professional service the smarter financial choice.
By following these targeted repair strategies and preventative measures, you can successfully fix a crack in your fridge freezer and extend your appliance’s functional life for years to come. Remember that early intervention with proper materials makes the difference between a lasting repair and temporary patch that fails within weeks.