Frigidaire Bottom Freezer Not Sealing? Fix It Fast
That annoying warm spot in your freezer drawer or the frost creeping across the ceiling means your Frigidaire bottom freezer not sealing properly. When that critical rubber gasket fails to create an airtight closure, warm kitchen air infiltrates both compartments, causing your compressor to work overtime while your groceries slowly warm toward unsafe temperatures. You might notice condensation pooling on refrigerator shelves, higher energy bills without explanation, or food spoiling faster than it should. The good news is that most sealing issues can be diagnosed and resolved without professional help—often within an afternoon. This guide walks you through everything from simple dollar bill tests to gasket replacement, helping you restore your Frigidaire bottom freezer to proper working condition.
Bottom freezer models face unique sealing challenges compared to top freezer or side-by-side designs. Your Frigidaire bottom freezer not sealing properly often stems from the drawer-style mechanism that slides in and out on tracks. This design requires the gasket to seal along multiple edges as the drawer closes, creating additional alignment considerations that top-mounted freezer doors don’t have. Over time, the track hardware can shift, the drawer can settle unevenly, or the gasket itself can degrade—any of which compromises that critical seal. By working through this systematic troubleshooting guide, you’ll identify the specific cause of your sealing problem and apply the appropriate fix.
Test Your Frigidaire Freezer Drawer Seal with Dollar Bill Method
Before diving into repairs, confirm that a seal problem actually exists and identify its exact location. A simple but effective test requires nothing more than a standard dollar bill or sheet of paper.
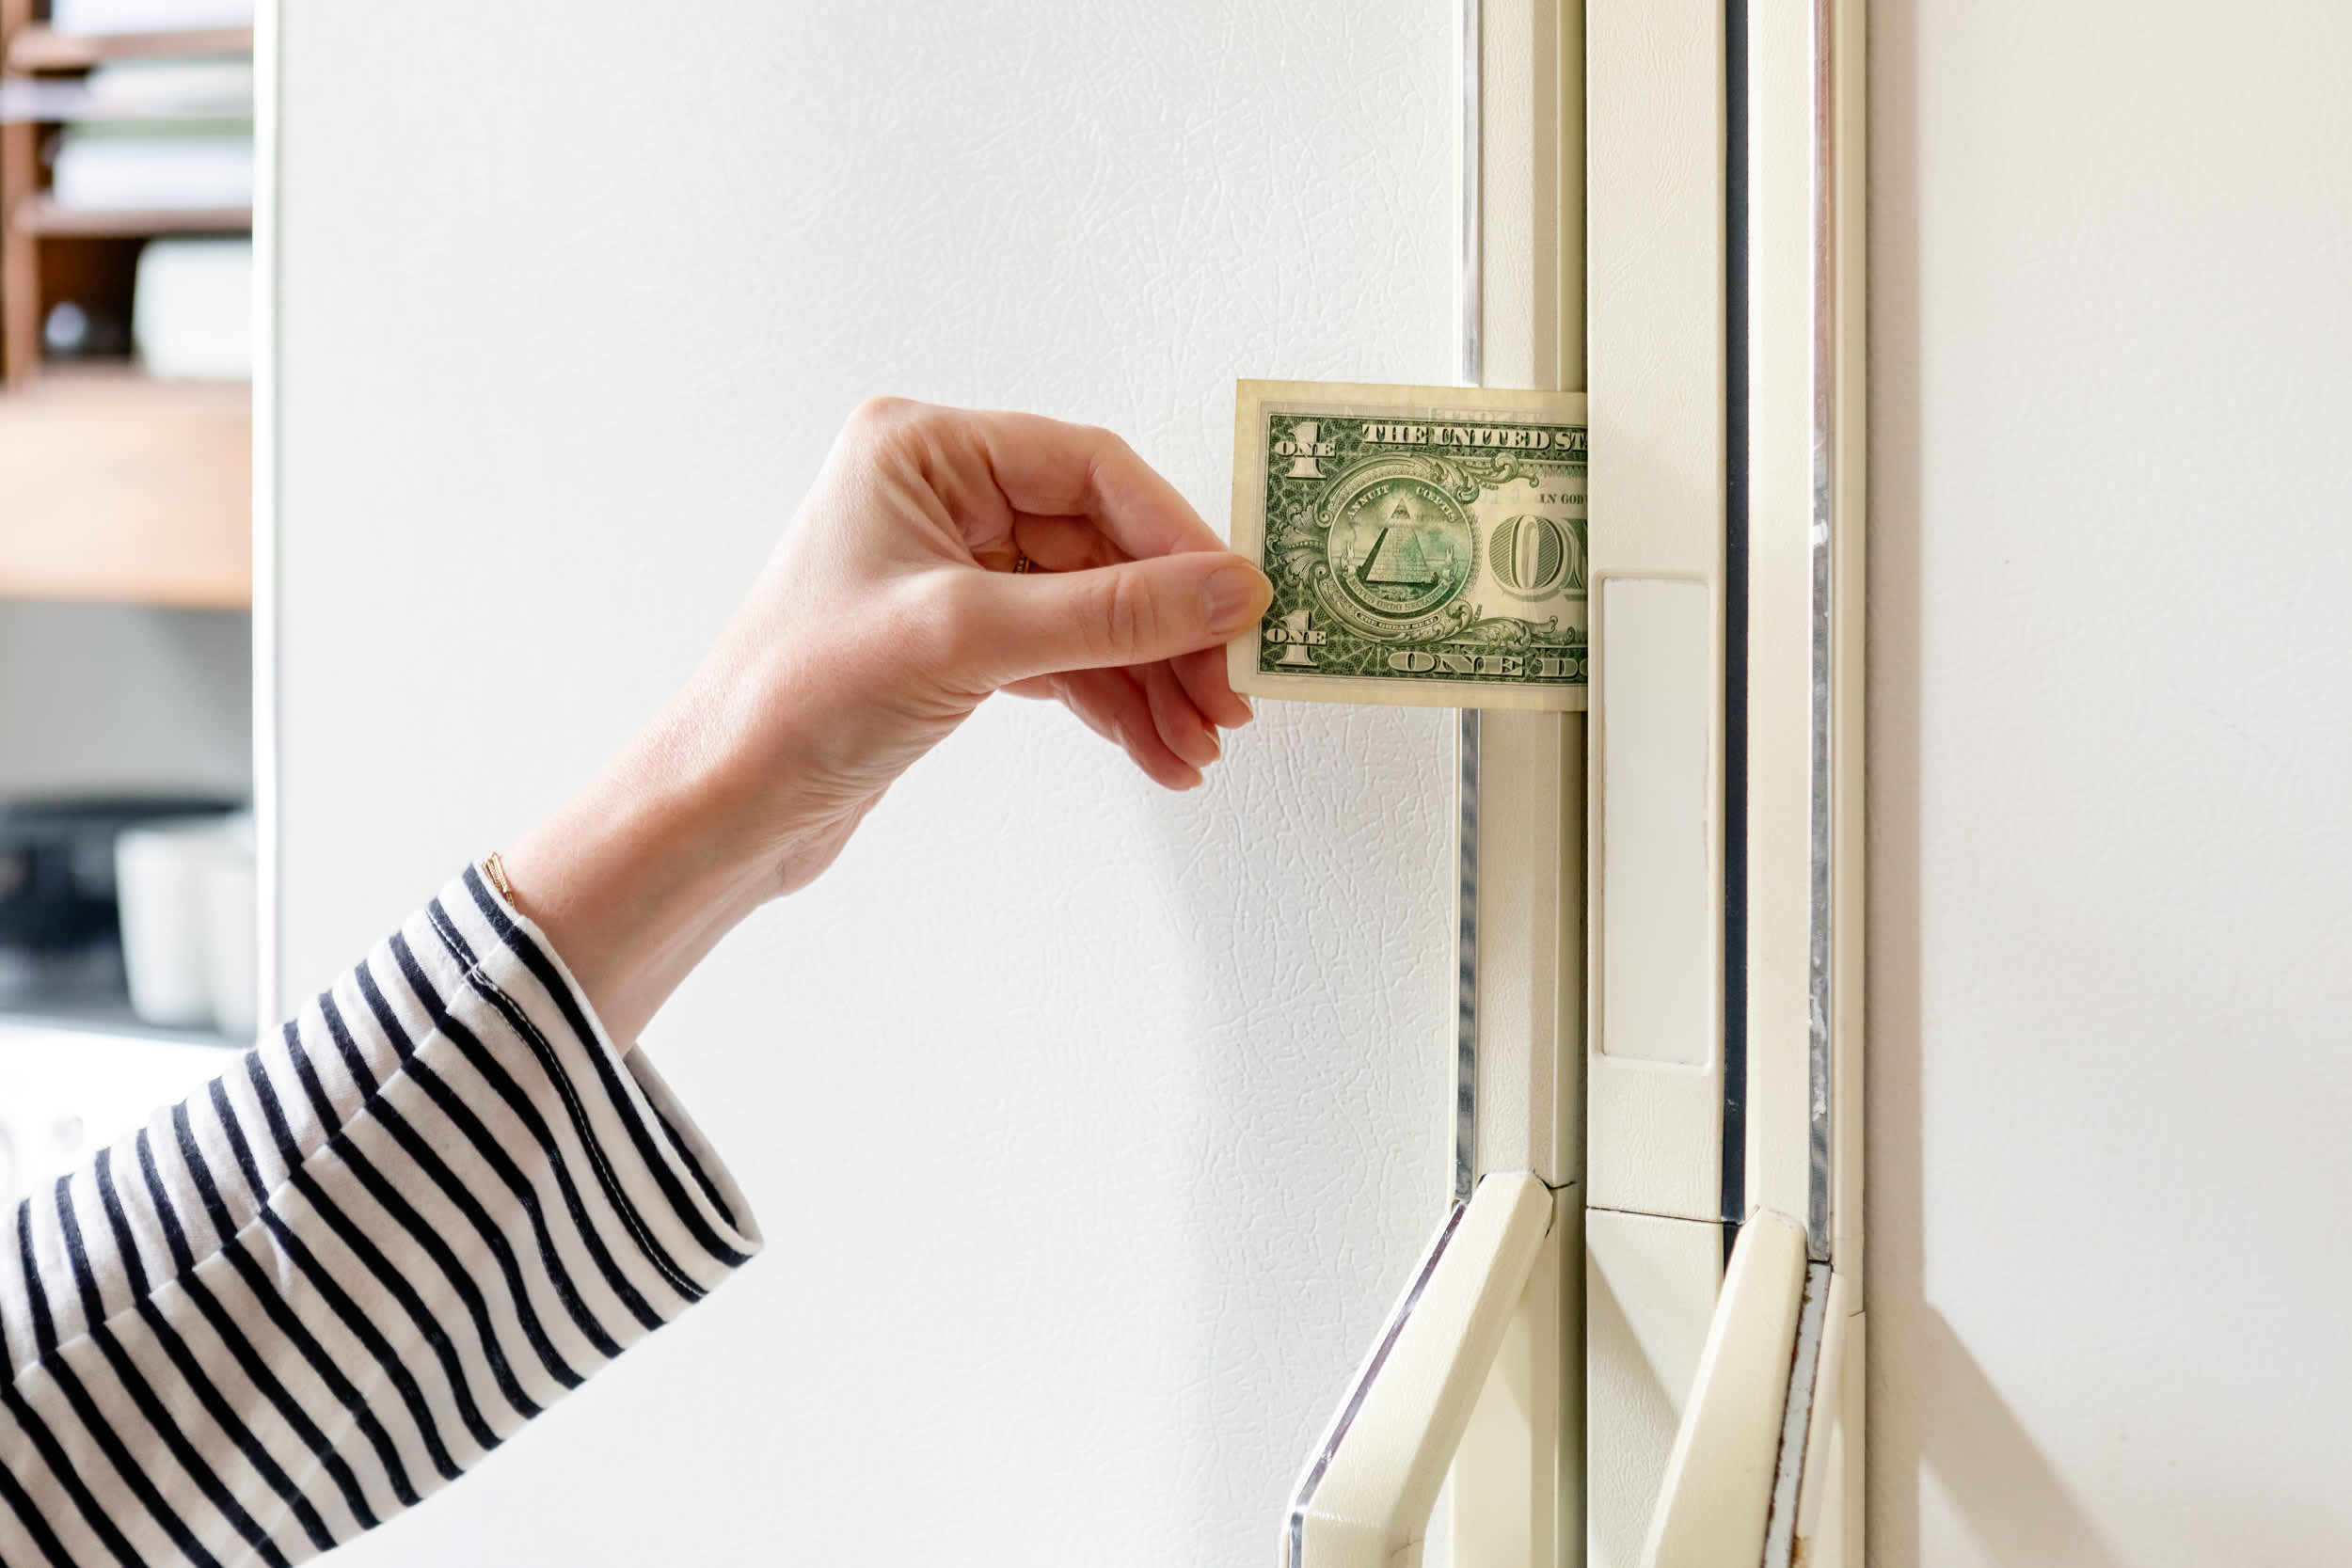
Perform the Dollar Bill Test: Open your freezer drawer and slip a dollar bill between the gasket and the cabinet frame along the edge where they meet when closed. Close the drawer firmly, ensuring the seal makes contact with the bill along its entire length. Now gently pull on the bill with consistent force. A properly functioning seal will grip the bill firmly, requiring noticeable effort to slide it out. If the bill falls out immediately or slides through without resistance, that section of the gasket has lost its sealing pressure. Test multiple points around the entire perimeter—seals often fail unevenly, with some sections still functional while others have degraded entirely. Pay special attention to the corners and hinge areas, as these high-stress points typically show wear first in Frigidaire bottom freezer models.
Visual Inspection Techniques: While the dollar bill test reveals functional problems, visual inspection identifies physical damage that may not affect the seal test but will eventually. Examine the entire gasket surface under good lighting, looking for visible cracks, tears, splits, or breaks in the rubber material. Run your fingers along the gasket feeling for flattened or compressed sections that may not rebound fully after the drawer closes. Check the gasket’s attachment points to ensure it remains firmly secured to the drawer frame—no loose corners, detached sections, or gaps where the seal has pulled away. For bottom freezer models, inspect the drawer gasket thoroughly, as these seals often have different configurations than the refrigerator door seal.
Clean Your Freezer Gasket to Restore Proper Sealing
Contaminants are a leading cause of Frigidaire bottom freezer not sealing properly. Food particles, grease, spills, and everyday kitchen residue build up on door gaskets, particularly in the folds where the seal contacts the cabinet.
Gasket Cleaning Procedure: Prepare a solution of warm water and mild dish soap—avoid harsh chemicals that can degrade rubber materials. Using a soft cloth or sponge, thoroughly clean all surfaces of the gasket, working the soap into the folds and crevices where debris accumulates. For stubborn residue, allow the soapy solution to sit on the affected area for several minutes before wiping clean. Rinse thoroughly with clean water to remove all soap residue, as leftover soap can attract more dirt. Dry completely with a soft cloth before closing the drawer. This cleaning should be performed at least monthly, or immediately after any spill.
Deep Cleaning for Stubborn Residues: When standard cleaning doesn’t remove built-up grime, a more thorough approach may be necessary. Mix a solution of baking soda and warm water—about one tablespoon of baking soda per cup of water. Apply this paste to heavily soiled areas and gently scrub with a soft-bristled toothbrush, paying attention to the gasket’s folds. For mold or mildew concerns, a mixture of equal parts white vinegar and water can be applied after cleaning, but rinse thoroughly afterward. Never use bleach on rubber gaskets, as these chemicals accelerate degradation.
Defrost Your Freezer to Break the Frost-Seal Cycle

Frost buildup on or around the door seal indicates a sealing problem that creates a vicious cycle where the frost prevents proper closure, which causes more frost to accumulate.
Why Frost Indicates Seal Failure: When warm, humid air enters the freezer compartment through a failing seal, the moisture in that air condenses on cold surfaces and freezes. This frost accumulation appears on the door gasket, around the seal perimeter, and sometimes inside the freezer compartment itself. The frost creates physical barriers that prevent the drawer from closing fully, which allows more warm air to enter, which creates more frost. Breaking this cycle requires eliminating both the existing frost and the seal failure that allowed the moisture intrusion in the first place.
Safe Defrosting Process: If frost has accumulated on the gasket or seal surfaces, proper defrosting is necessary before the seal can function. Remove all food items from the freezer and store them in coolers with ice packs. Disconnect power to the unit by unplugging it. Place towels around the base of the freezer to catch water as the frost melts. Leave the drawer open and allow the frost to melt naturally—this may take several hours. Never use sharp objects to chip away ice, as this can puncture the sealed refrigeration system or tear the gasket. Once fully defrosted, dry all surfaces completely with towels before restoring power.
Adjust Your Freezer Drawer Alignment for Proper Sealing
When the drawer itself is misaligned, even a perfect gasket cannot create an effective seal. Bottom freezer models require attention to both the refrigerator door hinges and the freezer drawer tracks.
Freezer Drawer Track Inspection: The freezer drawer operates on a track system that can affect alignment. Inspect the track for debris, ice buildup, or physical damage that might prevent the drawer from closing fully. Clean the track with a damp cloth and dry thoroughly. Check that the drawer sits level when closed—if it sits crooked, the tracks may need adjustment or the rollers may be worn. Some models have adjustment screws on the track system—consult your owner’s manual for specific instructions. The drawer should close with minimal force and stay closed firmly, with the gasket compressing evenly along the entire perimeter.
Refrigerator Door Adjustment: Most Frigidaire bottom freezer models have adjustable hinges that allow the refrigerator door to be repositioned for proper alignment. Locate the hinge screws on the top or bottom of the refrigerator door—these are typically accessible with the door open. Loosen the screws slightly and gently shift the door vertically or horizontally as needed to improve alignment with the cabinet. You want the gasket to make even contact all around when the door closes, with no visible gaps at any point. Tighten the screws securely once the alignment is correct, then test by closing the door and checking for even gasket compression.
Replace Your Worn Freezer Gasket When Necessary
When cleaning and adjustment don’t restore proper sealing, the gasket itself may be too worn, damaged, or degraded to function effectively. Gasket replacement is a straightforward repair that most homeowners can complete successfully.
Identifying Gasket Replacement Needs: Physical damage such as tears, cuts, breaks, or permanently deformed sections requires gasket replacement rather than repair. A gasket that fails the dollar bill test at multiple points despite cleaning likely needs replacement. If the gasket material feels hard and brittle rather than flexible, degradation has progressed too far for the seal to function. Any sections where the gasket has pulled away from the door frame, torn at the corners, or separated from its mounting rail indicate necessary replacement.
Gasket Replacement Steps: Start by obtaining the correct replacement gasket for your specific Frigidaire model—have your model number ready when ordering. Most gaskets are held in place by a retaining strip or channel that runs along the door frame. Carefully pry the old gasket away from this retaining channel, noting how it’s seated. Clean the channel thoroughly before installing the new gasket. Install the new gasket by pressing it securely into the retaining channel, ensuring it’s fully seated along the entire perimeter with no gaps or bunching. Once installed, test the seal with the dollar bill method and allow the refrigerator to run for 24 hours before evaluating cooling performance.
Prevent Future Frigidaire Bottom Freezer Not Sealing Issues
Regular maintenance keeps your Frigidaire bottom freezer sealing properly for years while avoiding the problems that lead to premature gasket failure.
Regular Inspection Schedule: Implement a monthly visual inspection routine, checking for visible damage, deformation, or contamination of the gasket material. Perform the dollar bill test quarterly to confirm that sealing pressure remains adequate throughout the seal’s perimeter. Deep clean the gasket every three months, paying particular attention to folds and crevices. Annually assess drawer alignment and track condition, making adjustments before misalignment causes seal damage. This systematic approach catches problems early, when they’re easiest and cheapest to address.
Environmental and Usage Factors: The refrigerator’s installation location significantly affects gasket longevity. Avoid locations where ambient temperatures drop below 55°F, as extreme cold can make gasket material stiff and brittle. Ensure adequate ventilation around the refrigerator’s exterior to prevent overheating that accelerates degradation. Keep the unit away from direct sunlight and heat sources like ovens, dishwashers, or heating vents. When loading items into the refrigerator or freezer, avoid forcing items against the door or pushing them past the point where the door closes naturally. These environmental and usage considerations, while sometimes overlooked, have a major impact on how long your door seals last.
By following this systematic approach—testing to confirm the problem, cleaning to address contamination, adjusting to correct misalignment, and replacing when necessary—you can resolve most Frigidaire bottom freezer not sealing issues without professional help. Regular maintenance then keeps the problem from recurring, protecting your food, your energy bills, and your appliance’s lifespan.