How to Thaw Frozen Bread Quickly and Easily
Finding yourself with a rock-hard loaf of bread but no time to wait? You’re not alone. Millions of households freeze bread to extend its shelf life, only to struggle with the thawing process later. Improper thawing leads to soggy, dry, or moldy bread that’s worse than throwing money away. The good news is that with the right technique, your frozen bread can taste freshly baked. This guide reveals exactly how to unthaw bread from freezer while preserving its texture, flavor, and freshness—whether you need it in 5 minutes or 24 hours. You’ll learn professional methods that work for every bread type, avoid common mistakes that ruin your loaf, and discover time-saving tricks most people never consider.
Refrigerator Thawing: The Gold Standard for Perfect Results
Thawing bread in the refrigerator delivers consistently excellent results with minimal effort. This slow method preserves the bread’s structure while preventing bacterial growth, making it ideal when you can plan ahead.
How Long to Leave Bread in the Fridge for Complete Thawing
Most standard loaves require 8-12 hours to fully thaw in the refrigerator. Sliced bread typically softens within 6-8 hours, while denser varieties like sourdough or whole grain may need up to 14 hours. For best results, remove your frozen bread from its packaging and place it in a paper bag before refrigerating—this allows proper air circulation while preventing excess moisture buildup. Never leave bread in plastic during refrigerator thawing, as this traps condensation that leads to sogginess.
Why Refrigerator Thawing Prevents Sogginess Better Than Room Temperature
When bread thaws slowly in cold temperatures, water molecules gradually return to their original positions in the starch structure. Rapid thawing at room temperature causes moisture to pool on the surface before the interior softens, creating that unpleasant damp texture. The refrigerator’s consistent cool environment maintains the bread’s cellular integrity, resulting in a loaf that feels and tastes nearly fresh-baked.
Microwave Thawing: Emergency Method for Immediate Use
When you need bread in minutes rather than hours, the microwave offers a viable emergency solution—if you follow precise techniques to prevent partial cooking or rubbery texture.
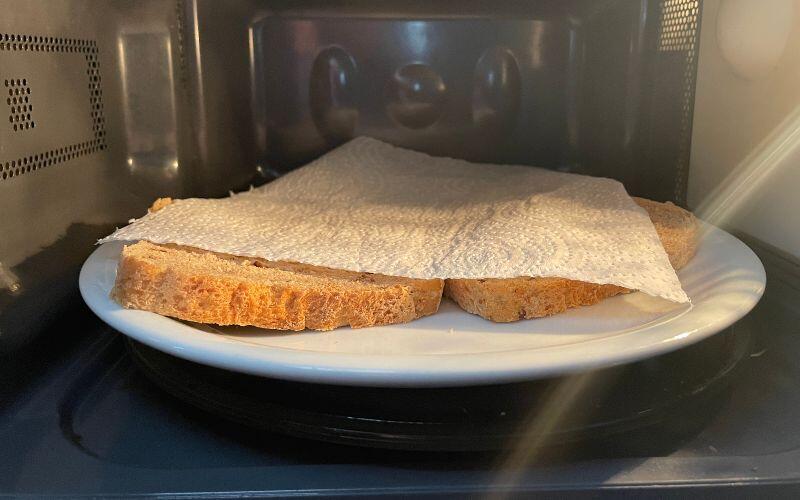
Exact Power Settings and Timing for Different Bread Types
For a standard sandwich loaf: Wrap 2-3 slices in a dry paper towel and microwave on 30% power for 15 seconds. Flip the slices and repeat for another 10-15 seconds. Rolls require 20-25 seconds total at the same power setting. Artisan loaves need careful attention—thaw in 10-second bursts at 20% power, rotating the bread between intervals. Never exceed 30 seconds per side regardless of bread type, as higher durations trigger starch gelatinization that permanently alters texture.
Critical Mistake That Turns Bread Into a Gummy Mess
The most common microwave error is using too high a power setting. At 50% power or above, microwave energy heats water molecules too rapidly, causing them to burst from starch granules before the structure can reabsorb them. This creates pockets of trapped steam that collapse into gummy sections as the bread cools. Always use 10-30% power and check frequently—your bread should feel cool to the touch, not warm, during the process.
Oven Revival: Transforming Frozen Bread Into “Fresh-Baked”
The oven method works exceptionally well for fully frozen loaves that need complete restoration. This technique essentially skips the thawing stage by gently baking the bread from frozen, yielding superior results to conventional thawing for many bread types.
Step-by-Step Temperature Control for Crispy Crust and Soft Interior
Preheat your oven to 325°F (163°C) with a shallow pan of water on the bottom rack. While heating, remove all packaging from your frozen loaf and place it directly on the center rack. Bake for 20-25 minutes for a standard loaf, 15-20 minutes for rolls. The steam from the water pan prevents excessive drying while the gentle heat penetrates the frozen structure. For crusty breads like baguettes, increase temperature to 350°F (177°C) and reduce time to 12-15 minutes.
Why This Method Outperforms Counter Thawing for Artisan Breads
Artisan breads with open crumb structures suffer most from conventional thawing, as moisture migrates to the crust and softens it irreversibly. The oven method simultaneously thaws and re-crisps the crust while the interior softens, essentially resetting the bread’s texture. The controlled heat allows starch retrogradation to reverse properly, whereas room temperature thawing often leaves artisan breads with a gummy texture in the center.
Countertop Thawing: When It Works and When to Avoid It
Thawing bread at room temperature offers convenience but carries significant risks if not executed properly. This method works best for certain bread types under specific conditions.
Safe Time Limits for Different Bread Varieties
Sliced sandwich bread can safely thaw on the counter for 2-3 hours when wrapped in its original packaging. Rolls and buns require only 1-2 hours. Dense breads like rye or pumpernickel may take 4-5 hours but generally withstand longer countertop thawing. Never leave bread at room temperature longer than 4 hours total, as this enters the food safety danger zone where bacteria multiply rapidly. Humid environments require even shorter thawing times—reduce by 30-50% in tropical climates.
Humidity Control Techniques to Prevent Soggy Bottoms
Place thawing bread on a wire rack rather than a solid surface to allow air circulation underneath. If your kitchen is particularly humid, set a small fan on low speed several feet away to create gentle airflow around the loaf. For extra protection, place a folded paper towel beneath the bread to absorb excess moisture. Check the bread every 30 minutes and replace the paper towel if it becomes damp.
Bread-Type Specific Thawing Protocols
Different breads require tailored approaches to maintain their unique textures and flavors after freezing. Applying a one-size-fits-all method often compromises quality.
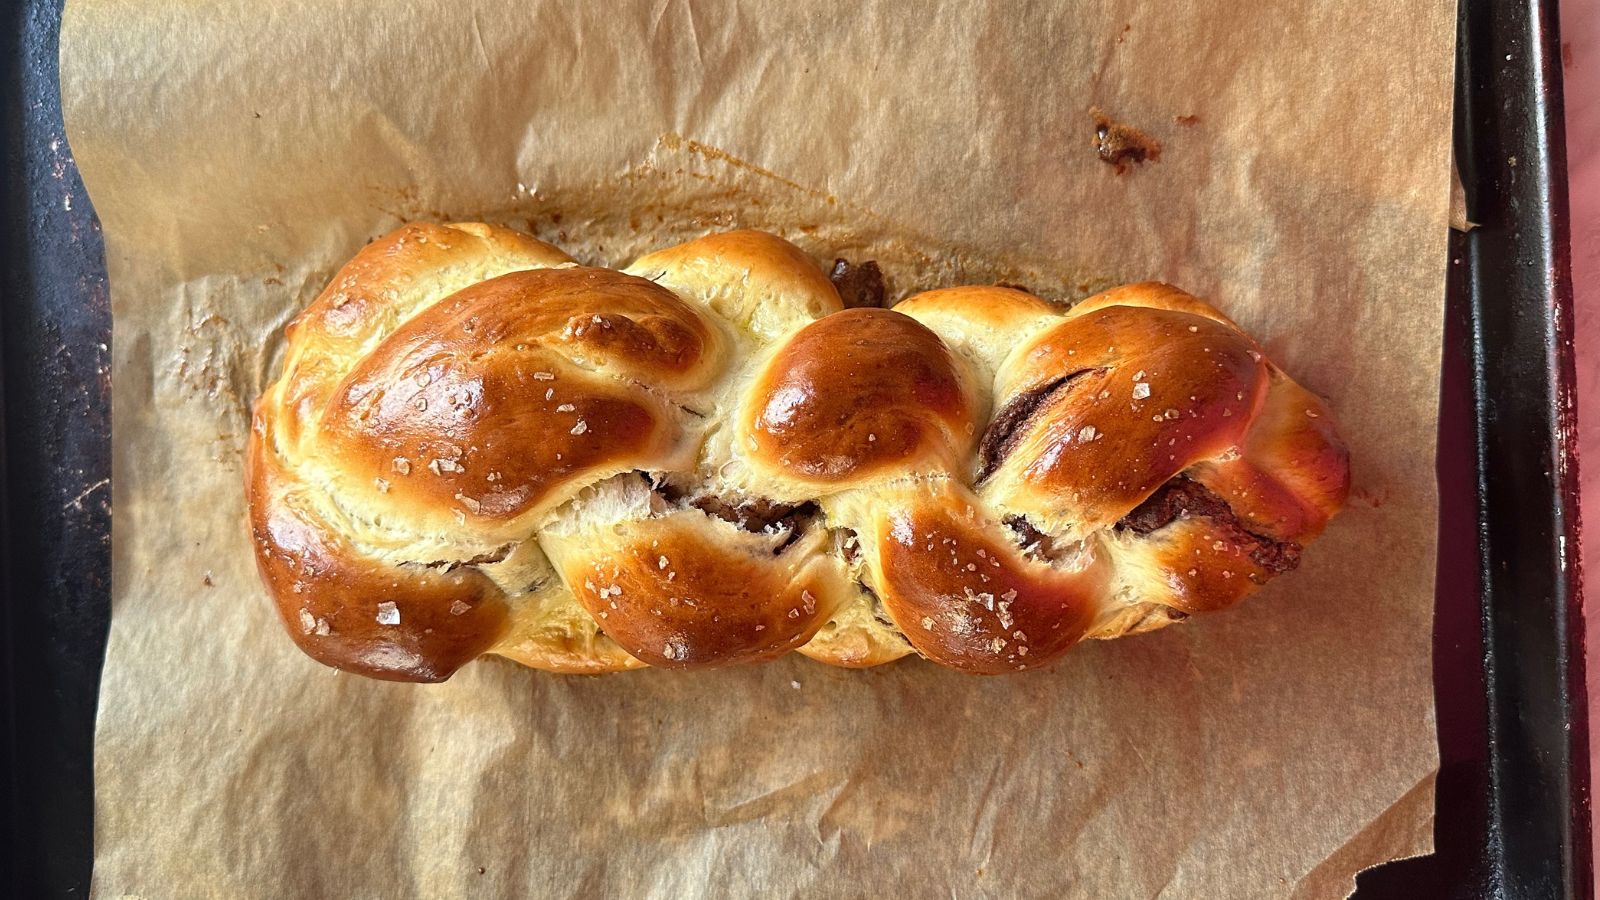
Brioche and Enriched Doughs: Preventing Butter Separation
Rich, buttery breads like brioche or challah need extra care during thawing. Always thaw in the refrigerator for 12-18 hours—never at room temperature. The high fat content makes these breads prone to oil separation when thawed too quickly. Wrap the frozen loaf in parchment paper before placing in a paper bag for refrigeration. After thawing, refresh in a 300°F (149°C) oven for 5 minutes to redistribute fats and restore texture.
Whole Grain and Seed Breads: Maintaining Structural Integrity
Dense whole grain loaves benefit from a hybrid approach: thaw in the refrigerator for 6-8 hours, then finish at room temperature for 1-2 hours. This prevents the bran particles from absorbing too much moisture during slow thawing, which can make the bread crumbly. When slicing, use a serrated knife with gentle sawing motions—never press down forcefully, as the partially thawed structure is more fragile than fully fresh bread.
Preventing Common Thawing Disasters
Even with proper technique, several pitfalls can ruin your thawed bread if you’re not prepared to address them immediately.
Fixing Slightly Dry Bread After Thawing
If your bread emerges drier than desired, wrap it in a clean, damp (not wet) kitchen towel and let it sit for 10-15 minutes. The gentle steam rehydrates the crust without making it soggy. For more severe dryness, lightly mist the crust with water and bake at 300°F (149°C) for 3-5 minutes. Never apply water directly to sliced surfaces, as this creates uneven moisture that leads to mold.
Emergency Solution for Partially Thawed and Refrozen Bread
If your bread started thawing then accidentally refroze, don’t despair. Thaw it completely using the refrigerator method, then refresh in a 350°F (177°C) oven for 8-10 minutes. This second baking cycle resets the starch structure that was partially damaged during improper thawing. The bread won’t be quite as good as properly thawed, but it will be perfectly edible and far better than throwing it away.
Proactive Freezing Techniques That Make Thawing Easier
How you freeze bread initially dramatically impacts how well it thaws later. Implement these professional practices before freezing to ensure optimal results during thawing.
The Paper Towel Trick for Moisture Control
Before freezing, wrap your bread tightly in plastic wrap, then add a single layer of paper towels between the plastic and bread surface. The paper towels absorb excess moisture during freezing and thawing, preventing ice crystals from forming directly on the bread. This simple step reduces sogginess by up to 70% compared to standard freezing methods.
Portion Control Strategies for Single-Serving Thawing
Slice bread before freezing and separate slices with parchment paper. This allows you to remove only what you need without thawing the entire loaf. For rolls or bagels, freeze them on a baking sheet first, then transfer to an airtight container once solid—this prevents them from freezing together in a solid mass that’s difficult to separate later.
Final Note: Properly thawed bread should feel uniformly soft with no cold spots, have a pleasant aroma, and maintain its original texture characteristics. For best quality, consume thawed bread within 24-48 hours—refreezing significantly degrades texture. Master these techniques and you’ll never waste frozen bread again, always having bakery-fresh results ready when hunger strikes. Remember: the right thawing method depends on your timeline and bread type, so match your approach to your specific needs for perfect results every time.