How to Reset Whirlpool Upright Freezer
Is your Whirlpool upright freezer displaying an error code, failing to maintain temperature, or acting unresponsive after a power outage? A proper reset often resolves these issues without requiring a service call. Learning how to reset your Whirlpool upright freezer saves time, prevents food spoilage, and restores proper operation within minutes.
This guide covers every reset scenario you’ll encounter, from simple power cycles to control panel resets. Whether you own a traditional dial-control model or a modern digital display freezer, you’ll find the specific instructions needed to get your appliance running properly again. Understanding these procedures empowers you to handle common freezer issues confidently and maintain your valuable frozen food inventory.
When to Reset Your Whirlpool Upright Freezer
Understanding when a reset is the appropriate solution helps you diagnose problems efficiently and avoid unnecessary service calls. Freezers require resets in several common situations that don’t necessarily indicate mechanical failure.
Power interruptions rank as the most frequent reason for resets. When electricity flickers or goes out completely, the freezer’s control board may lose its programming settings. Upon power restoration, the unit might display error codes, run continuously, or fail to start entirely. A reset recalibrates the system and clears these temporary faults.
Error code appearances signal that the appliance’s sensors detected abnormal conditions. Common codes include “PF” (power failure), “E1” or “E2” (sensor faults), and “dr” or “df” (door ajar warnings). While some codes indicate genuine problems, many clear themselves after a reset if the underlying condition has been resolved.
Temperature inconsistencies often respond well to resets. If you notice frost buildup in certain areas, items freezing at different rates, or the freezer running constantly without reaching the proper temperature, a reset can restore default settings and allow the system to recalibrate.
Basic Power Reset Procedure

The power reset—sometimes called a “hard reset” or “power cycle”—disconnects the appliance from electricity completely, allowing the control board to discharge and reboot. This procedure resolves most operational issues and should always be attempted first.
Step-by-Step Power Cycle
First, locate your freezer’s power cord, which typically extends from the rear bottom or back of the unit. Do not simply turn the appliance off using the control panel, as this may not stop power flow to the control board.
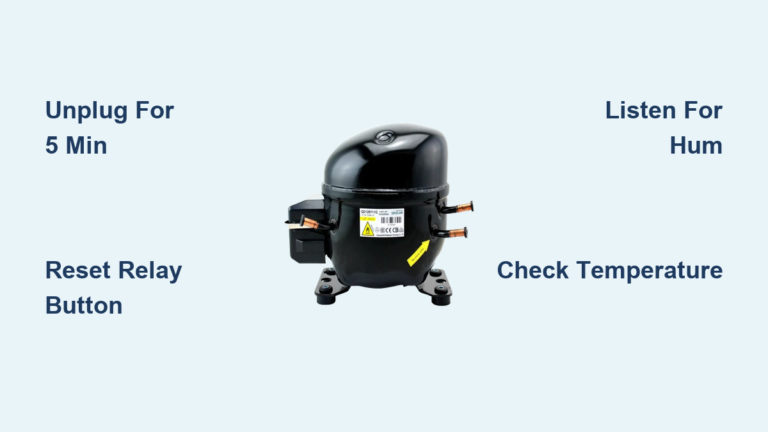
Unplug the power cord from the wall outlet. If the plug is difficult to reach, switch off the circuit breaker controlling the freezer’s outlet instead. You must completely disconnect power for a minimum of five minutes to allow capacitors to discharge fully.
While the freezer remains unplugged, inspect the cord and plug for visible damage. Check for frayed wires, bent prongs, or burn marks that could indicate electrical problems requiring professional attention.
After waiting at least five minutes, plug the freezer back in or switch the circuit breaker on. If your model has a “Power” button, press and hold it for three to five seconds. This ensures the control board initializes properly rather than remaining in standby mode.
Allow the freezer to run undisturbed for two to four hours before adding fresh food. This waiting period lets the appliance reach stable operating temperature and ensures the cooling system has stabilized following the reset.
Control Panel Reset Methods
Modern Whirlpool upright freezers feature digital control panels requiring specific reset sequences. The exact procedure varies by model year and control configuration, so try the method matching your freezer’s interface.
Digital Display Models
For freezers with LED or LCD displays, simultaneously press and hold the “Fast Freeze” and “Power” buttons for approximately ten seconds. The display should flash, beep, or go blank, then illuminate normally when the reset completes. Some models require holding these buttons until the display shows “rS” (reset) or similar indicator.
If your model has separate temperature adjustment buttons, try holding the “Up” and “Down” arrows simultaneously for ten seconds. This combination activates the diagnostic mode on many Whirlpool appliances; within that mode, a second button press often triggers a reset.
Dial and Button Control Models
Older Whirlpool upright freezers use mechanical dials with basic push-button controls. Locate the “Reset” button—it’s often small and recessed near the temperature dial or on the control housing.
If no dedicated reset button exists, turn the temperature dial to the “Off” position, wait sixty seconds, then return it to your preferred setting. This simulates a power interruption and often resolves minor control glitches.
Resetting After Error Codes
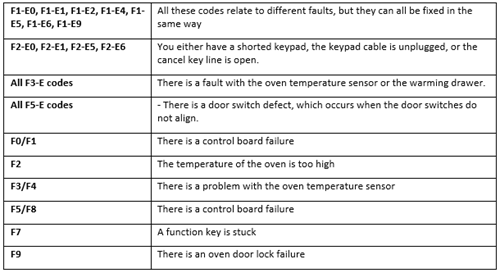
Error codes appear when sensors detect conditions requiring attention. Different codes require different reset approaches, so identifying the specific code determines your next steps.
Power Failure Code (PF)
The “PF” code simply indicates the freezer lost power at some point and does not necessarily indicate a problem. To clear it, press any button to silence the alarm (if sounding), then perform a standard power cycle as described above. The code typically clears automatically once the freezer reaches operating temperature.
Door Ajar Codes (dr, df, or door icon flashing)
These codes mean the door switch detected an open door for an extended period. Before resetting, inspect the door seal for food particles, frost buildup, or physical damage that might prevent a complete seal. Clean the seal with warm, soapy water and ensure it sits flush against the cabinet when closed.
If the seal appears intact, the door switch itself may be faulty. A reset won’t permanently resolve this issue, but you can temporarily clear the code by pressing any button or closing the door firmly.
Model-Specific Reset Instructions

Whirlpool produces several upright freezer lines with distinct reset procedures. Identifying your model helps ensure accurate instructions.
Whirlpool Gold Series Upright Freezers
Gold Series models feature a membrane control panel with a small “Reset” button near the temperature display. Press and hold this button for five seconds until the display shows “8:8” or goes blank. Release the button, and the freezer will beep once to confirm the reset.
Whirlpool Conquest Series Upright Freezers
Conquest models use a dial-based control system with a small recessed reset button located behind the temperature knob. To access it, remove the knob by pulling it straight off the shaft, then press the reset button inside using a paperclip or similar object.
Hold the reset button for five seconds while the freezer remains plugged in. Replace the knob and verify the display shows normal operation.
Resetting After Power Outages
Extended power outages can disrupt freezer operation more significantly than brief interruptions. Following an outage, take these steps to ensure safe operation and clear any error codes.
First, do not open the freezer door unnecessarily. The frozen contents maintain temperature for 24-48 hours with minimal door openings, depending on ambient conditions. This preservation time lets you verify power stability before restarting the cooling system.
Once power has been confirmed stable for at least thirty minutes, perform the standard power cycle reset. Unplug the unit or switch off the circuit breaker, wait five minutes, then restore power. This pause ensures any power fluctuations have settled completely.
After the reset completes, press the “Power” button to start the compressor (if applicable) and set the temperature to your preferred setting. The freezer typically requires 4-6 hours to reach stable operating temperature; avoid adding fresh food until then.
Troubleshooting Persistent Issues
When resets fail to resolve operational problems, systematic troubleshooting identifies the underlying cause. Several components can prevent normal operation even after successful resets.
Verify Power Supply
Before concluding the freezer requires service, confirm the outlet delivers power. Plug a lamp, phone charger, or other small appliance into the outlet to verify it functions. Check the circuit breaker and confirm it hasn’t tripped; freezers should have a dedicated 15-20 amp circuit.
Inspect the cord for damage, particularly where it enters the rear of the appliance or near the plug. Cord damage often occurs from being crushed against walls or walked on repeatedly. A damaged cord requires replacement before the freezer will operate.
Check Door Switch Operation
A faulty door switch causes multiple symptoms including error codes, continuous running, and failure to cool. With the door closed, listen for a distinct “click” indicating the switch activated.
To test the switch, open the door and verify the interior light illuminates (if equipped). If the light fails to come on, the switch may be defective. Access the switch by removing the door switch housing and testing continuity with a multimeter.
Clean Condenser Coils
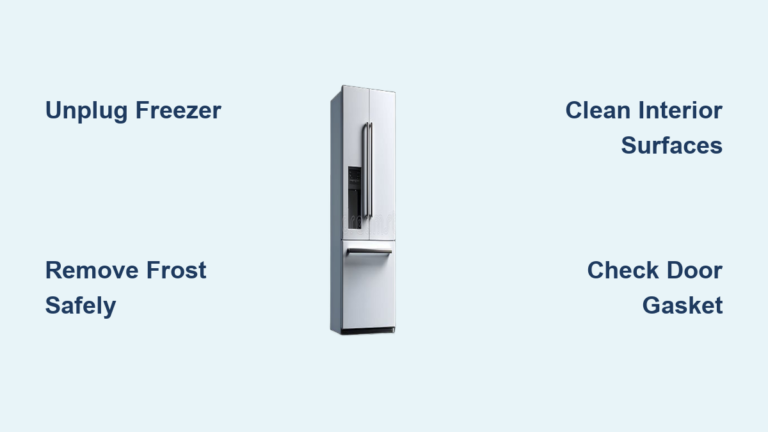
Dirty condenser coils cause the compressor to work harder, potentially triggering overheating protection and error codes. Unplug the freezer and locate the coils, typically accessible through a rear panel or at the bottom front of the unit.
Vacuum the coils gently using a coil brush attachment to remove accumulated dust, pet hair, and debris. For best results, perform this maintenance every 6-12 months.
Maintaining Optimal Freezer Operation
Regular maintenance prevents many issues requiring resets and extends your freezer’s operational lifespan. Implementing these practices reduces troubleshooting needs and maintains consistent performance.
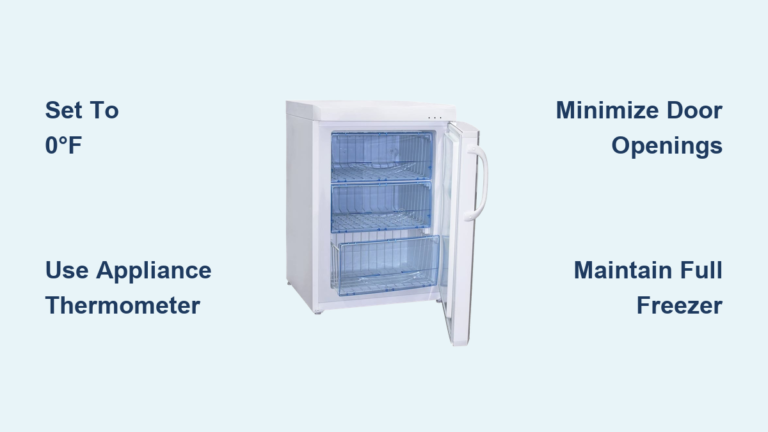
Temperature monitoring helps identify problems before they escalate. Keep an appliance thermometer inside the freezer and check readings monthly. The ideal freezer temperature remains at 0°F (-18°C); readings above 5°F (-15°C) indicate the system isn’t operating efficiently.
Door seal inspection prevents temperature fluctuations that stress the cooling system. Monthly, inspect the door seal for cracks, tears, or compression damage. Clean seals with mild detergent to remove grease buildup that can prevent a complete seal.
Proper loading practices maintain airflow essential for even cooling. Leave space between items and the walls to allow cold air circulation. Avoid blocking air vents inside the freezer, and don’t overfill the unit beyond its designed capacity.
When to Seek Professional Service
Some situations require certified technician intervention despite successful resets. Recognizing these scenarios prevents further damage and ensures safe resolution.
Cooling failure after reset indicates a mechanical or electrical problem requiring diagnosis. If the freezer runs but doesn’t reach proper temperature, or if the compressor doesn’t activate at all following reset procedures, professional service is warranted.
Repeated error codes that clear with reset but return within hours or days suggest an underlying fault. Persistent sensor failures, cooling system problems, or control board issues require specialized testing equipment to identify and repair.
Visible damage including refrigerant leaks (oily residues), burnt electrical components, or physical damage to the refrigeration lines necessitates professional attention. These conditions can pose safety hazards and typically worsen without proper repair.
Resetting your Whirlpool upright freezer resolves most operational issues without service calls. The power cycle method addresses the majority of problems, while control panel resets handle digital interface concerns. Error codes provide diagnostic guidance, with most clearing after successful resets when underlying conditions have been addressed.
Regular maintenance including temperature monitoring, door seal inspection, and coil cleaning prevents many reset-requiring issues. When problems persist despite proper reset procedures, professional service ensures safe, effective resolution of mechanical or electrical faults. Keep your model’s owner’s manual accessible for reference, and note any error codes that appear. Documenting when issues occur and what codes display helps technicians diagnose problems more efficiently if service becomes necessary.