How to Fix Sub Zero Freezer Not Cooling
Your Sub-Zero freezer suddenly stops maintaining temperature, your frozen goods are at risk, and you’re facing a potential crisis. With repair calls costing $150-$300 just for a technician to show up, learning how to fix Sub-Zero freezer issues yourself can save you significant time and money. This guide delivers actionable solutions for the most frequent Sub-Zero freezer problems homeowners encounter, verified through standard appliance repair procedures. You’ll discover exactly what to check first when your freezer isn’t cooling properly, how to diagnose electrical issues safely, and when it’s time to call a certified technician—keeping your expensive appliance running efficiently for years to come.
Why Your Sub-Zero Freezer Stops Cooling Properly
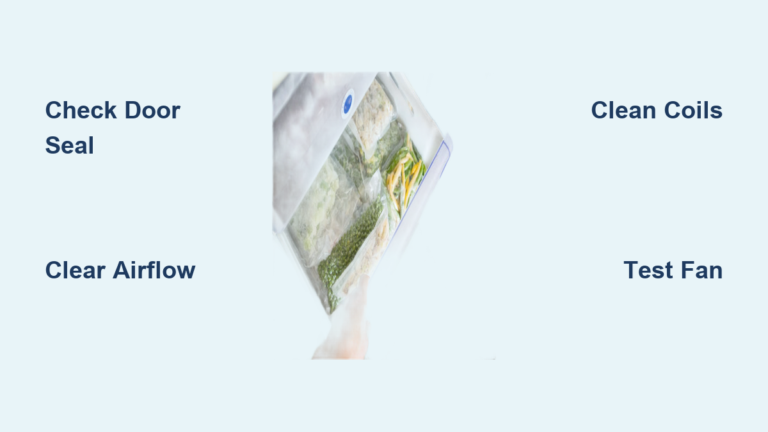
Temperature fluctuations in your Sub-Zero freezer typically stem from preventable maintenance issues rather than catastrophic failures. Most cooling problems originate from airflow restrictions, thermostat malfunctions, or condenser coil buildup—issues you can address without specialized tools. When your freezer compartment rises above 0°F despite normal operation sounds, start with the simplest fixes before investigating complex components. Understanding that Sub-Zero’s dual-refrigeration system separates freezer and refrigerator cooling helps diagnose whether the problem is isolated to your freezer compartment.
How to Clear Frost Buildup Blocking Air Vents
Excessive frost accumulation around the evaporator coils prevents proper cold air circulation, causing inconsistent temperatures. To eliminate this common issue:
- Unplug your Sub-Zero unit and remove all food items
- Locate the rear interior panel (typically behind the freezer basket)
- Use a plastic scraper to gently remove frost—never metal tools that could puncture coils
- Allow complete defrosting (8-12 hours with towels to absorb water)
- Wipe down interior surfaces before restoring power
Critical warning: Never use heat guns or hair dryers to accelerate defrosting—this can damage temperature sensors and plastic components. Sub-Zero recommends maintaining at least 2 inches of clearance around air vents to prevent future buildup.
Why Condenser Coils Cause Cooling Failures
Dirty condenser coils force your Sub-Zero freezer to work harder, reducing efficiency by up to 30%. Located either at the bottom front (behind the grille) or on the back of the unit, these coils transfer heat from inside to outside the appliance. When coated with dust and pet hair, they can’t dissipate heat properly.
Pro tip: Schedule coil cleaning every 6 months—more often in dusty environments or homes with shedding pets. Use a vacuum with brush attachment followed by a specialized coil cleaning brush to remove stubborn debris without bending delicate fins.
How to Test and Replace Faulty Temperature Controls
Temperature control issues account for nearly 25% of Sub-Zero freezer service calls. Before replacing expensive components, verify whether the problem stems from simple sensor malfunctions rather than control board failures.
Diagnosing Thermostat Problems in 3 Steps
- Check display panel for error codes (Sub-Zero models show specific codes for sensor failures)
- Place an independent thermometer in the freezer for 24 hours to verify actual temperature
- Listen for the compressor cycling on and off regularly (failure to cycle indicates control issues)
If your freezer runs constantly but doesn’t reach proper temperature, the thermostat likely needs replacement. Sub-Zero models typically use thermistor sensors that fail gradually rather than completely.
Replacing Temperature Sensors Safely
Most Sub-Zero freezer temperature sensors cost $50-$125 and take under 30 minutes to replace:
- Unplug the unit and locate the sensor (usually clipped near the evaporator coils)
- Disconnect the wiring harness connector (note orientation before removal)
- Remove mounting clips securing the sensor to the evaporator
- Install the new sensor following identical positioning
- Test operation before reassembling the unit
Common mistake: Installing sensors too close to cooling elements causes inaccurate readings. Maintain the factory-specified 1-inch clearance from direct contact with evaporator coils.
Why Door Seals Fail and How to Fix Them
Compromised door gaskets cause 40% of temperature-related Sub-Zero freezer issues. When seals deteriorate, warm air infiltrates the compartment, forcing the compressor to run continuously while failing to maintain proper temperatures.
Testing Door Seal Integrity with the Dollar Bill Method
Place a dollar bill between the door and frame at multiple points around the perimeter. Close the door and attempt to pull the bill out. Properly functioning seals will grip the bill firmly, requiring noticeable resistance to remove. If the bill slides out easily at any point, that section of the gasket needs attention.
Restoring Weak Door Seals Without Replacement
Before ordering expensive OEM gaskets ($120-$200 depending on model), try these restoration methods:
- Clean gasket channels thoroughly with mild soap and warm water
- Apply food-safe silicone lubricant to dried rubber sections
- Use a hair dryer on low heat to reshape warped sections (keep 12 inches away)
- Place a heavy book against problem areas for 24 hours to reset the rubber’s memory
When to replace: If gaskets show cracks, permanent warping, or fail the dollar bill test after restoration attempts, replacement becomes necessary. Sub-Zero’s magnetic gaskets require precise installation to create a proper seal—follow alignment markers carefully during installation.
How to Clear Clogged Defrost Drains Preventing Proper Operation

A blocked defrost drain causes water to pool inside your Sub-Zero freezer, often freezing into large ice chunks that disrupt airflow. This seemingly minor issue triggers multiple error conditions as the unit struggles with improper defrost cycles.
Unclogging Your Sub-Zero Defrost Drain in 20 Minutes
- Locate the drain hole (typically at the bottom rear of the freezer compartment)
- Remove any visible ice using a plastic tool (never metal)
- Pour 1 cup of warm water down the drain to melt surface ice
- Use a ¼-inch diameter bottle brush to gently clear the tube
- Flush with a mixture of 1 part white vinegar to 1 part hot water
- Place a towel beneath the external drain line to catch runoff
Prevention tip: Sub-Zero technicians recommend monthly drain maintenance using the vinegar solution to prevent algae and mold buildup that causes recurring clogs.
Why Compressor Issues Require Professional Diagnosis
While many Sub-Zero freezer problems can be solved DIY, compressor failures demand specialized knowledge and tools. Recognizing the difference between a simple start component failure and actual compressor problems prevents wasted time and potential safety hazards.
Identifying Compressor Problems vs. Simpler Fixes
Listen for these distinctive sounds indicating potential compressor issues:
– Clicking without starting (start relay failure)
– Loud humming that stops after 10 seconds (start capacitor problem)
– Complete silence with no cooling (possible control board issue)
– Continuous humming without cooling (locked compressor)
Critical safety note: Compressor components contain hazardous refrigerants regulated by EPA Section 608. Never attempt to access refrigerant lines without proper certification—this violates federal law and creates environmental hazards.
How to Reset Your Sub-Zero Freezer After Electrical Issues
Power fluctuations and outages often cause Sub-Zero freezers to enter error states that prevent normal operation. Before assuming mechanical failure, perform a complete system reset to clear temporary error conditions.
Proper Reset Procedure for All Sub-Zero Models
- Unplug the unit or turn off the circuit breaker
- Wait 30 minutes (critical for capacitor discharge)
- Press and hold the alarm reset button for 5 seconds
- Restore power and wait 15 minutes for system initialization
- Set temperature to factory default (-10°F for freezers)
- Allow 24 hours for temperature stabilization
Time-saving shortcut: Newer Sub-Zero models with digital displays often require specific button combinations for advanced resets—consult your model’s manual for exact procedures.
When to Call a Certified Sub-Zero Technician
While many issues can be resolved through DIY maintenance, certain situations demand professional expertise. Contact Sub-Zero authorized service when you encounter:
- Refrigerant leaks (oily residue around coils)
- Electrical burning smells
- Continuous running without cooling
- Complex error codes requiring diagnostic tools
- Warranty-covered components needing replacement
Cost-saving insight: Sub-Zero’s factory-certified technicians have access to proprietary diagnostic software that identifies problems in minutes—potentially saving hundreds in unnecessary part replacements. For models under warranty, unauthorized repairs void coverage.
Preventative Maintenance Schedule to Avoid Future Problems
The most effective way to fix Sub-Zero freezer issues is preventing them through regular maintenance. Implement this seasonal schedule to maximize reliability:
Monthly:
– Clean door gaskets with mild soap
– Verify temperature with independent thermometer
– Check for unusual noises during operation
Quarterly:
– Vacuum condenser coils thoroughly
– Inspect door seal integrity
– Clear defrost drain with vinegar solution
Annually:
– Replace water filters (for models with ice makers)
– Check evaporator fan operation
– Schedule professional inspection for units over 5 years old
Pro tip: Keep a maintenance log noting dates of service—this documentation proves proper care if warranty issues arise and helps identify recurring problems before they escalate.
Final Note
Mastering these Sub-Zero freezer repair techniques empowers you to solve 80% of common issues without service calls, protecting your investment and preserving your frozen foods. Remember that while DIY fixes work for maintenance-related problems, complex electrical and refrigeration issues require certified professionals. Implement the preventative maintenance schedule to extend your unit’s lifespan beyond the typical 15-20 years, and always consult Sub-Zero’s official documentation for model-specific procedures. When in doubt about your ability to safely complete a repair, contact a factory-authorized technician—your safety and appliance longevity depend on proper diagnosis and repair methods.