How to Clean Fridge Freezer Coils: Quick Steps
Your refrigerator hums along quietly in the kitchen, working tirelessly to keep your food fresh—but hidden components may be working harder than they should. Fridge freezer coils—the condenser coils responsible for releasing heat from your appliance—can accumulate dust, pet hair, and debris over time, forcing your refrigerator to consume more energy and potentially shortening its lifespan. While modern refrigerators have largely reduced the need for regular coil cleaning, many homes still benefit from this straightforward maintenance task. Understanding when cleaning is necessary, how to locate your specific coil configuration, and following proper techniques ensures your refrigerator operates efficiently while avoiding common mistakes that could damage delicate components.
Why Dirty Coils Are Costing You Money
When dust and debris coat your refrigerator’s condenser coils, the heat transfer process becomes significantly less effective. Your compressor must run longer and more frequently to compensate, resulting in higher electricity bills that compound monthly. A refrigerator with clean condenser coils operates with substantially less energy expenditure than one with neglected coils, potentially saving homeowners hundreds of dollars over the appliance’s operational lifetime.
How Compressor Stress Shortens Appliance Life
The compressor serves as the heart of your refrigerator’s cooling system and bears the brunt of efficiency losses caused by contaminated coils. When coils become clogged with dust, the compressor works under increased stress, cycling more frequently and running for extended periods. This additional wear and tear accelerates component degradation and can lead to premature compressor failure—one of the most expensive refrigerator repairs possible. Regular coil cleaning represents a simple preventive measure that can extend your appliance’s operational lifespan by years, delaying the significant expense of replacement.
Recognizing Cooling Performance Issues
Cooling performance also suffers when coils become heavily contaminated. Internal temperatures may fluctuate unpredictably, with the fresh food compartment failing to maintain proper chilling levels while the compressor runs almost continuously. In severe cases, dirty coils can lead to inadequate cooling altogether, causing food spoilage and potential health hazards. If you notice your refrigerator running constantly or struggling to maintain temperature, coil cleaning might be the solution you need.
Should You Clean Your Refrigerator Coils?
Contrary to popular belief, most modern refrigerators manufactured in the past two decades no longer require regular coil cleaning under normal household conditions. Appliance repair experts confirm that refrigerator designs have evolved significantly since the early 2000s, with sealed condenser systems protecting critical components from significant dust accumulation. This represents a fundamental shift from older refrigerator designs where coil cleaning was considered essential routine maintenance.
High-Risk Models That Need Regular Attention
Luxury built-in refrigerators from manufacturers such as Sub-Zero and Viking represent the primary category that still requires regular coil maintenance. These high-end units often position their condenser coils in locations that remain accessible and may still accumulate sufficient debris to impact performance. Additionally, refrigerators approximately fifteen to twenty years old or older typically follow the traditional design philosophy that requires periodic coil cleaning to maintain efficiency.
Environmental Factors That Increase Cleaning Needs
Even with modern refrigerators, specific home environments significantly influence how quickly coils accumulate contamination. Homes with significant dust accumulation due to nearby construction, desert climates, or inadequate air filtration systems may find their refrigerators benefit from occasional coil attention. Greasy kitchen environments present another accelerating factor—airborne grease particles from frying and high-fat cooking methods can coat refrigerator components more rapidly than dust alone. Pet-owning households, particularly those with shedding animals, should consider more frequent inspection and cleaning, as pet hair combines with household dust to form dense mats that block airflow more aggressively.
Essential Tools for Proper Coil Cleaning
Vacuum and Brush Combination
A vacuum cleaner equipped with a brush attachment serves as the primary tool for most cleaning tasks. The brush attachment provides gentle suction that removes loose debris without pulling on or bending the fragile coil fins that facilitate heat transfer. Avoid using high suction settings or concentrated vacuum pressure, as strong airflow can actually bend coil fins, reducing surface area and impeding airflow.
Specialized Cleaning Brushes
A soft-bristled brush or specialized coil cleaning brush proves essential for dislodging stubborn dust that vacuuming alone cannot remove. These brushes are designed to sweep between coil fins and around fan blades without bending or damaging sensitive metalwork. For older refrigerators with more accessible coils, a dedicated refrigerator coil cleaning brush—typically about two feet long with a bendable handle—proves particularly effective for reaching into tight spaces between coil rows and around fan components.
Safety and Access Equipment
Work gloves protect your hands from accumulated dust and from any sharp or rusty edges that may be present, particularly on older appliances. A screwdriver is necessary for most coil cleaning tasks, as many models feature panels or kickplates that must be removed to access the coils—have both Phillips head and flathead options available. Microfiber cloths dampened with plain water provide the final cleaning step, allowing you to wipe down accessible coil surfaces without introducing harmful chemicals.
Locate Your Refrigerator’s Coil Configuration
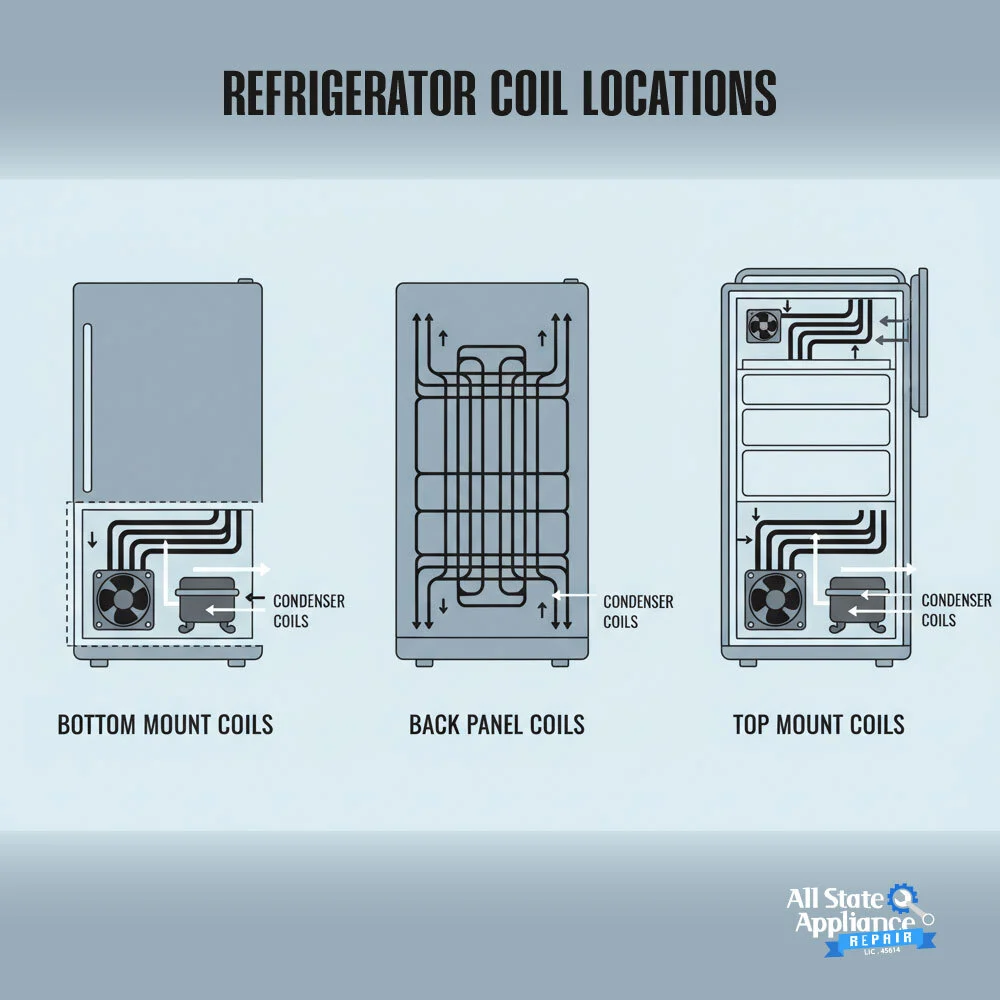
Rear-Mounted Coils on Older Models
Refrigerators manufactured before the 2000s most commonly feature rear-mounted condenser coils. These appear as serpentine metal tubing with attached fins visible once you pull the appliance away from the wall. Accessing rear-mounted coils requires pulling the refrigerator away from the wall—which may involve removing a base panel or kickplate depending on the specific model—and then removing the protective rear panel. Plan to allocate sufficient time for this configuration, as moving a heavy appliance and accessing the rear panel takes longer than front-access configurations.
Bottom-Mounted Coils on Modern Units
Many contemporary refrigerators feature bottom-mounted coils, typically located behind a base grille or kickplate at the front bottom of the appliance. These coils draw room air in from the front, pass it over the coils to absorb heat, and exhaust warm air from the bottom or rear. Accessing bottom-mounted coils generally requires less effort than rear-mounted configurations. For most models, open the refrigerator doors, place hands along the ends of the base grille, push in on the top while pulling up on the bottom to release mounting clips, then remove the grille panel.
Top-Mounted Coils on Luxury Models
Certain high-end and built-in refrigerator designs position condenser coils at the top of the appliance. These are accessed through a grill panel at the top front of the refrigerator. Sub-Zero models frequently feature this configuration, with an easily accessible top grill panel that can be removed for coil inspection and cleaning. Top-mounted coil configurations are generally the most convenient to service, with the entire cleaning process taking approximately fifteen minutes for those familiar with the procedure.
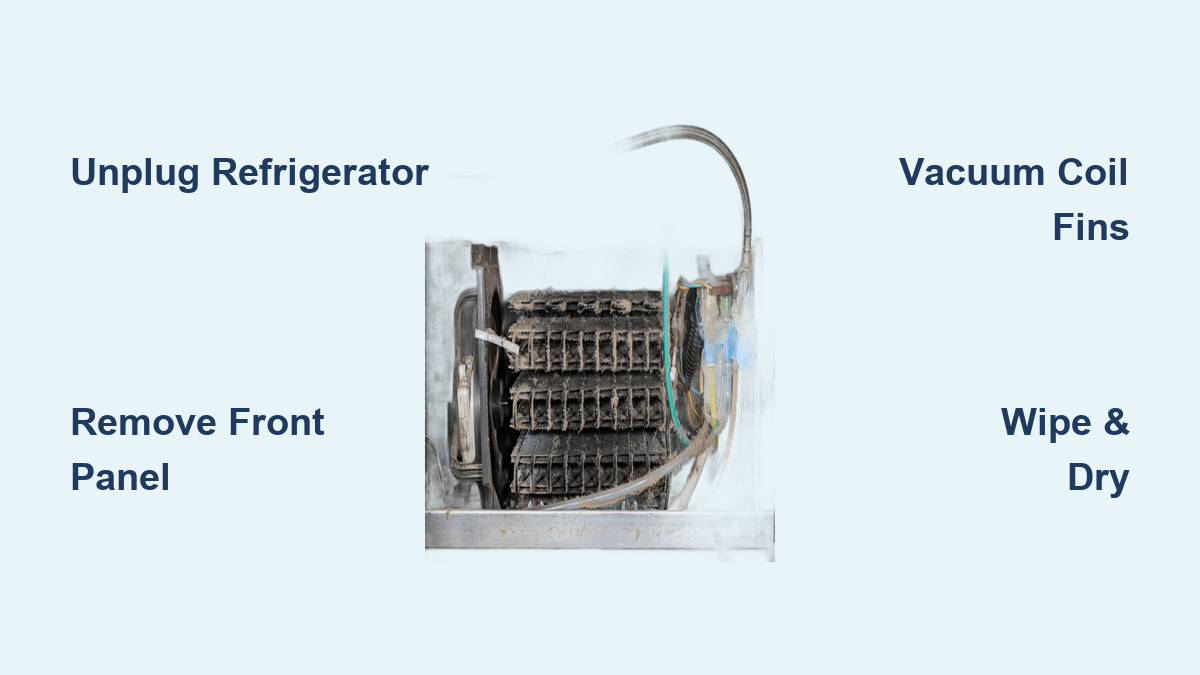
Step-by-Step Cleaning Process for Maximum Effectiveness
Safety First: Power Down and Wait
Before beginning any coil cleaning procedure, prioritize electrical safety by disconnecting power to the refrigerator. Unplug the power cord from the wall outlet or switch off the circuit breaker that powers the appliance. Verify that power is disconnected by checking that the interior lights do not illuminate when the door opens. After disconnecting power, allow the refrigerator to sit unplugged for at least thirty minutes to ensure internal components cool down sufficiently.
Access Coils Without Damage
Put on your work gloves before handling the refrigerator. If you need to move the refrigerator from the wall to access rear-mounted coils, pull it directly and gently out in a straight line using the rollers. Avoid tilting or twisting the refrigerator during movement. For bottom grille removal, open both doors, place hands along the grille ends, push in on the top while pulling up on the bottom to release mounting clips. For screwed panels, remove fasteners and keep them organized in a safe location.
Vacuum and Brush Technique for Complete Cleaning
Vacuum loose debris using your brush attachment, moving slowly and carefully across coil surfaces in the direction of the fins to avoid bending them. Pay special attention to corners, crevices, and areas where coils connect to other components. Brush stubborn contamination using a soft-bristled or dedicated coil cleaning brush, gently sweeping across coil surfaces in the direction of the fins. For side-by-side refrigerators with layered bottom coils, insert the brush carefully between coil rows to loosen trapped debris.
Final Steps: Wipe, Dry, and Reassemble
Complete the process with a final wipe-down using a damp microfiber cloth to remove any remaining grime. Allow drying time of fifteen to thirty minutes before reassembling panels and restoring power. Reattach all panels carefully, lining up components before securing them. Slide the refrigerator back against the wall if you moved it, leaving several inches of clearance for rear exhaust if applicable. Restore power and monitor performance for several hours.
Optimal Cleaning Frequency by Situation

Standard Recommendations
GE Appliances recommends cleaning condenser coils every six months as part of regular refrigerator maintenance for their product line. However, Whirlpool takes a more nuanced approach, stating that in normal home operating environments, routine condenser cleaning is not typically needed for many of their modern models. They explicitly recommend cleaning every two to three months only for environments that are particularly greasy, dusty, or have significant pet traffic.
Adjust for Your Specific Environment
Homes in dusty climates should consider increasing coil cleaning frequency as dust accumulation occurs more rapidly. Greasy kitchen environments where frying and high-temperature fat-based cooking are frequent should also clean more often, as airborne grease coats components with sticky residue. Pet-owning households benefit from increased inspection and cleaning frequency due to the combination of pet hair and household dust forming dense airflow-blocking mats.
Built-In and Luxury Models
Luxury built-in refrigerators from manufacturers like Sub-Zero and Viking require annual coil cleaning regardless of environmental conditions. These high-end units often feature coil placement that remains accessible and may not benefit from the same sealed designs that protect coils in mainstream refrigerators. Expert recommendations specifically note annual cleaning for these built-in models to maintain optimal performance.
Critical Mistakes That Damage Your Refrigerator

Bending Coil Fins During Cleaning
Bending coil fins occurs when brushing or vacuuming is performed perpendicular to the fin direction or with excessive pressure. Bent fins reduce the coil’s surface area and impede airflow, potentially creating efficiency problems worse than the original dust accumulation. Always work in the direction of the fins and use gentle, continuous movement rather than concentrated pressure.
Using Harsh Chemicals on Sensitive Components
Using harsh chemicals during cleaning can corrode metal components or leave residues that attract more dust over time. Plain water is sufficient for final wipe-down of accessible surfaces. Avoid any cleaning solutions, even those marketed as safe for appliances, as they provide no benefit and introduce unnecessary risk to coil components.
Neglecting Electrical Safety Protocols
Neglecting electrical safety by failing to disconnect power before cleaning creates serious risk of electrical shock. Always unplug the refrigerator or turn off its circuit breaker before beginning any maintenance. Verify that power is disconnected by checking that interior lights don’t illuminate when doors open. The thirty-minute wait period after disconnecting power isn’t optional—it allows components to cool and refrigerant pressure to equalize.
When Professional Help Is Necessary
If the condenser fan is noisy, not turning, or visibly damaged, a qualified appliance technician should inspect and repair the component. Attempting to repair or replace fan components yourself may void warranties and could create safety hazards. If you’re uncomfortable accessing internal components or moving heavy appliances, professional assistance provides a safer alternative. The physical risks of moving a refrigerator—including back injury and crushing hazards—should not be underestimated.
If the refrigerator continues to run excessively or fails to cool properly after thorough coil cleaning, professional diagnosis is appropriate. Multiple factors can cause these symptoms, and accurate diagnosis requires specialized tools and expertise that most homeowners lack. Continuing to operate a refrigerator with unresolved cooling problems can lead to food spoilage and potentially more serious component damage.
Maintain Peak Refrigerator Performance Long-Term
Beyond coil cleaning, several maintenance practices contribute to overall refrigerator efficiency and longevity. Periodic visual inspection of accessible coil components helps determine when cleaning is actually needed rather than following a fixed schedule. Keeping the surrounding area clean reduces the rate at which coils accumulate dust and debris. Vacuum or sweep the floor beneath and behind the refrigerator regularly to remove dust that could be drawn into the condenser system during operation.
Door seal maintenance also contributes to overall refrigerator efficiency by preventing warm air infiltration. Clean door seals regularly with mild soap and water, inspecting them for cracks, tears, or compression that might prevent a proper seal. Worn or damaged door seals should be replaced promptly to maintain proper refrigerator operation, as they allow warm air to enter and cause the compressor to work harder to maintain internal temperatures.
For most consumers with refrigerators manufactured in the past twenty years, annual inspection without necessarily performing cleaning may represent an appropriate middle ground. During inspection, if minimal dust accumulation is observed, cleaning can be deferred. Only when visible contamination is present should you proceed with the full cleaning process, balancing potential efficiency benefits against the time, effort, and potential risks associated with accessing internal components. By understanding your refrigerator’s specific coil configuration and following proper techniques, you can maintain optimal appliance performance for years to come.