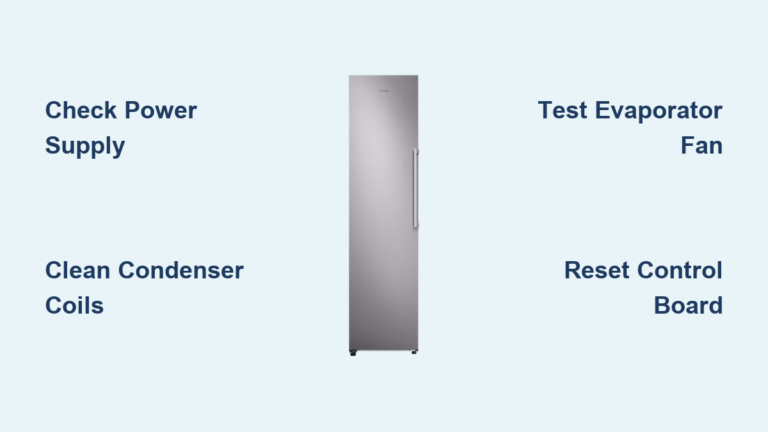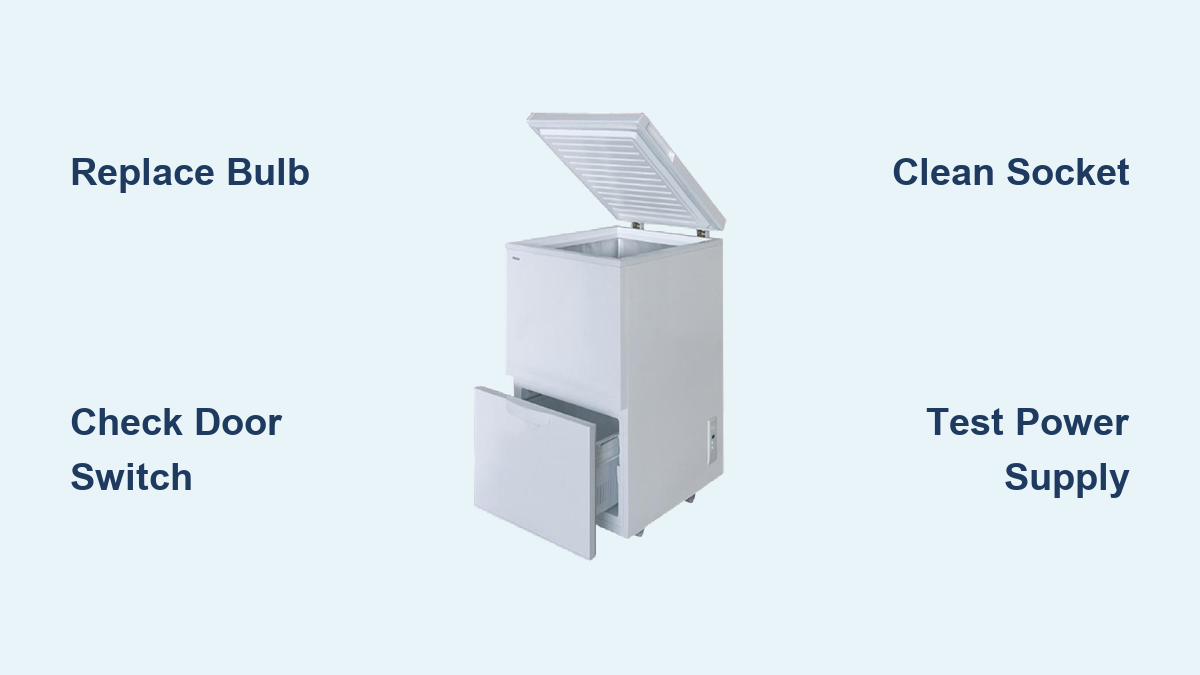
How to Fix Haier Freezer Light Not Working
A dark freezer compartment every time you open your Haier freezer creates immediate frustration as you fumble through frozen items without proper illumination. This common issue affects thousands of Haier freezer owners annually, forcing them to use phone flashlights or risk damaging containers while searching for food. Beyond the daily inconvenience, a non-working freezer light can signal underlying electrical problems that, if ignored, may lead to more serious appliance issues. Fortunately, most Haier freezer light failures can be diagnosed and fixed with basic tools in under 30 minutes, saving you both time and money compared to calling a professional technician.
Inside your Haier freezer, three critical components work together to provide illumination: the bulb itself, the socket housing, and the door activation switch. When any single component fails, the entire lighting system stops functioning. The good news is that systematic troubleshooting helps you pinpoint the exact problem without unnecessary part replacements or wasted effort. This guide walks you through each potential failure point with specific diagnostic steps and repair procedures tailored to Haier freezer models.
Replace Your Haier Freezer Bulb in 5 Minutes

A burned-out bulb causes approximately 70% of all Haier freezer light problems, making it the logical starting point for your troubleshooting. Freezer bulbs endure constant cold temperatures and frequent on-off cycles that significantly shorten their lifespan compared to standard household bulbs. Before moving to complex diagnostics, always verify whether a simple bulb replacement solves your issue.
When examining your current bulb, look for telltale signs of failure including dark spots on the glass envelope, a broken or separated filament, or cloudy discoloration inside the bulb. Some failures occur internally without visible external damage, so if you’re uncertain about the bulb’s condition, substitution provides the most reliable diagnosis. Never assume the bulb works just because it looks intact—many freezer bulbs fail without obvious visual indicators.
Haier freezers require specific bulb specifications that differ from standard refrigerator bulbs. Using an incorrect replacement causes immediate failure or premature burnout. Most Haier models need E12 candelabra base bulbs with 10-15 watt maximum ratings that are specifically rated for low-temperature operation below 0°F (-18°C). Standard bulbs without this temperature certification fail quickly in freezer environments because their internal components aren’t designed for extreme cold exposure. Always check your owner’s manual or the existing bulb’s base markings to confirm the exact specifications for your model.
The replacement process takes just five minutes with minimal tools. First, unplug your freezer to ensure electrical safety. Remove any protective plastic cover shielding the bulb—some Haier models have snap-on covers requiring gentle prying with a flathead screwdriver. Turn the bulb counterclockwise to remove it, handling the new bulb with a clean cloth or gloves to prevent skin oil transfer that creates hot spots and reduces bulb lifespan. Insert the new bulb and turn clockwise until finger-tight, then reinstall any protective cover and restore power. Test the light by opening and closing the freezer door multiple times to confirm reliable operation.
Fix Your Haier Freezer Door Switch Immediately
If replacing the bulb doesn’t restore light, your door switch has likely failed—the second most common cause of Haier freezer light problems. This small component activates the light when the door opens and turns it off when closed. A faulty switch can leave your light permanently off, stuck on (which wastes energy), or functioning only intermittently depending on the specific failure mode.
Locate your Haier freezer’s door switch by examining the door frame and door jamb. Most models position this switch along the side of the door opening in the upper third section where it contacts the door when closed. The switch appears as a small plastic component, typically black or white, with a button or lever that compresses when the door closes. Some Haier models integrate the switch directly into the light socket assembly, requiring different diagnostic approaches.
Testing the door switch requires a multimeter set to continuity mode. After unplugging the freezer completely, disconnect the wire connectors from the switch terminals. Place the multimeter probes across the two terminals: with the switch depressed (simulating door closed), you should get no continuity reading; when you press the switch (simulating door open), you should hear the continuity beep. Inconsistent readings or complete failure to switch states confirms a defective switch requiring replacement.
Door switch replacement follows a straightforward process. Some switches secure with small screws requiring Phillips head removal, while others clip into place needing gentle prying with a flathead screwdriver. After removing the retaining mechanism, pull the switch out slightly to access the wire connectors—photograph their configuration before disconnection. Connect the wires to the new switch using the same arrangement, mount it securely, and test operation by opening and closing the door while observing the light response.
Eliminate Socket Corrosion in Your Haier Freezer
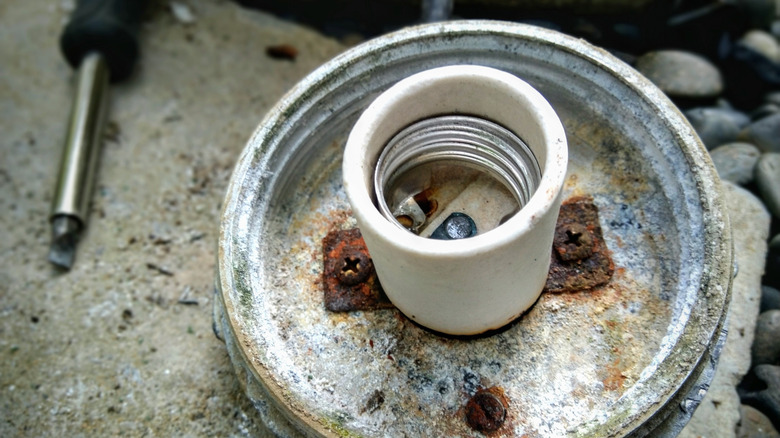
Corrosion inside the light socket represents a frequent cause of persistent lighting problems in Haier freezers, particularly in humid environments. Moisture accumulation during door openings and defrost cycles creates conductive pathways that corrode the metal contacts, preventing proper electrical connection with the bulb base. This issue often returns after bulb replacement if the underlying corrosion isn’t addressed.
Visual inspection reveals most socket corrosion problems. Remove the bulb and examine the socket interior with a flashlight. White or greenish powdery buildup indicates active corrosion that’s either causing current failure or will do so soon. Darkened or blackened contacts suggest previous arcing from poor electrical connections. Flattened or pushed-in contact tabs show mechanical wear from repeated bulb insertion and thermal cycling.
Cleaning a corroded socket requires minimal tools but careful execution. Unplug the freezer and remove the bulb. Use compressed air to blow dust and debris from the socket interior, then apply electrical contact cleaner spray to the contacts. For stubborn corrosion, gently scrub with a soft-bristled toothbrush (never metal tools that could damage contacts). Allow the socket to dry completely for at least 30 minutes before reinstalling the bulb. This simple maintenance takes less than ten minutes but significantly extends socket service life and prevents recurring light failures.
Restore Power to Your Haier Freezer Light Socket

When both the bulb and door switch function correctly but the light still fails, electrical power delivery to the socket becomes your diagnostic focus. This situation indicates a break in the circuit between your freezer’s main power supply and the light assembly—either in the wiring harness, connections, or socket contacts themselves.
Begin by verifying household electrical power reaches your freezer. Check that the power cord is fully inserted into a functioning outlet by testing with another appliance. Examine the cord for visible damage, particularly near the plug end and where it enters the freezer cabinet. Some Haier models experience wiring issues within the door hinges where repeated movement causes internal wire breakage over time.
Testing socket power requires a multimeter set to AC voltage mode. With the door open and bulb removed, place one probe on the center socket contact and the other on a metal ground point like the freezer’s interior chassis. A reading of approximately 120V for US models confirms proper power delivery. No reading or significantly lower voltage indicates an interruption in the electrical supply chain. Wiggle wire harness connections at the socket assembly and door hinge points while monitoring voltage—fluctuations confirm loose connection points needing tightening.
Source Correct Parts for Your Specific Haier Freezer Model
Obtaining the right replacement parts for your Haier freezer prevents frustration and ensures proper function after repair. Several identification methods guarantee you order compatible components the first time.
Your Haier freezer’s model number and serial number provide the most reliable reference for part identification. Locate this information on the inside wall of the freezer compartment, typically on the left or right side away from door hinges. Some models place the label on the door frame or inside the door. The model number appears as a combination of letters and numbers (like HCM16ASAWW), while the serial number follows a different format. Record both numbers exactly as shown before contacting parts suppliers.
With your model number available, several sourcing options exist. Haier customer support provides OEM parts validated for your specific model, though often at premium prices. Online appliance parts retailers like AppliancePartsPros, RepairClinic, and PartSelect maintain searchable databases by model number with competitive pricing. Local appliance repair shops sometimes stock common Haier parts for immediate availability.
When sourcing parts, verify compatibility by comparing part numbers directly rather than relying on general compatibility claims. Light sockets, door switches, and bulb shields often look similar across models but have slight dimensional or electrical differences. Compare your existing part to any prospective replacement side-by-side, checking mounting screw positions, wire connector types, and dimensions before purchase.
Prevent Recurring Haier Freezer Light Failures
Implementing simple preventive maintenance habits extends your light system’s life and prevents inconvenient failures. These practices take minimal time but provide significant protection against repeated bulb, socket, or switch replacements.
Handle all light components with clean, dry hands or cloth barriers. Skin oils transferred to bulb surfaces create localized hot spots during operation that dramatically reduce filament lifespan. Develop the habit of using the cloth wrapper from new bulbs or a clean shop towel when handling any bulb.
Schedule annual inspections of your light system as part of regular freezer maintenance. During these inspections, check bulb condition, socket interior cleanliness, and door switch operation. Clean socket contacts with compressed air and a dry brush before corrosion develops. Test the door switch by listening for the audible click when the door closes and verifying consistent light activation.
Maintain proper door seal integrity through regular cleaning and prompt gasket replacement when damage appears. A compromised gasket allows moisture infiltration that accelerates corrosion in all electrical components. Check seal condition monthly by closing a dollar bill in the door and attempting to pull it out—you should feel resistance throughout the entire seal perimeter.
A non-functioning Haier freezer light rarely indicates serious problems with your appliance, but resolving the issue promptly prevents daily inconvenience when searching through frozen contents. By following this systematic approach—starting with simple bulb replacement and progressing through switch testing, socket inspection, and electrical verification—you’ll identify and resolve the specific component causing failure without unnecessary parts purchases. Most light repairs complete in under thirty minutes with basic tools, restoring full functionality to your freezer while building confidence for future maintenance tasks. Regular attention to door seals and socket cleanliness prevents recurrence, ensuring reliable illumination for years of convenient freezer use.