How to Store Soup in Freezer: Best Tips
Nothing ruins a comforting bowl of homemade soup faster than discovering freezer burn has transformed your carefully crafted broth into a bland, leathery mess. When you’ve invested time simmering bones for stock or chopping fresh vegetables for a hearty stew, improper freezing techniques can waste both ingredients and effort. The best way to store soup in freezer containers makes the difference between enjoying restaurant-quality meals months later and facing disappointing, texture-altered leftovers. Understanding the right containers, cooling methods, and storage timelines preserves your soup’s flavor, texture, and nutritional value while preventing common freezer disasters.
This guide reveals the precise techniques that transform your freezer into a reliable meal-prep partner rather than a soup graveyard. You’ll discover which containers prevent freezer burn most effectively, how to prepare different soup varieties for optimal freezing, and exactly when to add delicate ingredients for peak quality after thawing. Whether you’re batch-cooking for weekly meals or preserving seasonal harvests, these methods ensure your frozen soup tastes nearly as good as the day you made it.
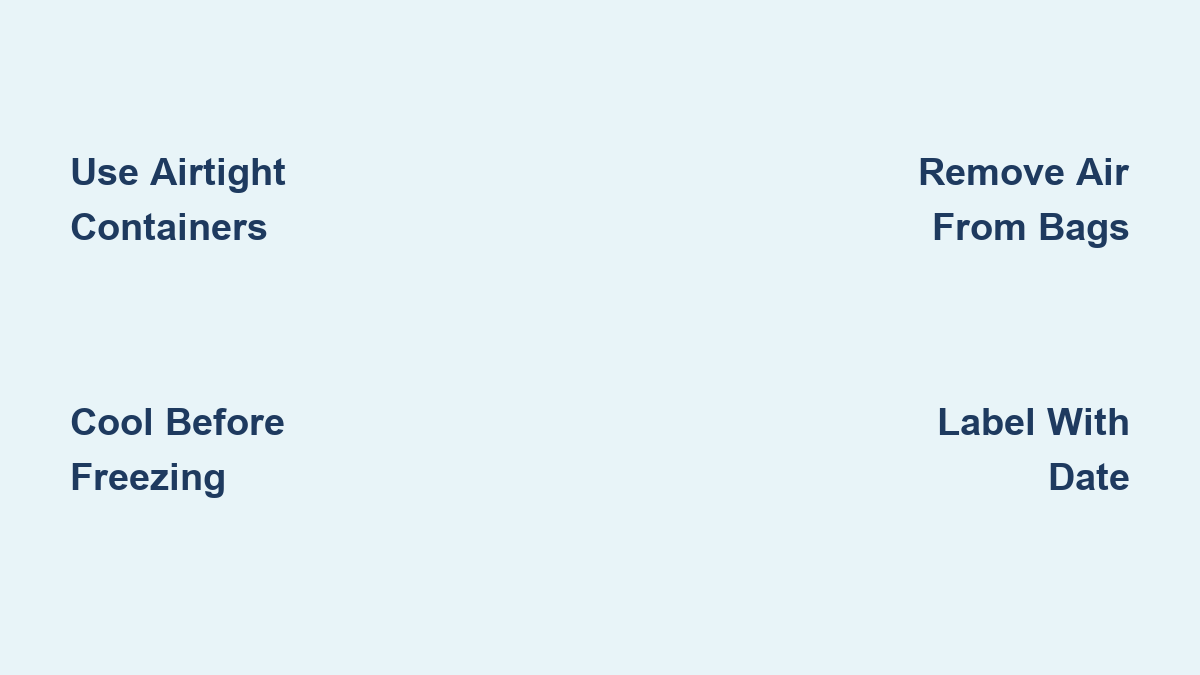
Choose the Right Freezer Containers

Your container selection directly impacts soup quality after thawing, and not all containers perform equally in freezer conditions. Airtight freezer-safe containers prevent air exposure that causes freezer burn, which creates dry, discolored patches that ruin texture and flavor while making soup taste stale.
Rigid BPA-free plastic containers with secure-fitting lids work exceptionally well for most soups. Look for containers specifically labeled “freezer-safe,” as they’re made from thicker plastic that resists cracking at low temperatures. Glass containers, particularly borosilicate varieties, offer an excellent alternative since they don’t absorb odors and can go directly from freezer to stovetop in many cases. However, glass becomes more brittle with repeated freezing cycles, so inspect older containers for hairline cracks before use.
For maximum space efficiency, lay freezer bags flat on a baking sheet before filling them with soup. This creates compact, stackable portions that freeze quickly and thaw evenly. Remove as much air as possible before sealing—either by pressing it out manually or using a straw to create a near-vacuum seal. These flat portions work perfectly for meal planning since you can freeze individual servings and grab exactly what you need without thawing excess.
Prepare Soup for Freezing

How you prepare soup before freezing determines its quality months later. Never place hot soup directly in the freezer, as this raises your freezer’s internal temperature and creates condensation that leads to ice crystals and freezer burn. The USDA recommends cooling hot food to room temperature within two hours before transferring to the refrigerator or freezer.
Portion soup into meal-sized containers before freezing so you only thaw what you need. Label each container clearly with the soup type and freeze date—this prevents “mystery soup” scenarios and helps track storage duration. Some ingredients should be added fresh rather than frozen with the base soup. Pasta continues absorbing liquid during storage and becomes mushy; cook pasta separately and add it when serving. Rice similarly loses texture and should be cooked fresh. Dairy-based soups may separate when frozen; freeze the base without cream and add dairy when reheating. Fresh herbs lose flavor and color—add them as garnish after thawing.
Master the Cooling and Freezing Process
Proper cooling technique prevents bacterial growth while maintaining soup quality. Use the two-stage cooling method: first cool soup to room temperature within two hours of cooking, then transfer to the refrigerator to cool further before freezing. This prevents your freezer’s temperature from spiking while ensuring food passes quickly through the danger zone between 40°F and 140°F.
For faster initial cooling, divide hot soup into smaller, shallow containers—increased surface area allows heat to dissipate more quickly. Stirring occasionally during cooling releases trapped heat. Some cooks place their pot in an ice water bath, stirring frequently until temperature drops significantly before proceeding with refrigerator cooling.
When moving soup to the freezer, place containers in the coldest part of your freezer, typically the back corner or middle shelf away from the door. Avoid packing containers too tightly initially to allow proper air circulation. Allow several hours for soup to freeze solid before rearranging containers to maximize space. Verify your freezer maintains 0°F or below with a freezer thermometer—higher temperatures cause larger ice crystals that damage soup texture.
Prevent Freezer Burn Effectively

Freezer burn occurs when air reaches food surfaces, causing moisture loss and resulting in dry, discolored patches that are safe but unappetizing. Preventing it requires eliminating air exposure completely using multiple techniques.
Press plastic wrap directly onto the soup surface in containers before adding the lid—this eliminates the air pocket where oxidation occurs. For superior protection, add plastic wrap followed by parchment paper directly on the soup surface before sealing. When using freezer bags, squeeze out as much air as possible before sealing. For best results, consider investing in a vacuum sealing system that removes nearly all air, dramatically extending freezer life.
Maintain consistent freezer temperature to prevent freezer burn. Every time your freezer door opens, temperature fluctuates, causing ice crystals to form and reform on food surfaces. Avoid unnecessary freezer openings, and check that your freezer seal closes properly using the dollar bill test—if the bill pulls out easily, the seal needs replacement.
Thaw and Reheat Frozen Soup Safely
Proper thawing is essential for maintaining soup quality and ensuring food safety. The safest method involves transferring frozen soup to the refrigerator and allowing it to thaw slowly over 24 to 48 hours. This gradual thaw maintains safe temperatures throughout and produces the best texture.
When time is limited, use the cold water method: place sealed containers in a sink of cold water, changing the water every 30 minutes. This typically takes two to three hours for individual portions. Never thaw soup at room temperature, as the exterior warms into the danger zone while the interior remains frozen.
For quickest reheating, go directly from frozen to reheated without separate thawing. Add frozen soup to a pot with a small amount of additional liquid and heat over medium-low, stirring frequently. Bring soup to a full rolling boil and maintain for at least one minute to destroy any bacteria. Cream-based soups should be heated gently to prevent separation; add dairy and fresh herbs after reheating.
Maintain Your Freezer Soup Inventory
Organize your freezer thoughtfully to prevent waste and ensure you use stored soups. Place newly frozen items in the back with older items moved toward the front—this first-in-first-out system prevents forgotten, freezer-burned containers.
Label every container with soup type, preparation date, and contents list. A simple labeling system using a dry-erase marker works well. Some households maintain a spreadsheet tracking freezer contents, including portion counts and expiration dates, making meal planning easier.
Conduct regular freezer audits—perhaps quarterly—to identify items that should be used soon. Check dates on stored soups, move items approaching their quality peak to the front, and evaluate whether older items should be used or discarded. This practice prevents discovering unidentifiable, ancient soup during busy weeks.
Common Mistakes to Avoid
Several recurring mistakes undermine soup freezing efforts. Leaving excessive headspace in containers causes problems because liquids expand when freezing—if containers are filled too full, they can crack or split. Leave approximately one inch of headspace for pint containers and one to two inches for larger containers.
Never freeze soup in single-use disposable containers like yogurt cups—they aren’t designed for freezer use, may crack, and don’t seal effectively. Skipping the cooling step and placing hot soup directly in the freezer strains your appliance and creates condensation that becomes ice. Failing to remove air from freezer bags or not pressing plastic wrap onto soup surfaces creates conditions for rapid freezer burn.
Store Soup Long-Term Successfully
For best quality, consume most soups within three to six months of freezing, with clear broths lasting longer and cream-based soups best used earlier. Soups containing ingredients that freeze poorly, like pasta or fresh herbs, should be consumed within one to two months.
Vacuum sealing provides the most reliable method for long-term storage by preventing all air exposure. Without a vacuum sealer, double-bag freezer items with air pressed out of both bags. For containers, add extra protection by wrapping sealed containers in freezer paper.
Temperature stability becomes increasingly important for long-term storage. Avoid storing items in the freezer door where temperature fluctuates, and keep your freezer as full as possible since frozen items help maintain temperature stability. Check temperature with a thermometer and adjust settings if needed.