Beko Fridge Freezer Repair Guide
Your Beko fridge freezer suddenly stops maintaining proper temperatures, leaving you with warm drinks and melting ice cream. That persistent error code flashing on the display panel creates anxiety about expensive repairs. Or perhaps you’re hearing strange noises that keep you up at night, wondering if your appliance is on its last legs. These common Beko fridge freezer issues disrupt your daily routine and threaten your food safety, but most problems have straightforward solutions you can handle yourself with basic tools and careful guidance.
Beko appliances deliver reliable performance for many households, yet even these energy-efficient units encounter problems over time. The good news is that 70% of Beko fridge freezer issues can be diagnosed and resolved without professional help, saving you unnecessary service calls. This practical guide cuts through the confusion to give you actionable steps for identifying and fixing the most frequent Beko refrigerator problems. Whether you’re dealing with frost buildup, temperature inconsistencies, or mysterious leaks, you’ll learn exactly what to check and how to restore your appliance to peak performance.
Fix Beko Freezer Error Codes Before Calling a Technician

Your Beko’s digital display flashing error codes provides crucial diagnostic information, but deciphering these signals correctly separates quick fixes from serious problems requiring professional attention.
Decode E0, E1, E2, E4, and E5 Error Codes
When your Beko fridge freezer shows an E0 code, it typically indicates communication failure between the control board and display panel—often caused by loose ribbon cable connections behind the control panel. Reset the system by unplugging for 15 minutes, then carefully check connections after removing the control panel cover. The E1 code signals refrigerator temperature sensor failure, frequently resolved by replacing the sensor located near the evaporator fan housing. For E2 codes indicating freezer sensor problems, inspect the sensor wiring for damage and test resistance with a multimeter set to Ω mode.
E4 error codes commonly point to defrost system malfunctions, requiring inspection of the defrost heater, thermostat, and timer. If your Beko displays E5, this usually indicates compressor start-up issues—check the start relay and overload protector mounted on the compressor. Before replacing any components, always perform a full reset by disconnecting power for 15 minutes, as many error codes clear after a system reboot when no actual hardware failure exists.
Identify Critical Warning Light Patterns
Beyond digital error codes, your Beko’s LED indicators provide vital status information. A solid red light that won’t reset after closing the door typically means the freezer temperature has risen above 15°F (-9°C), often from a door left ajar or failing compressor. Flashing red lights that persist after temperature normalization indicate ongoing system faults requiring component testing. Amber lights during normal operation usually signal active defrost cycles—expected behavior that shouldn’t last more than 30 minutes.
If your Beko’s temperature warning light activates after power restoration following an outage, allow 4-6 hours for the unit to stabilize before troubleshooting. Continuous flashing red lights combined with warm interior temperatures strongly suggest compressor failure, while intermittent flashing often points to sensor issues that may resolve with cleaning or replacement.
Restore Proper Cooling Performance in Your Beko Fridge Freezer
Temperature problems represent the most common Beko fridge freezer complaints, but systematic troubleshooting helps you pinpoint whether the issue stems from simple user error or actual component failure.
Troubleshoot Inadequate Freezer Cooling
When your Beko freezer fails to maintain freezing temperatures, begin with the simplest explanations. Verify the temperature setting hasn’t been accidentally adjusted above -18°C (-0.4°F)—many models have touch controls vulnerable to accidental presses. Check door seals using the dollar bill test: close the door on a bill at multiple points; if it slides out easily, replace the gasket. Clean dust-clogged condenser coils located beneath the front kickplate using a vacuum with brush attachment—dirty coils reduce cooling efficiency by up to 30%.
Listen for compressor operation—a properly functioning unit produces steady humming during cooling cycles. If the compressor clicks on and immediately off, test the start relay for continuity with a multimeter. A failed relay shows no continuity when tested and requires replacement with an exact model-specific part. Persistent cooling problems after basic checks often indicate refrigerant leaks or compressor failure—situations requiring professional service.
Correct Refrigerator Compartment Temperature Issues
A Beko refrigerator section that’s too warm often relates to airflow problems between compartments. Ensure freezer-to-fridge air vents remain unobstructed by food containers—maintain at least two inches of clearance around all vents. Test the damper control mechanism by adjusting temperature settings while listening for the characteristic “click” of the damper opening and closing. A stuck damper prevents cold air from entering the refrigerator compartment.
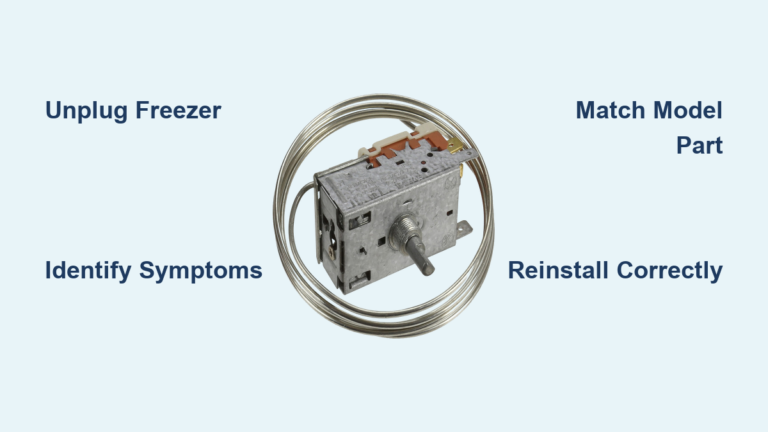
For refrigerator sections running too cold and freezing food, inspect the temperature control thermostat. This component regulates cooling cycles and can fail in the “on” position. Access the thermostat behind the temperature control knob, disconnect the wiring harness, and test for continuity as you adjust the temperature dial—failure to break continuity at warmer settings indicates a faulty thermostat requiring replacement.
Eliminate Excessive Frost Buildup in Beko Freezers

Frost-free Beko models shouldn’t accumulate more than a light dusting of frost—significant ice buildup signals defrost system problems requiring immediate attention to prevent compressor strain.
Diagnose Defrost System Component Failures
Manually advance the defrost timer using a small screwdriver in the timer’s adjustment slot until you hear a click—this forces the unit into defrost mode. After 15 minutes, check if the defrost heater at the bottom of the freezer compartment is warm. No heat indicates either a failed heater, thermostat, or timer. Test the defrost thermostat by disconnecting it and checking continuity with a multimeter—it should show continuity when cold and open circuit when warmed above 40°F (4.4°C).
Examine the defrost heater for visible damage like burned sections or broken elements. Test resistance across the heater terminals—typical readings range from 20-100 ohms depending on model. Infinite resistance indicates a failed heater requiring replacement. If both heater and thermostat test functional but frost persists, replace the defrost timer or adaptive defrost control board.
Clear Clogged Defrost Drain Lines
Even with a working defrost system, blocked drain lines cause water overflow and ice dams. Locate the drain hole in the freezer floor near the back wall and clear obstructions using a turkey baster filled with warm water. For stubborn clogs, mix 1 cup warm water with 1 tablespoon baking soda and flush through the drain. Check the external drain tube at the bottom front of the unit for kinks or blockages, and verify the drain pan above the compressor isn’t cracked or overflowing.
Prevent future clogs by monthly maintenance: flush the drain with warm water and a few drops of bleach to inhibit mold growth. During defrost cycles, watch for proper water drainage—slow or absent drainage indicates developing blockage requiring immediate attention.
Stop Water Leaks from Your Beko Fridge Freezer
Water pooling beneath your Beko appliance creates slipping hazards and potential floor damage—quick identification of the leak source prevents costly secondary damage.
Pinpoint Internal vs. External Leak Sources
Internal leaks typically originate from clogged defrost drains or cracked drain pans. Check for water accumulation under the vegetable crisper drawers—a telltale sign of overflow from a blocked defrost drain. External leaks usually stem from ice maker water lines or condensation from poor door seals. Trace water paths with paper towels to identify the precise origin before disassembling components.
For Beko models with water dispensers or ice makers, inspect the water supply line connections at both the refrigerator inlet valve and wall shutoff valve. Tighten loose fittings and replace cracked tubing—most Beko units use 1/4″ plastic or copper water lines. Test the inlet valve by disconnecting the water line and checking for drips during an ice maker cycle—persistent dripping indicates a faulty valve requiring replacement.
When to Call a Beko Repair Professional
While many issues yield to DIY fixes, certain Beko fridge freezer problems demand professional expertise to avoid safety risks and further damage.
Recognize Critical Repair Limitations
Never attempt refrigerant system repairs yourself—these require EPA certification and specialized equipment. Compressor failures, evaporator coil leaks, and refrigerant recharging should only be handled by licensed technicians due to environmental regulations and safety hazards. Similarly, complex electrical repairs involving control boards, sealed components, or high-voltage systems warrant professional service to prevent electrical shock or component damage.
If basic troubleshooting fails to resolve temperature issues after checking all accessible components, professional diagnosis becomes cost-effective compared to replacing multiple parts through trial and error. Check your Beko warranty status first—many components carry extended coverage periods that make professional repair free or significantly discounted.
Maintain Your Beko Fridge Freezer to Prevent Future Problems
Regular maintenance extends your Beko appliance’s lifespan by up to 5 years while preventing 80% of common repair issues before they develop.
Implement Essential Monthly Maintenance
Vacuum condenser coils every month to maintain optimal cooling efficiency—dirty coils force the compressor to work 30% harder. Clean interior surfaces with a baking soda solution to prevent odor buildup and bacterial growth. Test door seals monthly using the dollar bill method and clean gaskets with mild soap to maintain flexibility. Check temperature settings with an independent appliance thermometer to verify proper operation.
Schedule quarterly deep cleaning sessions to inspect and clear the defrost drain, examine water lines for ice maker models, and verify proper door alignment. Annual professional maintenance checks refrigerant levels, electrical connections, and compressor performance—small investments that prevent major breakdowns.
By following these practical Beko fridge freezer repair strategies, you’ll maintain reliable food preservation while minimizing unnecessary service calls. Remember that systematic troubleshooting, proper component testing, and timely maintenance prevent most common problems—keeping your Beko appliance running efficiently for years to come.