How to Freeze Corn for Long-Term Storage
There’s nothing quite like biting into sweet, fresh corn straight from the garden, but learning how to prepare corn for the freezer lets you enjoy that summer flavor all year long. Whether you’re harvesting from your backyard plot, scoring a great deal at the farmers market, or simply want to preserve grocery store corn at its peak, proper freezing techniques make all the difference between mediocre and mouthwatering results. By following these proven methods, you’ll lock in that just-picked sweetness and texture for up to twelve months of delicious meals.
The key to successful frozen corn lies in understanding the entire process from selection through storage. This guide walks you through every step, covering the best equipment, proven techniques for how to prepare corn for the freezer, and expert tips that separate decent results from exceptional ones. With the right approach, you’ll transform abundant summer harvests into a pantry staple that elevates soups, casseroles, salads, and side dishes all winter long.
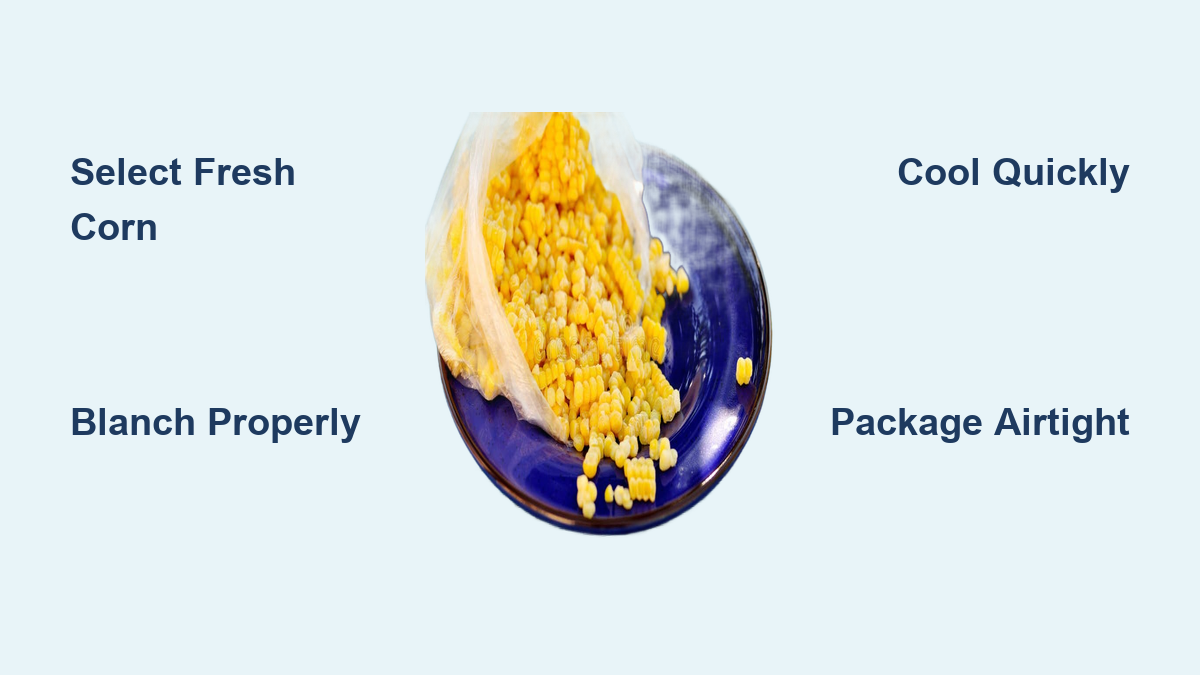
Select Fresh Corn for Freezing
The foundation of excellent frozen corn begins with choosing ears at their peak freshness. When selecting corn, look for bright green husks that feel snug and tight around the cob—loose or dried husks indicate older corn that won’t freeze as successfully. The silks should appear golden and moist rather than brown or brittle; more silks often actually indicate more kernels beneath the husk, which means better yield.
Take a moment to inspect the kernels by pulling back a small portion of the husk at the tip. The kernels should look plump, well-formed, and filled with milky liquid when gently punctured. Avoid ears with mushy tips, shriveled kernels, or any discoloration, as these signs point to corn that has passed its prime. Old corn not only tastes less sweet but also develops a mealy texture that doesn’t improve with freezing.
For those growing their own corn or buying directly from farmers, timing significantly impacts results. Corn reaches peak sugar content in the milk stage, roughly twenty days after silk appears. The sugars begin converting to starch almost immediately after harvest, so plan to prepare your corn for the freezer within a few hours of picking for the best flavor. If you must delay, store unhusked corn in the refrigerator and use it within one to two days.
Gather Essential Equipment
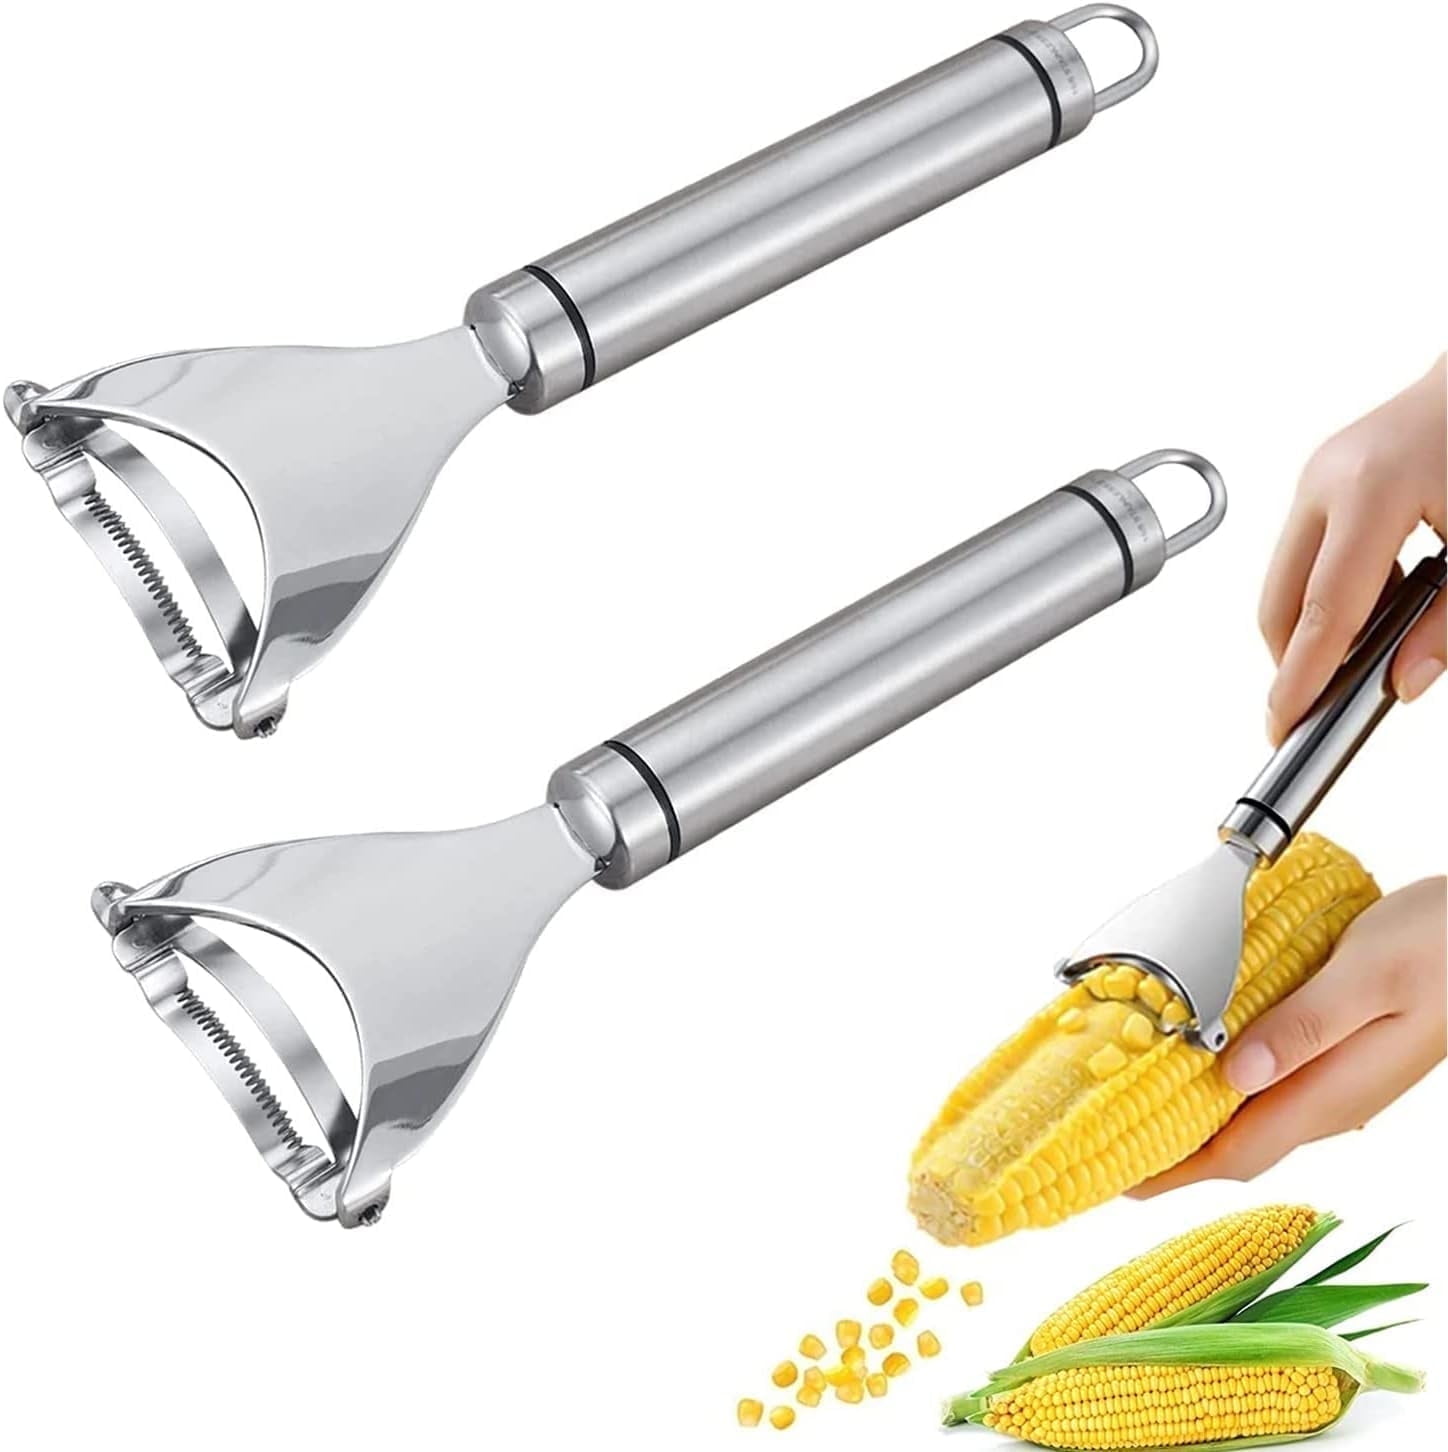
Having the right tools makes the corn freezing process smoother and more efficient. The most critical item is a sharp serrated knife—a bread knife or dedicated corn cutter with serrated edges cuts through kernels cleanly without crushing them. A dull knife crushes kernels, releasing juices that carry away flavor and create a mushy texture once frozen.
A bundt pan or angel food cake pan proves invaluable for catching kernels as you cut them off the cob. Simply place the small end of the cob in the center hole, and the kernels fall uniformly into the pan below while preventing the cob from slipping around your cutting surface. This single tool transforms a messy, frustrating task into an organized process.
For cooking methods, you’ll need a large stockpot or Dutch oven that accommodates your batch size, along with measuring cups and spoons for accurate seasoning. Wooden spoons work well for stirring hot corn without damaging cookware. When cooling blanched corn, prepare a large bowl or clean cooler filled with ice water—the insulation of a cooler keeps water cold longer and handles larger batches more effectively.
Freezer storage requires quart-sized freezer bags or airtight freezer containers. Bags offer the advantage of being flattened for space-efficient stacking once frozen. Additional helpful items include:
– A large cutting board placed on a cookie sheet to catch stray kernels
– Tongs for handling hot cobs
– A ladle for transferring cooked corn
– Permanent markers for labeling bags with contents and dates
Cut Corn Off the Cob
Cutting corn from the cob requires technique to maximize yield while maintaining kernel quality. After husking outdoors or over a large sheet pan to contain the mess, rinse each cob under cold water to remove any remaining silk fragments or debris. Inspect each ear and trim away any bruised or damaged sections with a sharp knife before cutting.
Set up your bundt pan on a stable surface and hold the cob vertically with the stem end seated in the center hole. Using long, smooth strokes with your serrated knife, slice downward through the kernels while rotating the cob slightly with your free hand. Cut approximately two-thirds of the kernel depth—avoid going all the way to the cob, as the tough white base kernels don’t freeze well and can impart a woody flavor.
Let the kernels fall into the pan below, then transfer the cut corn to your cooking pot. Continue until all your corn is cut, periodically emptying the pan into your pot. This bundt pan technique keeps kernels contained, prevents the cob from rolling, and makes transferring to cooking vessels much easier. For large batches, consider working in batches and having multiple containers ready.
Blanch Corn Properly

Blanching plays a crucial role in producing high-quality frozen corn by deactivating enzymes that would otherwise cause gradual degradation of color, flavor, texture, and nutritional value during frozen storage. Without blanching, frozen corn gradually loses its fresh characteristics over time, becoming duller, softer, and less nutritious.
Bring a large pot of water to a rolling boil before adding your prepared corn. For corn on the blanching method, submerge whole cleaned cobs in the boiling water and cook until they turn bright yellow—typically three to four minutes for standard ears. Small ears need slightly less time, while large ears may require an additional minute. If blanching cut kernels, the time drops to just four minutes.
The University of Georgia Cooperative Extension provides precise guidelines: small ears under 1.25 inches in diameter need seven minutes, medium ears between 1.25 and 1.5 inches need nine minutes, and large ears over 1.5 inches need eleven minutes. Always use a large pot of water that returns to boiling quickly after adding the corn, and don’t overcrowd the pot—work in batches if necessary for even blanching.
Cool Corn Quickly
Prompt and complete cooling after blanching prevents overcooking and the development of off-flavors. Prepare your ice bath before you begin blanching so it’s ready the moment the corn comes out of the pot. A large bowl works for small batches, but a clean cooler excels for bigger harvests thanks to its size and insulation properties.
Transfer blanched corn immediately to the ice bath using tongs or a slotted spoon. Allow the corn to cool for approximately four to five minutes—roughly matching the blanching time—until completely cooled through. For cut kernels, this cooling period locks in the bright yellow color and crisp texture. For whole cobs, the cooling ensures the cob interior reaches a safe temperature before cutting.
Drain the cooled corn thoroughly and pat cobs dry with paper towels before cutting or packaging. Excess water dilutes flavors during cooking and creates ice crystals that damage texture during freezing. For cut-kernel methods, spreading the corn in large shallow pans speeds cooling compared to leaving it in large pots.
Package for Freezer Storage
Proper packaging protects frozen corn from air exposure and moisture loss that causes freezer burn. For the cut-cook-freeze method, ladle cooled corn along with some cooking liquid into freezer bags or containers. Portion into two to three cup amounts—roughly one quart per bag—which represents a usable amount for most recipes without requiring thawing more than necessary.
Seal bags tightly, pressing out as much air as possible before closing. For standard bags, roll from the bottom up to push air out before sealing. If you own a vacuum sealer, use it for maximum shelf life and protection against freezer burn. Label each bag clearly with the contents and freeze date using a permanent marker.
For corn frozen on the cob, wrap each ear individually in plastic wrap—two to three layers for best protection—then place wrapped ears in freezer bags. Remove air and seal. Alternatively, use freezer-safe containers that prevent crushing during storage. Lay bags flat until frozen solid, which takes about four to six hours, then stack them upright or arrange in neat rows for compact freezer organization.
Store at Optimal Temperature
Consistent freezer temperature determines how long your prepared corn for the freezer maintains peak quality. Store frozen corn at zero degrees Fahrenheit (-18°C) or lower, which is the standard temperature for most home freezers. At this temperature, properly prepared and packaged corn stays at excellent quality for extended periods.
Corn frozen using cooked methods maintains peak quality for eight to twelve months. This timeframe represents optimal flavor, texture, and color—while the corn remains safe to eat beyond this period, you may notice decreased sweetness, slightly softer texture, and diminished vibrancy. Raw frozen corn has a shorter prime period of three to six months due to ongoing enzyme activity, though it remains safe for up to eight months.
Check your freezer temperature periodically with a thermometer to ensure it maintains zero degrees consistently. Frost-free freezers cycle on and off, which can cause temperature fluctuations that impact frozen food quality. Position corn toward the back of the freezer where temperature remains most stable, away from the door where warm air enters during opening.
Solve Common Freezing Problems

Even experienced corn preservers occasionally encounter issues. Understanding the causes and solutions helps ensure success with every batch you prepare for the freezer.
Bland tasting frozen corn usually indicates the starting corn wasn’t fresh enough. Corn begins converting sugar to starch immediately after harvest, so corn picked several days before freezing lacks the sweetness of fresh-picked ears. For best results, freeze corn within hours of harvest. You can also slightly increase sugar quantities in your recipe to compensate for less-sweet corn.
Mushy texture in thawed corn typically results from overcooking at some point in the process. If you boiled corn too long before freezing, cell structures break down and kernels soften. Reduce cooking times slightly and ensure prompt, complete cooling after cooking. Using overmature corn—past the milk stage—also produces tougher, more developed kernels that freeze poorly.
Watery frozen corn stems from excess liquid in the packaging. Use just enough water to prevent scorching during cooking—about two cups for ten cups of corn. Don’t add more liquid than necessary, and drain briefly before packaging if significant liquid remains. The corn should feel moist but not sit in a pool of liquid.
Freezer burn appears as dry, discolored patches on the corn surface and indicates air exposure during storage. Prevent it by using quality freezer bags, removing all air before sealing, and maintaining consistent temperatures below zero degrees. Small freezer-burned patches are safe to eat but won’t taste as good—simply cut them away before using the corn.
Use Frozen Corn in Recipes
Frozen corn’s versatility makes it valuable for countless dishes throughout the year, replacing fresh corn in most recipes with excellent results. The cooking method you choose depends on how you plan to use the thawed corn.
For simple side dishes, reheat thawed or frozen corn in a saucepan with butter over medium-high heat until piping hot. Season with salt and pepper to taste, and finish with fresh herbs like chives or cilantro for brightness. This approach works regardless of which preparation method you used—cut-cook-freeze, blanch-then-cut, or raw frozen all reheat beautifully.
In hot dishes like soups, stews, chilis, and casseroles, add frozen corn directly without thawing. Toss it into the pot during the last ten to fifteen minutes of cooking, and it will thaw and heat through as the dish finishes. This works exceptionally well in corn chowder, chicken and corn casseroles, and vegetarian chili, where the texture holds up to extended cooking.
For cold preparations like salsas, corn salads, and pasta salads, thaw the corn completely in the refrigerator overnight or in a bowl of cool running water. Drain any excess liquid before adding to your recipe. Blanched frozen corn performs better than raw frozen corn in cold applications, as the raw method can yield a slightly different texture when served cold.
Extend Your Corn Harvest Year-Round
Learning how to prepare corn for the freezer transforms a few weeks of summer abundance into year-round meal possibilities. The investment in proper equipment, attention to freshness, and careful technique pays dividends every time you open your freezer to find bright, sweet corn waiting to elevate your meals.
Start with the cut-cook-freeze method for the best balance of flavor, texture, and convenience. Once you’ve mastered that approach, experiment with blanching whole cobs for that classic boiled corn experience months later. Store your frozen corn properly, label everything with dates, and use the oldest packages first to ensure nothing goes to waste.
The satisfaction of serving delicious corn dishes in the depth of winter—corn that tastes remarkably like it was just picked—makes all the preparation worthwhile. Your future self will thank you every time you reach into the freezer for corn that brings summer sunshine to your table, regardless of what’s happening outside.