How to Make Ice Cream in a Freezer
Your freezer isn’t just for storing leftovers—it’s your secret weapon for creating creamy, dreamy homemade ice cream without expensive equipment. When your craving for cold treats strikes but you don’t own an ice cream maker, knowing how to make ice cream in a freezer becomes your ticket to delicious satisfaction. This method transforms simple pantry ingredients into rich, smooth desserts using nothing but your standard kitchen tools and freezer space. Forget complicated machines or specialty equipment—you’ll discover exactly how to make ice cream in a freezer that rivals store-bought versions, with complete control over ingredients and flavors. By the end of this guide, you’ll master the science of freezer ice cream and never waste another perfectly good craving opportunity.
Essential Ingredients for Freezer Method Success
Before you start churning your expectations, gather these fundamental components that determine your ice cream’s texture and taste. The magic happens through the right balance of fat, sugar, and liquid—get this ratio wrong and you’ll end up with icy disappointment rather than creamy perfection.
Why Whole Dairy Makes All the Difference
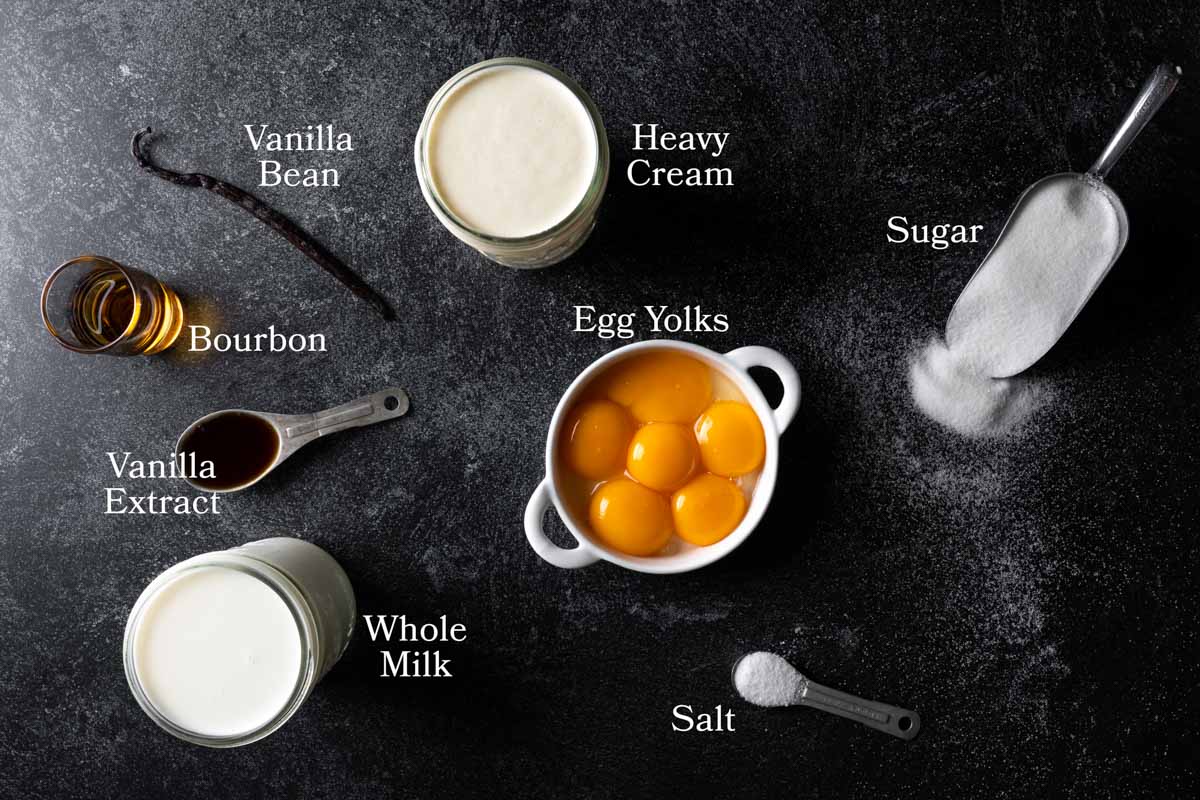
Your choice of dairy directly impacts creaminess—skim milk creates icy crystals while heavy cream delivers luxurious texture. Whole milk (3.25% fat) provides balanced results, but for truly decadent ice cream, combine heavy cream (36-40% fat) with whole milk in a 2:1 ratio. The fat molecules surround ice crystals during freezing, preventing large crystal formation that causes graininess. For dairy-free alternatives, full-fat coconut milk works best due to its similar fat content to dairy cream.
Sugar’s Critical Role Beyond Sweetness
Sugar does far more than sweeten your mixture—it lowers the freezing point, keeping your ice cream scoopable. Too little sugar and your creation becomes a solid block; too much and it won’t freeze properly. For standard batches, use 1/2 to 2/3 cup sugar per quart of liquid base. Experiment with alternatives like honey (use 25% less as it’s sweeter) or corn syrup (prevents crystallization but alters flavor). Remember that mix-ins like cookie dough or fruit add their own sugars, so adjust accordingly.
Perfecting Your Base Mixture Before Freezing
The foundation of great freezer ice cream lies in proper preparation before it ever touches your freezer. Many home cooks skip crucial steps here, wondering why their results turn icy or separated.
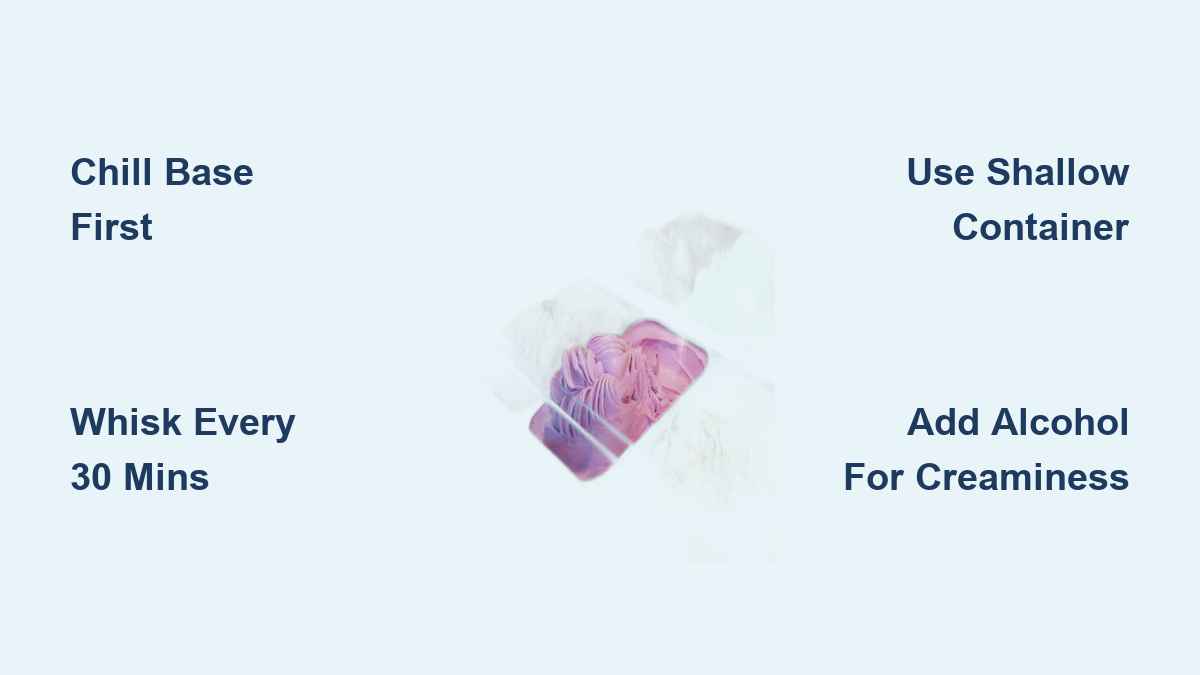
The Importance of Thorough Chilling Before Freezing
Never pour room-temperature mixture directly into your freezer container—this guarantees large ice crystals. Instead, cool your base completely in the refrigerator for at least 4 hours (overnight is better). This pre-chilling step ensures rapid, even freezing when placed in your freezer. Place your container in the coldest part of your freezer (usually the back, away from the door) for consistent temperature exposure.
Why Whisking Matters More Than You Think
After initial freezing (about 45-60 minutes), your mixture will have a slushy consistency around the edges. This is your critical intervention point—remove and vigorously whisk the mixture to break up forming ice crystals. Return to freezer and repeat every 30 minutes for 2-3 cycles. This manual “churning” mimics an ice cream maker’s function, incorporating air and preventing crystal growth. Skip this step and you’ll end up with solid ice rather than creamy texture.
Optimal Freezer Containers and Setup

What you freeze your mixture in affects both texture and convenience more than most home cooks realize. The right container makes all the difference between easy scooping and ice cream frustration.
Best Container Materials for Even Freezing
Metal containers freeze contents fastest but make removal difficult. Glass risks cracking from expansion. Your best bet is a shallow, airtight plastic container (9×5 inch loaf pan works perfectly) that allows maximum surface exposure. Fill only 3/4 full to accommodate expansion. For easier removal, line with parchment paper leaving an overhang—this creates instant handles for lifting your finished ice cream.
Strategic Placement for Consistent Results
Position your container in the back of your freezer where temperature fluctuates least. Avoid stacking items on top during the freezing process. If your freezer has a “fast freeze” setting, use it for the first hour, then return to normal setting. Never place near the freezer door where temperature changes occur with each opening.
Timing Your Freezer Ice Cream Perfectly
Understanding the freezing timeline prevents the two most common failures: rock-hard disappointment or soupy mess. Your freezer’s temperature (ideally 0°F/-18°C) dramatically affects these timeframes.
First Hour Critical Intervention Points
Check your mixture at 45 minutes—it should have a thin layer of ice around the edges. Whisk thoroughly, scraping bottom and sides. Repeat at 75 minutes when more solid around edges. This second whisking incorporates air that creates lighter texture. By 2 hours, it should be thick but still soft enough to mix in add-ins like chocolate chips or fruit.
When to Stop Freezing for Ideal Texture
Most freezer ice cream reaches perfect scoopable consistency in 3-4 hours. Longer freezing creates harder texture—fine if you prefer firmer ice cream but requires 5-10 minutes of thawing before serving. Never freeze more than 24 hours without stirring, as extended freezing without agitation creates large ice crystals that ruin texture.
Solving Common Freezer Ice Cream Problems

Even with perfect technique, issues arise. These troubleshooting solutions address the most frequent freezer ice cream disasters.
Why Your Ice Cream Turns Icy and How to Fix It
Icy texture almost always means insufficient fat, too much water, or inadequate whisking during freezing. Solution: Add 1-2 tablespoons of alcohol (vodka works neutral) per quart—it lowers freezing point without affecting flavor. Alternatively, include 1 tablespoon light corn syrup in your base mixture to inhibit crystal formation.
Preventing Separation in Dairy-Free Versions
Coconut milk-based ice creams often separate during freezing. Fix this by adding 1/4 teaspoon xanthan gum while blending your base—it stabilizes emulsion. For nut milks, use store-bought versions containing stabilizers or add 1/2 teaspoon guar gum per quart before freezing.
Flavor Variations That Work Perfectly in Freezer Method
Certain flavors shine when made using the freezer method, while others require special handling to maintain quality.
Best Fruit Combinations for Minimal Ice Crystals
Puree fruits like strawberries or mangoes with 1 tablespoon lemon juice and 1 tablespoon sugar per cup before mixing into base—this reduces water content that causes iciness. For berries, cook down with 1 tablespoon cornstarch per cup to thicken juices. Always fold fruit in during the final whisking stage to prevent sinking.
Creating Swirls Without Messy Mixing
For fudge or caramel swirls, freeze your base until semi-solid (about 2 hours), then create wells with a spoon and pour in cooled sauce. Freeze 15 minutes, then gently fold once to create ribbons. Too much folding incorporates the swirl completely rather than creating distinct patterns.
Storage Solutions for Long-Term Enjoyment
Proper storage prevents freezer burn and texture degradation that ruins carefully crafted ice cream.
The Paper Parchment Trick for Easy Removal
After final freezing, press parchment paper directly onto the ice cream surface before securing the lid. This creates a moisture barrier that prevents ice crystals from forming on top. The overhang makes lifting your ice cream intact for clean slicing.
Reviving Hardened Ice Cream
If your ice cream becomes too hard, don’t microwave it—that creates uneven melting. Instead, transfer to refrigerator 20-30 minutes before serving. For immediate serving, dip your scoop in warm water first. If severely hardened, break into chunks, add 1 tablespoon cream, and briefly whisk to restore creaminess.
Time-Saving Shortcuts for Busy Ice Cream Lovers
When you need ice cream fast without compromising quality, these professional tricks deliver results in record time.
The Salted Ice Bath Acceleration Method
Place your ice cream container inside a larger bowl filled with ice and 1/4 cup rock salt. The salt lowers the melting point of ice, creating a super-cold environment that freezes your mixture 50% faster. Stir every 10 minutes instead of 30 for rapid results—ready in about 90 minutes total.
Pre-Mixed Base for Instant Gratification
Prepare and chill multiple batches of plain base mixture in labeled containers. When cravings strike, simply add flavorings to a portion and freeze. Keep pre-portioned add-in bags (chocolate chips, cookie crumbles) ready to fold in during the final whisking stage for instant customization.
Final Note: Mastering how to make ice cream in a freezer unlocks endless dessert possibilities without special equipment. By understanding the science behind creaminess—proper fat ratios, strategic whisking intervals, and ideal container selection—you’ll consistently create restaurant-quality results. Remember to chill your base thoroughly, intervene at the critical slushy stage with vigorous whisking, and store properly to prevent ice crystals. The next time you want homemade ice cream, skip the complicated machines and head straight to your freezer with confidence. With these techniques, you’re always just a few hours away from perfectly creamy, custom-flavored frozen delight that satisfies even the most discerning palate.