How to Fix GE Freezer Not Defrosting
When your GE freezer stops defrosting, frost builds up relentlessly until your entire freezer compartment transforms into an ice cave. You’ll notice ice forming around the evaporator coils, food containers becoming encased in frost, and drawers that are increasingly difficult to open. Meanwhile, the refrigerator section warms up despite normal freezer settings, causing milk to spoil and produce to wilt. If you’re manually defrosting with a hair dryer every few weeks, you’re dealing with a failed automatic defrost system—and knowing how to diagnose the exact problem saves you hundreds in service calls.
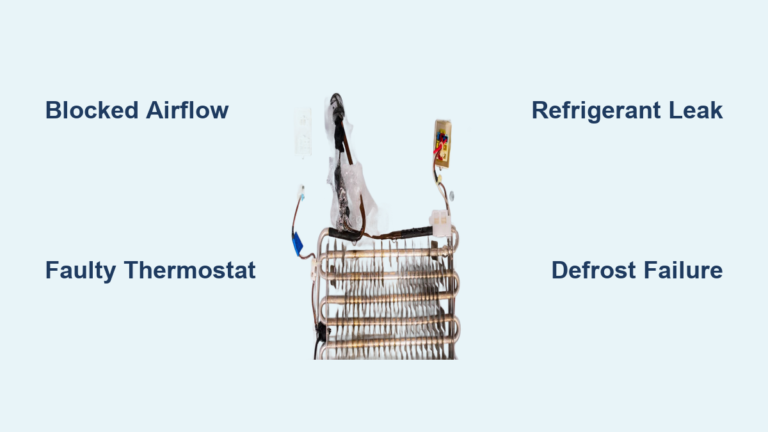
The defrost system in your GE refrigerator relies on four critical components working together: a heater, thermostat, thermistor, and control board. When any one fails, the entire system breaks down. The good news? Each component can be tested with a $20 multimeter, and replacement parts typically cost between $30-$250. This guide walks you through systematic testing procedures to pinpoint exactly which component has failed so you can make the repair yourself with confidence.
Spot the Early Warning Signs of Defrost Failure
Catching defrost problems early prevents extensive ice buildup and potential food loss. The symptoms develop gradually, so recognizing subtle changes helps you intervene before your freezer turns into an icebox.
Visible frost accumulation on freezer walls and shelves represents the first obvious sign. You might notice thin frost forming around the evaporator coils behind the rear panel, gradually thickening into solid ice blocks. Pro tip: Check for frost patterns—ice concentrated on the evaporator coils points to defrost system failure, while frost elsewhere may indicate door seal issues.
Temperature inconsistencies between compartments often accompany visible frost. The freezer may seem to maintain acceptable temperatures initially, but the refrigerator section warms noticeably because ice-blocked evaporator coils restrict cold air circulation. You’ll find dairy products spoiling faster despite the freezer appearing functional—a classic sign of airflow restriction.
Ice maker malfunctions frequently signal defrost problems. Cubes may shrink, melt partially, then refreeze into solid masses. Some users report finding pools of water in the ice maker bin as partially melted cubes release moisture that then refreezes. If your ice maker cycles erratically or stops producing ice entirely, defrost system issues are likely the culprit.
Extended compressor run times indicate your system is struggling. The compressor should cycle on and off as temperatures stabilize, but when frost insulates the evaporator coils, the system can’t transfer heat efficiently. Listen for the compressor running continuously or for unusually long periods—this not only increases energy bills but accelerates wear on all components.
How Each Defrost Component Actually Works

Understanding what each defrost system component does helps you test systematically and avoid replacing parts unnecessarily. The automatic defrost cycle occurs every 8-12 hours, but when components fail, this cycle breaks down completely.
The defrost heater mounts alongside the evaporator coils and activates during defrost cycles to melt frost accumulation. Most GE freezer heaters show resistance readings between 10-15 ohms when functioning properly, though some models accept readings up to 32 ohms. Critical warning: When accessing the heater, note the foam insulation surrounding it—this must be properly resealed after repairs to prevent moisture issues.
The defrost thermostat monitors coil temperature with a temperature-sensitive switch that closes when temperatures drop below 32°F. Located on the refrigerant line entering the evaporator coil assembly (typically top right), this disc-shaped component with pink and orange wires controls heater operation. Common mistake: Testing the thermostat at room temperature shows open continuity even on working units—always test when cold to avoid misdiagnosis.
The defrost thermistor provides continuous temperature feedback to the control board through variable resistance readings. Unlike the thermostat’s simple on/off function, the thermistor sends precise temperature data that determines defrost cycle timing. A functioning thermistor shows approximately 10,000 ohms at room temperature (70°F) and drops to about 5,000 ohms in ice water (32°F).
The main control board serves as the system’s brain, located behind a metal plate on the rear right side of the refrigerator. This component receives input from sensors and initiates defrost cycles at predetermined intervals. Board failures may cause no defrost initiation, continuous defrost operation (thawing your frozen food), or irregular cycle timing.
Essential Tools for Accurate Diagnosis

Before starting diagnosis, gather these specific tools to ensure accurate testing and safe repairs:
A digital multimeter with resistance (ohms) measurement capability forms the foundation of defrost system troubleshooting. Set it to the lowest ohms setting for precise readings on low-resistance components like the defrost heater. Pro tip: Test your multimeter on a known working circuit first to verify accuracy.
Basic hand tools enable component access: a Phillips head screwdriver for panel removal, nut drivers for terminal connections, and needle-nose pliers for manipulating wires. A flashlight with magnetic base keeps your hands free while working in tight spaces behind panels.
Safety equipment protects both you and the appliance: work gloves prevent cuts from sharp sheet metal edges, safety glasses shield against debris, and towels catch water from melting frost. Critical step: Always unplug the refrigerator completely before accessing internal components—defrost circuits operate at 120 volts.
First Test: Check Your Defrost Heater (Most Common Failure)
The defrost heater fails more frequently than any other component, making it the logical starting point. This test takes about 15 minutes and could save you unnecessary part replacements.
Start by unplugging the refrigerator and removing the freezer back panel to access the evaporator assembly. Locate the defrost heater—typically a metal tube or wire element running alongside the coils. Disconnect one wire from the heater terminals to isolate it from the circuit.
Set your multimeter to resistance measurement and place probes on the heater terminals. A functioning heater shows 10-15 ohms resistance (up to 32 ohms on some models). An “OL” (open loop) reading confirms a burned-out heater requiring replacement. Common mistake: Failing to disconnect one wire before testing gives false readings through parallel circuits.
If replacing the heater, part number AP4355467 covers many GE models. When installing, ensure proper orientation—dual-tube heaters provide more uniform heating but require specific placement. Reinstall all foam insulation to maintain defrost efficiency and prevent moisture problems.
Second Test: Verify Your Defrost Thermostat
After confirming the heater’s condition, test the defrost thermostat. This temperature-dependent component requires specific testing conditions to avoid misdiagnosis.
Locate the thermostat on the refrigerant line entering the evaporator coil assembly (top right side). Disconnect it from the wiring harness and test continuity across terminals. Critical requirement: The thermostat must be cold—below freezing—for accurate testing. Place it in an ice bath if necessary.
A properly functioning thermostat shows continuity (near zero ohms) when cold. If it fails to show continuity under cold conditions, it needs replacement (part number AP3884317). Pro tip: When reinstalling, ensure the thermostat makes direct contact with the refrigerant line—any gap prevents accurate temperature sensing.
Third Test: Inspect the Defrost Thermistor
The thermistor provides continuous temperature sensing that the control board uses to monitor system performance. Test it by measuring resistance at different temperatures.
Locate the thermistor near the evaporator coils—typically a small white oblong device. At room temperature (70°F), a functioning thermistor reads approximately 10,000 ohms. When submerged in ice water (32°F), resistance should drop to about 5,000 ohms.
If readings differ significantly or fail to change with temperature, replace the thermistor. Also trace wiring from thermistor to control board—corroded connections or damaged wires cause intermittent failures that component testing alone might miss.
Final Test: Diagnose Control Board Issues
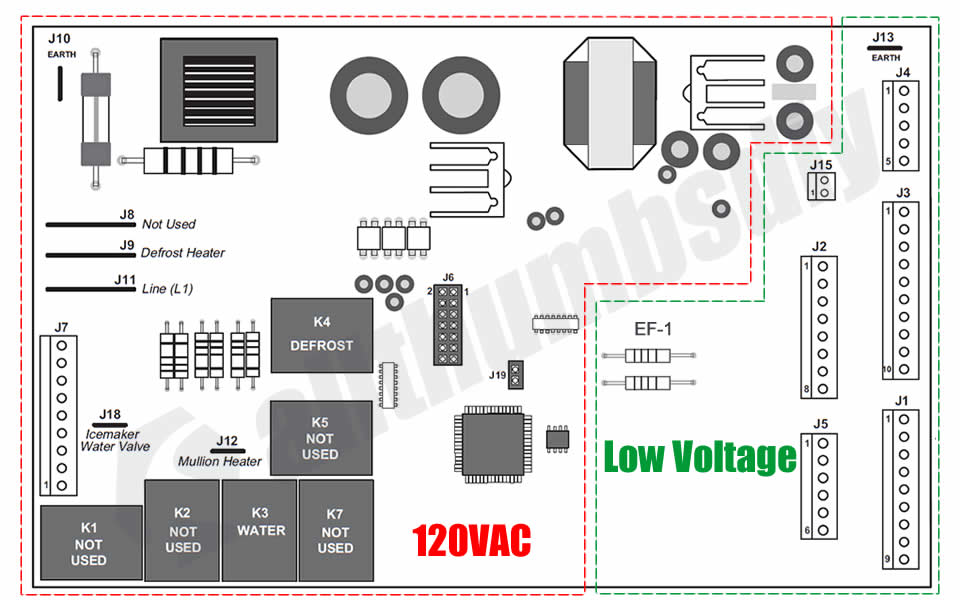
When all other components test properly but defrost still fails, the main control board is likely responsible. Test the entire defrost circuit by accessing the J7 and J9 plugs at the control board.
With the refrigerator unplugged, disconnect one connector and test resistance between appropriate terminals. A reading of 22 ohms or higher indicates proper circuit continuity. An open circuit suggests a problem in the wiring path.
Control board failure patterns include: no defrost initiation (continuous frost buildup), continuous defrost operation (thawing food), or irregular cycle timing. Common replacement boards include AP7188100 and WR55X38248. Critical note: Some boards require adjustments after installation—consult documentation carefully.
Identify Your Specific Failure Pattern
Recognizing symptom patterns helps prioritize testing and reduce diagnostic time:
-
Continuous ice buildup despite normal operation: Indicates heater or thermostat failure. Test heater first (most common failure), then thermostat (ensuring cold testing conditions).
-
Intermittent defrost failure (works for weeks then fails): Suggests marginal component function or wiring issues. Pay special attention to connection points and consider component age.
-
Continuous defrost operation (food thawing): Specifically indicates control board failure. The board cannot terminate defrost cycles properly.
-
Warm refrigerator with normal freezer temperature: Results from airflow restriction due to ice blockage. Underlying cause remains defrost system failure.
Maintain Your Defrost System Long-Term
Prevent future GE freezer not defrosting problems with these maintenance practices:
Clean condenser coils every six months using a brush attachment—dust and debris cause system stress that accelerates defrost component failure. Ensure the condenser motor operates without unusual noise or vibration.
Inspect door seals monthly for cracks, tears, or permanent deformation. Clean gaskets with mild soap and water, and smooth minor kinks using a hair dryer on low heat. Replace damaged gaskets promptly—warm air infiltration overworks the defrost system.
Watch for early symptoms: extended compressor run times, subtle increases in visible frost, temperature fluctuations, or unusual ice maker behavior. Addressing these early through diagnostic testing identifies failing components before complete system breakdown.
When your GE freezer not defrosting problem stems from a failed component, this systematic testing approach identifies exactly what needs replacement. Most repairs require basic tools and cost $30-$250 in parts. By understanding the four-component defrost system and testing methodically, you restore reliable automatic defrosting and eliminate the frustrating cycle of manual defrosting with hair dryers. If you’ve verified all components and still experience issues, consult a professional technician—some complex control board issues require specialized diagnostic equipment.