How to Check Freezer Thermostat: Quick Steps
Your freezer relies on a small but critical component to keep food frozen properly: the thermostat. This device monitors internal temperatures and signals the compressor to cycle on and off, maintaining the cold environment your food requires. When a thermostat fails, you may notice inconsistent temperatures, excessive frost buildup, or complete cooling loss. Learning how to check freezer thermostat problems yourself can save you time, money, and prevent food spoilage before a small issue becomes a major problem.
This guide walks you through every step of thermostat diagnostics, from recognizing failure symptoms to performing electrical tests with a multimeter. Whether your freezer runs constantly without shutting off or fails to start cooling at all, you’ll find the diagnostic procedures needed to identify the problem accurately. Most thermostat testing requires only basic tools and can be completed in under an hour, making it an achievable DIY project for most homeowners.
Why Your Freezer Won’t Stay Cold: Thermostat Failure Signs
Thermostat problems typically announce themselves through observable changes in your freezer’s performance. Recognizing these warning signs early helps you address issues before they lead to food loss or component damage. The most common indicators involve temperature inconsistencies, compressor behavior changes, and visible frost accumulation.
Temperature-related symptoms provide the clearest evidence of thermostat failure. A properly functioning freezer maintains temperatures between -18°C and -20°C (0°F to -4°F). If your freezer consistently runs warmer than this despite correct settings, or becomes excessively cold (below -24°F/-31°C), the thermostat may be failing to sense or regulate properly. Food developing freezer burn within days or ice cream becoming impossibly hard both suggest temperature regulation problems originating from the thermostat.
Compressor behavior offers additional diagnostic clues. A healthy thermostat allows the compressor to cycle on and off at regular intervals, typically running for 8-12 minutes per cycle in a typical household freezer. If the compressor runs constantly without shutting off, or never starts at all, the thermostat could be stuck in the closed or open position respectively. Strange clicking sounds from the thermostat location often indicate failing internal contacts or debris interfering with proper operation.
Frost accumulation patterns reveal cycling problems in manual-defrost models. When the compressor runs continuously due to a stuck-closed thermostat, evaporator coils become extremely cold, causing moisture in the air to freeze rapidly on interior walls. Several inches of frost buildup on walls and shelves suggests the thermostat isn’t cycling properly, forcing the compressor to run endlessly.
Required Tools for Freezer Thermostat Diagnosis

Gathering the right equipment before beginning diagnostics ensures efficient testing and prevents frustrating interruptions. Most thermostat testing requires common household tools and basic electrical testing equipment available at modest cost.
Hand tools form the foundation of your diagnostic toolkit. A screwdriver set with both Phillips and flathead heads in various sizes lets you remove access panels and the thermostat housing. Needle-nose pliers help manipulate small wires and connectors in tight spaces. A flashlight or work light illuminates dim areas behind and beneath appliances where thermostats are often mounted. Keep a towel nearby for cleaning up any water or frost encountered during inspection.
Electrical testing equipment proves essential for accurate diagnostics. A digital multimeter (DMM) measures continuity, resistance, and voltage—three key parameters for thermostat testing. This device provides precise readings that determine whether contacts are opening and closing properly. An appliance thermometer with a probe designed for freezer temperatures allows you to verify actual compartment temperatures against thermostat settings. Some thermometers include data logging capabilities to record temperature fluctuations over extended periods, helpful for identifying intermittent problems.
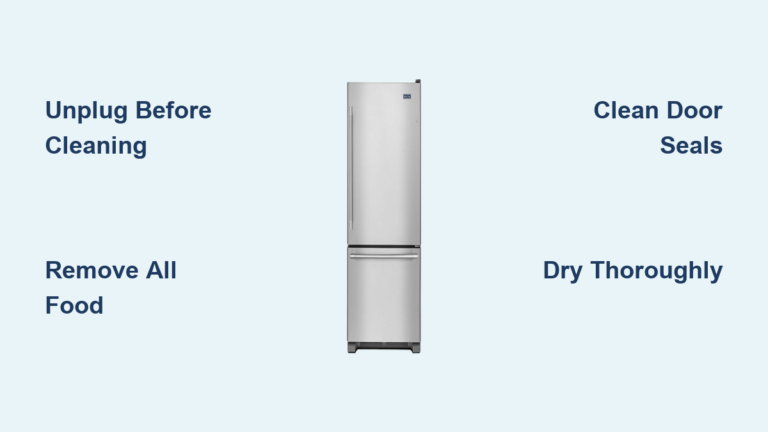
Critical Safety Steps Before Testing Your Thermostat
Working with electrical appliances demands strict attention to safety. Freezers store significant electrical charge in capacitors even after unplugging, making proper disconnection critical before testing any internal components.
Electrical disconnection must be complete before opening any panels or touching internal parts. Unplug the power cord from the wall outlet, or if the freezer is hardwired, switch off the appropriate circuit breaker at the electrical panel. Verify disconnection by testing with a voltage detector or by attempting to turn on interior lights. Wait at least 5-10 minutes after disconnecting power before touching internal components, as capacitors can retain dangerous charges for extended periods.
Personal safety practices prevent accidents during testing. Never perform diagnostics while standing on damp surfaces. Keep all electrical tools away from water or moisture. If defrosting is necessary before testing, allow sufficient time for ice to melt completely—rushing this process can damage electrical components. Wear appropriate clothing that won’t catch on moving parts or fan assemblies.
Fast Temperature Verification Test Without Tools
Before assuming electrical failure, verify that actual freezer temperatures match thermostat settings. This simple test often reveals whether the problem lies with the thermostat or another system component.
Initial temperature verification requires a reliable appliance thermometer placed in the freezer center, away from walls, door edges, and the evaporator coil. Close the door and allow the freezer to stabilize for 2-3 hours. For accurate results, perform this test after the freezer has run normally for 24 hours with minimal door openings. Record the thermometer reading and compare to the thermostat’s indicated setting—a discrepancy of 3-5°F is generally acceptable, but larger differences suggest thermostat inaccuracy.
Temperature cycling observation tests whether the thermostat properly cycles the compressor on and off. Set the thermostat to its middle setting and allow normal operation. Monitor compressor cycles over 24 hours using a timer or smartphone app to record running and resting periods. A functioning thermostat allows the compressor to run approximately 8-12 minutes per cycle, with similar rest periods, maintaining average cycle times of 15-20 minutes total. Document compartment temperature at each cycle end—the temperature should vary by no more than 2-3°F during cycling.
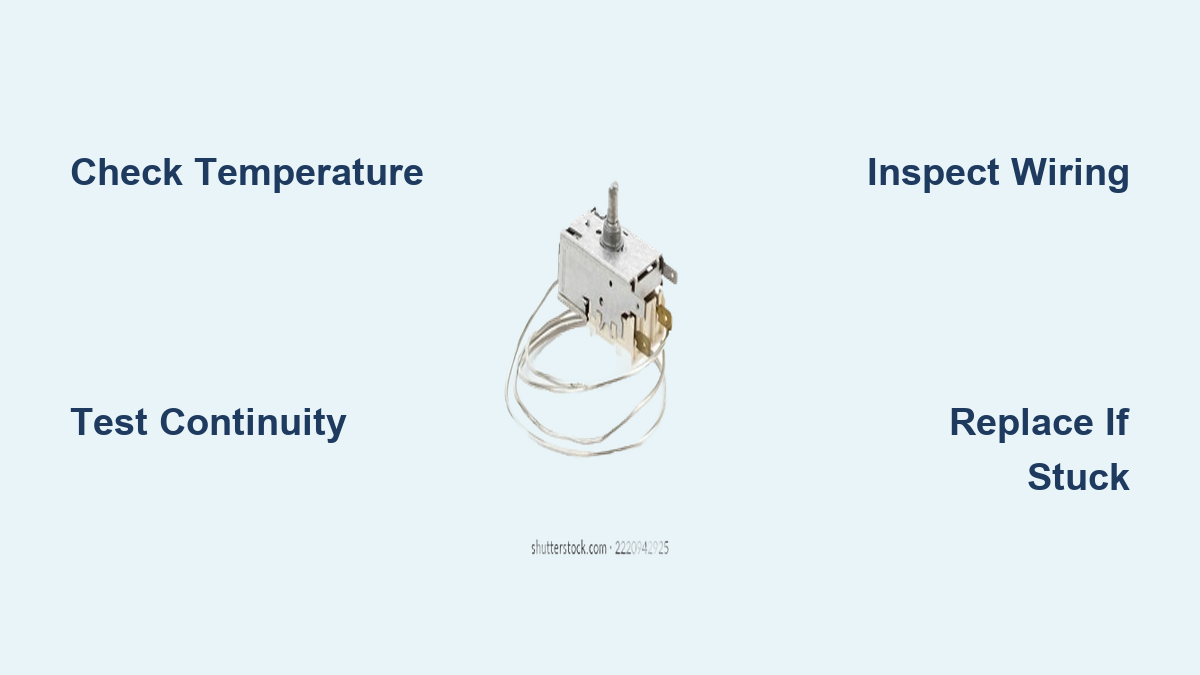
Exact Multimeter Testing Procedures for Thermostat Failure
Electrical testing with a multimeter provides definitive confirmation of thermostat function. These procedures determine whether contacts open and close properly at specific temperatures.
Continuity testing fundamentals reveal whether electrical paths exist through thermostat contacts. Set the multimeter to continuity or resistance (ohms) setting—the continuity setting typically beeps when connection is detected. Disconnect both wires from thermostat terminals, touch one probe to each terminal, and observe the reading. At room temperature (approximately 68-72°F), contacts should be closed, showing near-zero resistance (less than 1 ohm). No continuity at room temperature indicates contacts stuck in the open position.
Temperature-variation continuity testing verifies the thermostat’s ability to cycle between states. With multimeter probes attached to terminals, lower the temperature of the sensing bulb by wrapping it in ice (inside a plastic bag to prevent water damage). Watch and listen for the point where continuity is lost—the “click” of internal contacts opening. A functioning thermostat opens at a specific temperature corresponding to its calibration specification, typically between 15°F and 25°F for the cut-out point.
Voltage testing confirms whether the thermostat properly receives and switches electrical power. Set the multimeter to AC voltage range. With the freezer plugged in and thermostat calling for cooling, measure voltage at compressor connection points. When contacts are closed, full line voltage (110-120V in North America) should be present at output terminals. When the thermostat reaches cut-out temperature and opens, voltage drops to zero. No voltage at either position indicates a wiring problem, while constant voltage confirms a stuck-closed thermostat.
Step-by-Step Thermostat Testing Process for All Models

Following a systematic procedure ensures accurate diagnosis while minimizing risk of damage or injury. This step-by-step approach works for most residential freezers.
Preparation begins with gathering all tools and ensuring adequate workspace. Clear the freezer interior and have a cooler ready for food storage. Document the current thermostat setting and observed operational issues. Photograph the current configuration before changes. Review any available appliance manual or wiring diagram. Ensure the work area is well-lit and dry, then put on safety glasses and gloves.
Power disconnection requires unplugging the cord or switching off the appropriate circuit breaker. Confirm disconnection using a voltage tester. Wait 10 minutes for capacitors to discharge before touching internal components.
Thermostat access varies by model. Some freezers have exterior rear control knobs that unscrew to reveal the thermostat. Others require interior panel removal at the top or side compartment. Still others mount the thermostat on the compressor compartment at the rear bottom. Remove the access panel, noting screw positions, and photograph wiring configuration before disconnecting anything.
Physical inspection precedes electrical testing. Look for burning, melting, or corrosion on the thermostat body and terminals. Check the capillary tube for kinks or damage. Verify the sensing bulb is properly positioned in airflow. Gently wiggle wires to check for loose connections. Turn the control knob through its full range and listen for consistent clicking.
Multimeter testing proceeds with the meter set to continuity or lowest resistance range. At room temperature, a functioning thermostat shows continuity (beep or near-zero resistance). For temperature-variation testing, wrap the sensing bulb in a plastic bag and place in ice water. Watch for the point where continuity is lost as temperature drops—this indicates the cut-out temperature and confirms normal operation.
When to Replace Instead of Repair Your Thermostat

Certain symptoms definitively indicate thermostat failure requiring replacement rather than repair or adjustment. Recognizing these signs prevents wasted time on unsolvable problems.
Stuck-closed thermostats cause the compressor to run continuously without cycling off. The freezer becomes excessively cold with thick frost on walls and coils. Testing reveals continuity present at all temperatures, even when the sensing bulb is actively cooled. The thermostat never clicks open and voltage always reaches the compressor. Contact welding from electrical arcing or mechanical linkage failure typically causes this condition—cleaning contacts sometimes helps, but replacement is usually necessary.
Stuck-open thermostats prevent the compressor from receiving power entirely. Interior temperatures rise, causing food spoilage. Testing shows no continuity at any temperature, even when the thermostat is warmed significantly above room temperature. No voltage reaches the compressor terminals regardless of thermostat position. Contact pitting and erosion, corrosion from moisture, or physical damage cause this failure mode.
Replacement selection requires matching specifications exactly. Obtain the correct part using your freezer’s model number—the part tag is on the thermostat body or appliance serial plate. Key specifications include voltage and amperage ratings (must meet or exceed originals), temperature range, differential, mounting style, and terminal configuration. Universal thermostats work for some applications but may require wire adapter kits.
Preventing Future Thermostat Failures Through Proper Maintenance
Simple maintenance practices keep your freezer running reliably for years and extend thermostat life. These preventive measures help you avoid having to check your freezer thermostat repeatedly.
Regular temperature monitoring catches problems early. Check freezer temperatures monthly using a reliable thermometer and record readings to establish a baseline. Consistent readings within the desired range indicate proper operation. Significant deviations warrant investigation before food quality suffers. Digital thermometers with min/max memory identify temperature excursions between manual checks.
Clean components ensure efficient operation and reduce strain on all systems. Clean condenser coils at least twice yearly—more with pets or dusty environments. Vacuum or brush coils gently to remove accumulated debris. Keep door seals clean by wiping monthly with a damp cloth to remove food residue. Inspect seals for cracks and replace if damaged.
Avoid temperature shocks that stress components. Don’t place hot items directly in the freezer—allow cooling to room temperature first. Limit door opening frequency and duration, especially in humid environments. When loading large quantities of food, do so gradually rather than all at once. These practices reduce thermal stress and maintain consistent, reliable operation.
| Symptom | Likely Cause | Test Method | Solution |
|---|---|---|---|
| Compressor won’t start | Open thermostat contacts | Multimeter continuity at room temperature | Replace thermostat |
| Compressor runs constantly | Closed thermostat contacts | Continuity persists when bulb cooled | Replace thermostat |
| Intermittent operation | Loose connections or failing contacts | Monitor over time, wiggle wires | Tighten connections or replace |
| Temperatures too warm | Thermostat not calling for cooling | Temperature test, verify cycling | Adjust or replace thermostat |
| Temperatures too cold | Thermostat not cutting out | Check differential, test cycling | Replace thermostat |
| Excessive frost buildup | Continuous running from stuck thermostat | Visual inspection, continuity test | Replace thermostat |
Learning how to check freezer thermostat function empowers you to diagnose problems quickly and accurately. Most issues can be identified through systematic visual inspection, temperature monitoring, and multimeter testing. With proper tools, safety precautions, and this guide’s procedures, you can determine whether your thermostat requires adjustment, replacement, or professional attention—saving time and money while keeping your food frozen safely.