How to Fix a Leaky Freezer Gasket
That annoying puddle forming beneath your freezer isn’t just a cleaning headache—it’s a sign your freezer gasket is failing. When that rubber seal around your freezer door develops leaks, cold air escapes, energy bills rise, and your frozen food quality deteriorates faster than you’d expect. The good news? Most gasket problems can be fixed in under an hour with basic tools you likely already own. Whether you’re dealing with frost buildup along the door edges or noticing your freezer running constantly, this guide shows you exactly how to fix a leaky freezer gasket without calling a technician.
Why Your Freezer Gasket Is Leaking Now
Understanding what caused your gasket failure helps you choose the right repair approach and prevent recurrence. Most gasket leaks stem from one of three common issues that develop over time through normal use.
Accumulated debris and food residue create microscopic gaps between the gasket and door frame, allowing air exchange. Every time you open your freezer, airborne grease, sugar particles from frozen treats, and moisture from humid air settle along the sealing surfaces. Over months, this buildup creates a physical barrier that prevents proper contact. This is especially common in households with frequent freezer use or where sticky foods like ice cream or syrup containers are stored.
Rubber degradation from temperature cycling causes gaskets to lose flexibility over time. The constant expansion and contraction as your freezer cycles between freezing and defrost modes gradually breaks down the rubber’s molecular structure. You’ll notice this as hardening, cracking, or permanent flattening in high-stress areas like door corners. Most freezer gaskets last 5-7 years under normal conditions before this deterioration becomes problematic.
Door misalignment from hinge wear creates uneven pressure along the gasket perimeter. As hinge pins wear down from daily use, the door gradually sags, placing excessive strain on one section of the gasket while leaving others with inadequate contact pressure. This uneven wear pattern often starts as minor leaks in one corner that progressively worsen as the misalignment increases.
Immediate Leak Detection: Find Problem Areas Fast
Before attempting any repair, pinpoint exactly where your gasket is failing. These diagnostic methods take just minutes but save you from wasting effort on unnecessary repairs.
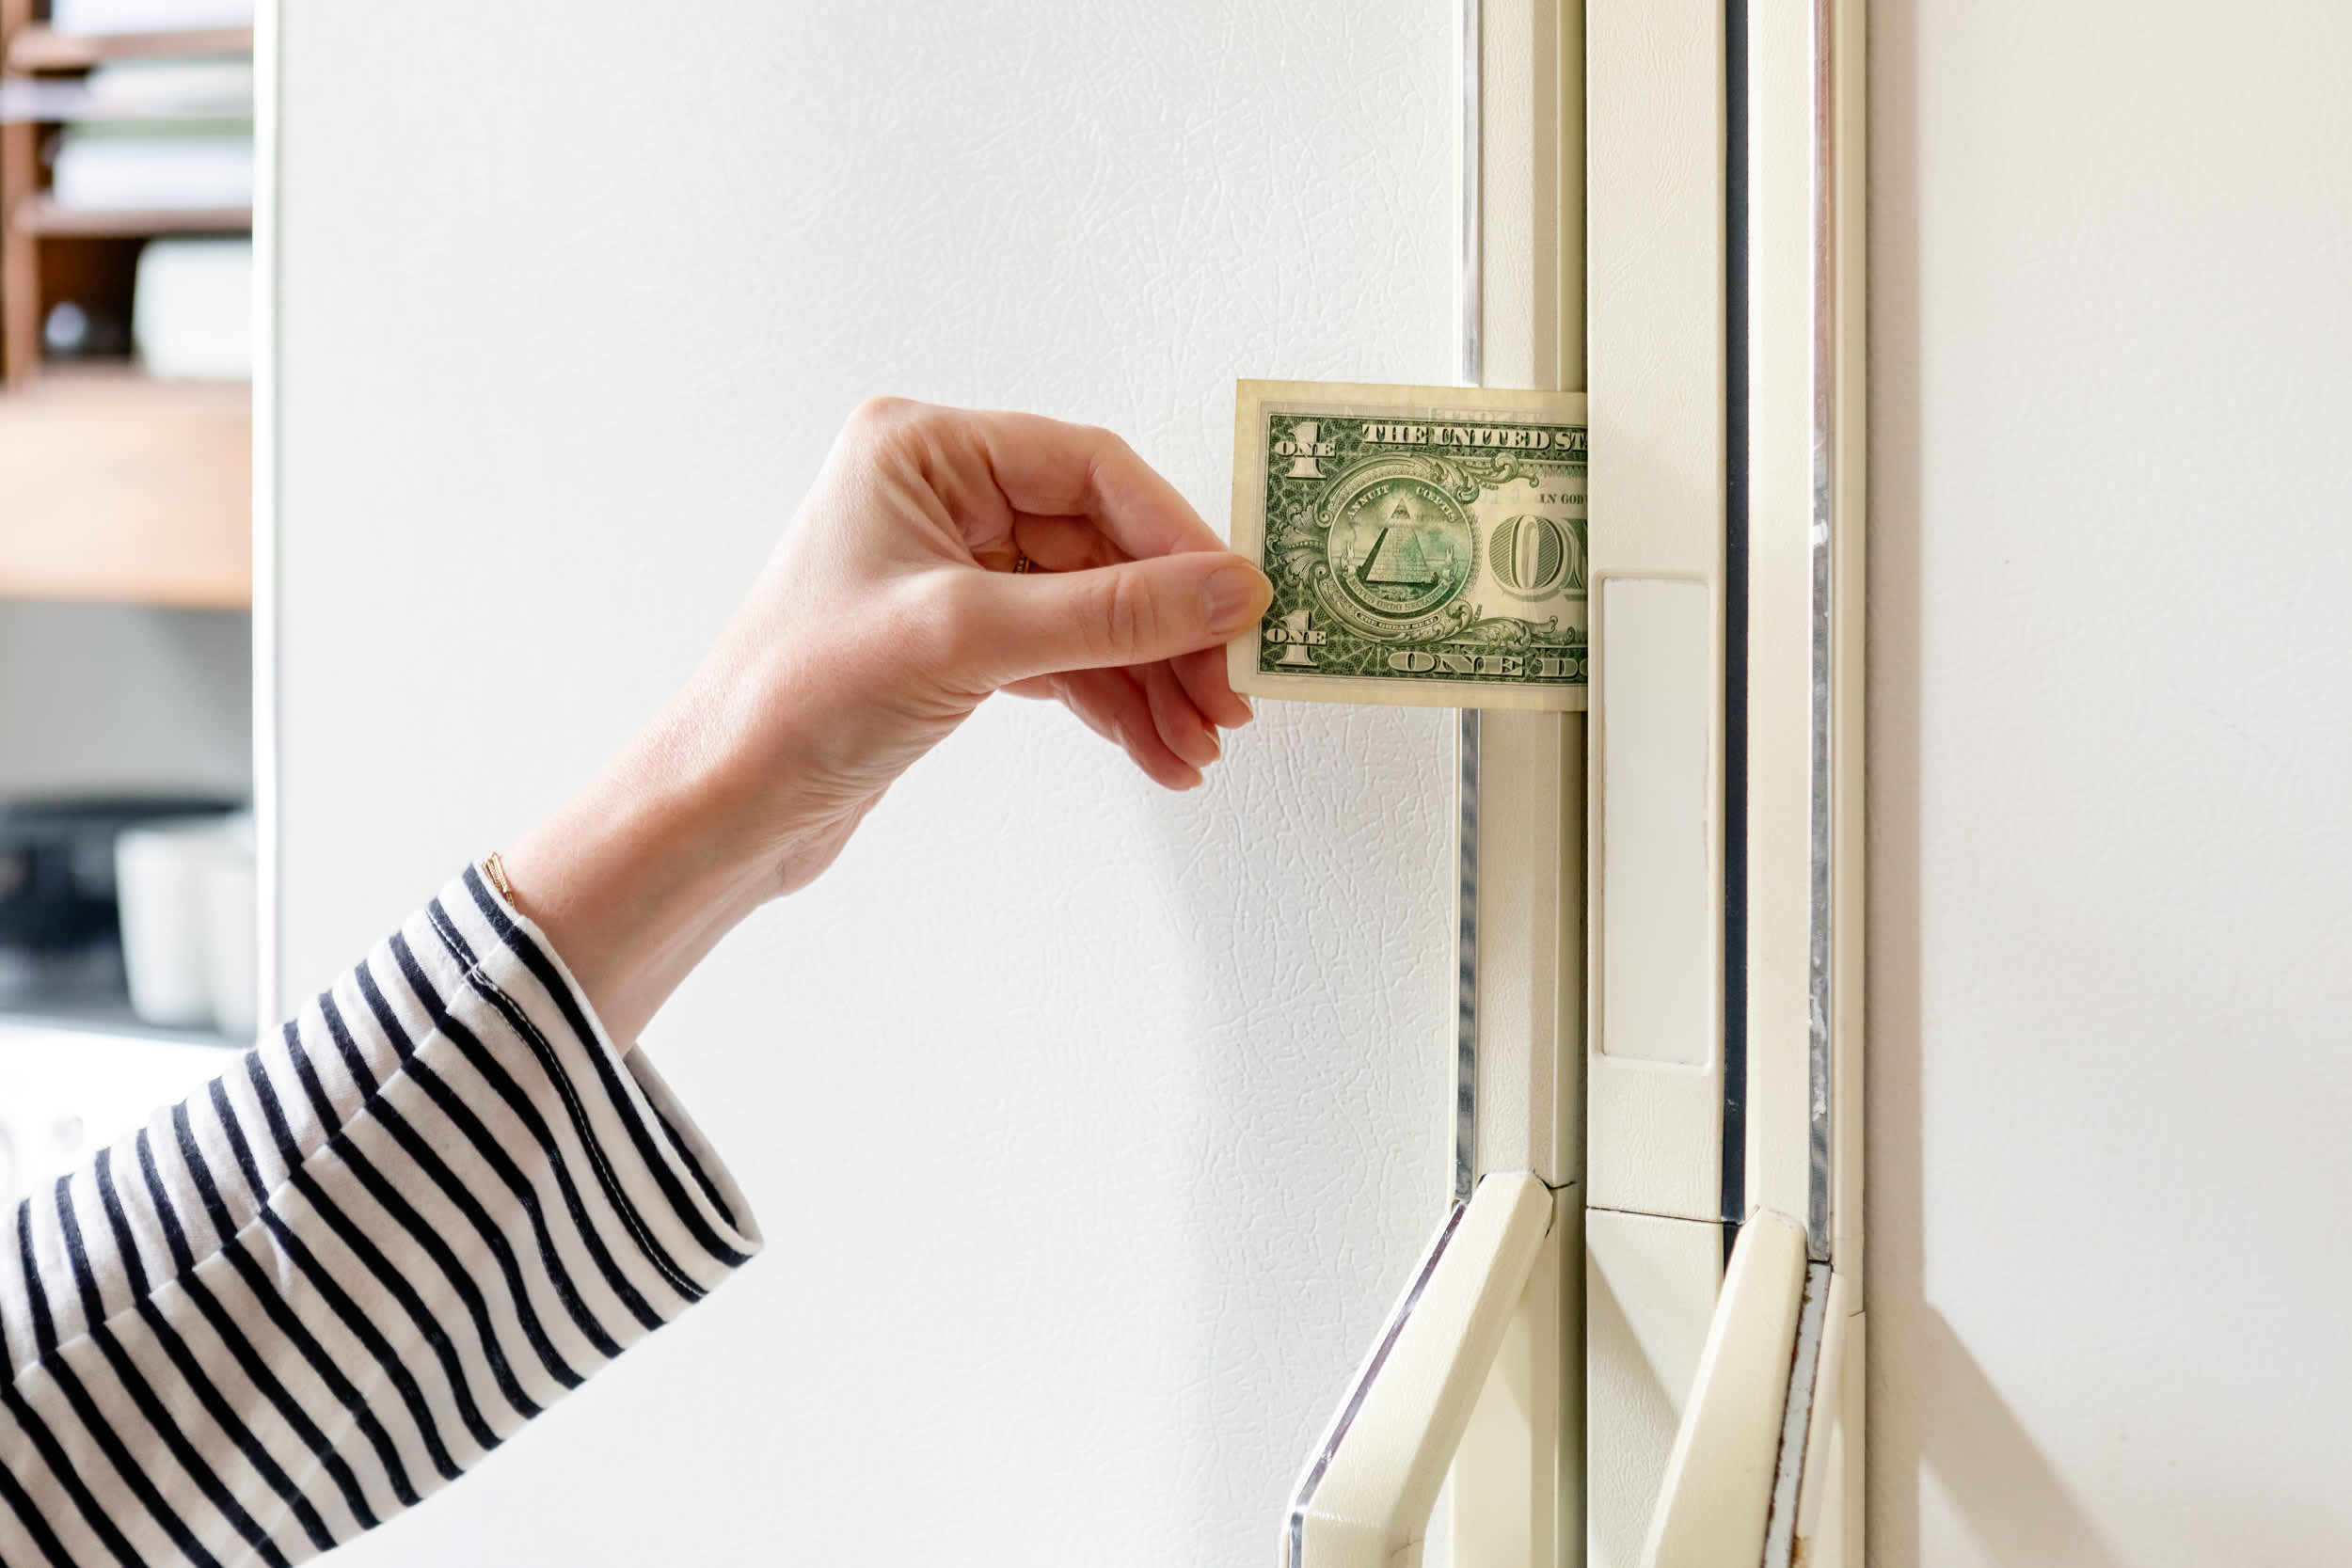
The Dollar Bill Test for Seal Integrity
Close a dollar bill or standard sheet of paper against the gasket door frame at multiple points around the perimeter, then try to pull it out. A properly sealing gasket will create noticeable resistance throughout the entire pull. If the paper slides out easily at any location—especially in corners—you’ve found your leak source. Repeat this test every 6 inches around the door, paying special attention to the lower corners where gravity and frequent opening cause accelerated wear.
Visual Inspection for Physical Damage
Examine the entire gasket rubber under good lighting, looking for:
– Cracks or tears in the rubber surface
– Permanent deformation where the gasket no longer springs back
– Embedded food particles or grease buildup
– Discoloration indicating material degradation
Run your fingers along the sealing surface feeling for hard spots, brittleness, or areas where the rubber has lost its pliability. These subtle changes often cause leaks before visible damage appears. Document problem areas with notes or photos to track during your repair process.
Cleaning Your Freezer Gasket Properly
Many “leaky” gaskets simply need thorough cleaning to restore proper sealing function. Follow these steps to eliminate contamination that’s compromising your seal.
Safe Cleaning Solution Preparation
Mix 1 tablespoon of mild dish soap with 2 cups of warm water in a spray bottle. Avoid harsh chemicals like bleach, ammonia, or abrasive cleaners that accelerate rubber deterioration. For stubborn buildup, add 1 tablespoon of white vinegar to your solution—this natural acid dissolves mineral deposits without damaging rubber.
Effective Cleaning Technique
Remove food items from the freezer door shelves to access the entire gasket. Spray your cleaning solution generously along the gasket channel, then use a soft-bristled toothbrush to work the solution into crevices. Focus on the inner sealing edge and the channel where the gasket mounts to the door frame—these areas trap the most debris. For gaskets that can be removed (check your manual), pull them away from the door frame slightly to access the mounting channel.
Drying and Testing
Wipe away all cleaning residue with a microfiber cloth, then allow the gasket to air dry completely for at least 30 minutes. Moisture left in the channel creates a barrier that prevents proper sealing. After drying, perform the dollar bill test again to verify improved seal integrity. If leaks persist, move to more advanced repair methods.
Repairing Minor Gasket Damage Yourself
Small tears, separated seams, and localized wear can often be fixed without full replacement. These techniques restore functionality to moderately damaged gaskets.
Fixing Small Tears with Food-Grade Silicone
For tears less than 1 inch, clean the area thoroughly and apply a thin bead of food-grade silicone sealant directly into the tear. Smooth with a wet finger to create a seamless patch, then allow 24 hours for complete curing before using the freezer. This flexible repair withstands normal door operation while maintaining a tight seal.
Reattaching Separated Seams
When gasket sections separate at corners or along the mounting channel, use rubber cement designed for automotive weatherstripping. Clean both surfaces with isopropyl alcohol, apply cement to both sides, press firmly together, and clamp with binder clips for 2 hours. Wipe away excess immediately with a damp cloth to prevent visible residue.
Restoring Flattened Gasket Sections
For gasket areas that have permanently compressed, submerge the affected section in hot water (140°F) for 30 seconds to temporarily soften the rubber. Immediately reinstall or press against the door frame while cooling—this allows the rubber to reform its shape with proper contact pressure. This technique works best on moderately worn gaskets before significant material degradation occurs.
Adjusting Your Freezer Door for Better Seal Contact

Even a perfect gasket can’t seal properly if your door isn’t aligned correctly. Most refrigerator doors allow simple adjustments to improve gasket contact.
Identifying Misalignment
Place a level across the top of your closed freezer door to check horizontal alignment. Measure the gap between door and cabinet at multiple points—if the gap varies by more than 1/8 inch around the perimeter, adjustment is needed. Pay special attention to the bottom corners where sag typically appears first.
Making Hinge Adjustments
Locate the hinge mounting screws (usually hidden under plastic caps), loosen them slightly with a screwdriver, then shift the door into proper alignment. For top-hinge models, small vertical adjustments come from the top hinge while horizontal alignment comes from the bottom. Tighten screws gradually while checking seal integrity with the dollar bill test after each adjustment.
When to Replace Your Freezer Gasket Entirely
Certain damage patterns indicate that repair attempts will provide only temporary relief. Recognize these signs that replacement is your best option.
Brittle, crumbling rubber that cracks when flexed has degraded beyond practical repair. Similarly, multiple tears or extensive cracking throughout the gasket means structural integrity is compromised. If more than 30% of the gasket shows permanent deformation, replacement becomes more cost-effective than continued patching.
Gaskets approaching 7+ years of service typically need replacement regardless of visible condition—rubber degradation continues internally even when the gasket appears intact. Replacement costs $30-$150 depending on your model but pays back quickly through reduced energy consumption.
Complete Gasket Replacement Process
When replacement becomes necessary, follow these steps for professional-quality results.
Ordering the Correct Replacement
Identify your appliance’s model number (usually on a label inside the freezer compartment) and search for the specific gasket part number. Contact the manufacturer directly if online sources show conflicting information—using the wrong gasket guarantees poor sealing. Photograph your existing gasket before removal to ensure proper installation orientation.
Installation Best Practices
Clean the mounting channel thoroughly with isopropyl alcohol before installation. Start at the top center, pressing the new gasket’s mounting flange firmly into the channel while working toward the corners. Avoid twisting or stretching the gasket—proper fit should require firm but not excessive pressure. Test seal integrity with the dollar bill method before closing the door for extended periods.
Preventing Future Gasket Leaks
Implement these maintenance habits to extend your new gasket’s service life.
Clean gaskets monthly with mild soap and water, focusing on the sealing surfaces. Apply a thin coat of silicone gasket conditioner every six months to maintain flexibility—never use petroleum-based products that accelerate rubber breakdown. Close the door gently but firmly; slamming accelerates wear at stress points. Check door alignment quarterly and adjust as needed to maintain even pressure across the entire gasket perimeter.
Fixing a leaky freezer gasket properly restores your appliance’s efficiency and protects your frozen food investment. Most issues resolve through thorough cleaning or minor repairs that take less than 30 minutes of your time. When replacement becomes necessary, the process remains straightforward with basic tools and careful attention to installation details. By implementing regular maintenance and prompt attention to early warning signs, you’ll keep your freezer sealing tightly for years to come—saving energy, preventing food waste, and avoiding costly service calls. The small effort required to maintain your freezer gasket delivers significant returns in appliance performance and longevity.