Freezer Door Seal Not Sticking? Fix It Fast
That annoying gap where your freezer door won’t fully close isn’t just a minor inconvenience—it’s silently driving up your energy bills while jeopardizing your frozen food. When your freezer door seal not sticking properly, cold air escapes, forcing the compressor to run constantly as it struggles to maintain temperature. This leads to excessive frost buildup, potential food spoilage, and higher electricity costs that can add up to $50+ annually. Many homeowners immediately assume they need expensive repairs or replacement, but 90% of these frustrating issues can be resolved with simple DIY fixes that take less than 30 minutes.
Before you call a technician or consider buying a new gasket, work through this systematic troubleshooting guide. The solutions range from quick adjustments you can make while grabbing ice cream to more involved fixes that still cost nothing but your time. By following these steps in order, you’ll pinpoint exactly why your freezer door seal isn’t sticking and apply the precise solution for your specific model and situation.
Test Seal with Paper Dollar Method
Before performing any repairs, confirm whether your seal actually has a problem. What appears to be a sticking issue might actually be a clearance problem or obstruction, and applying the wrong solution wastes time and money. The paper dollar test provides a quick, reliable assessment of your seal’s condition using items you already have at home.
Step-by-Step Test Procedure
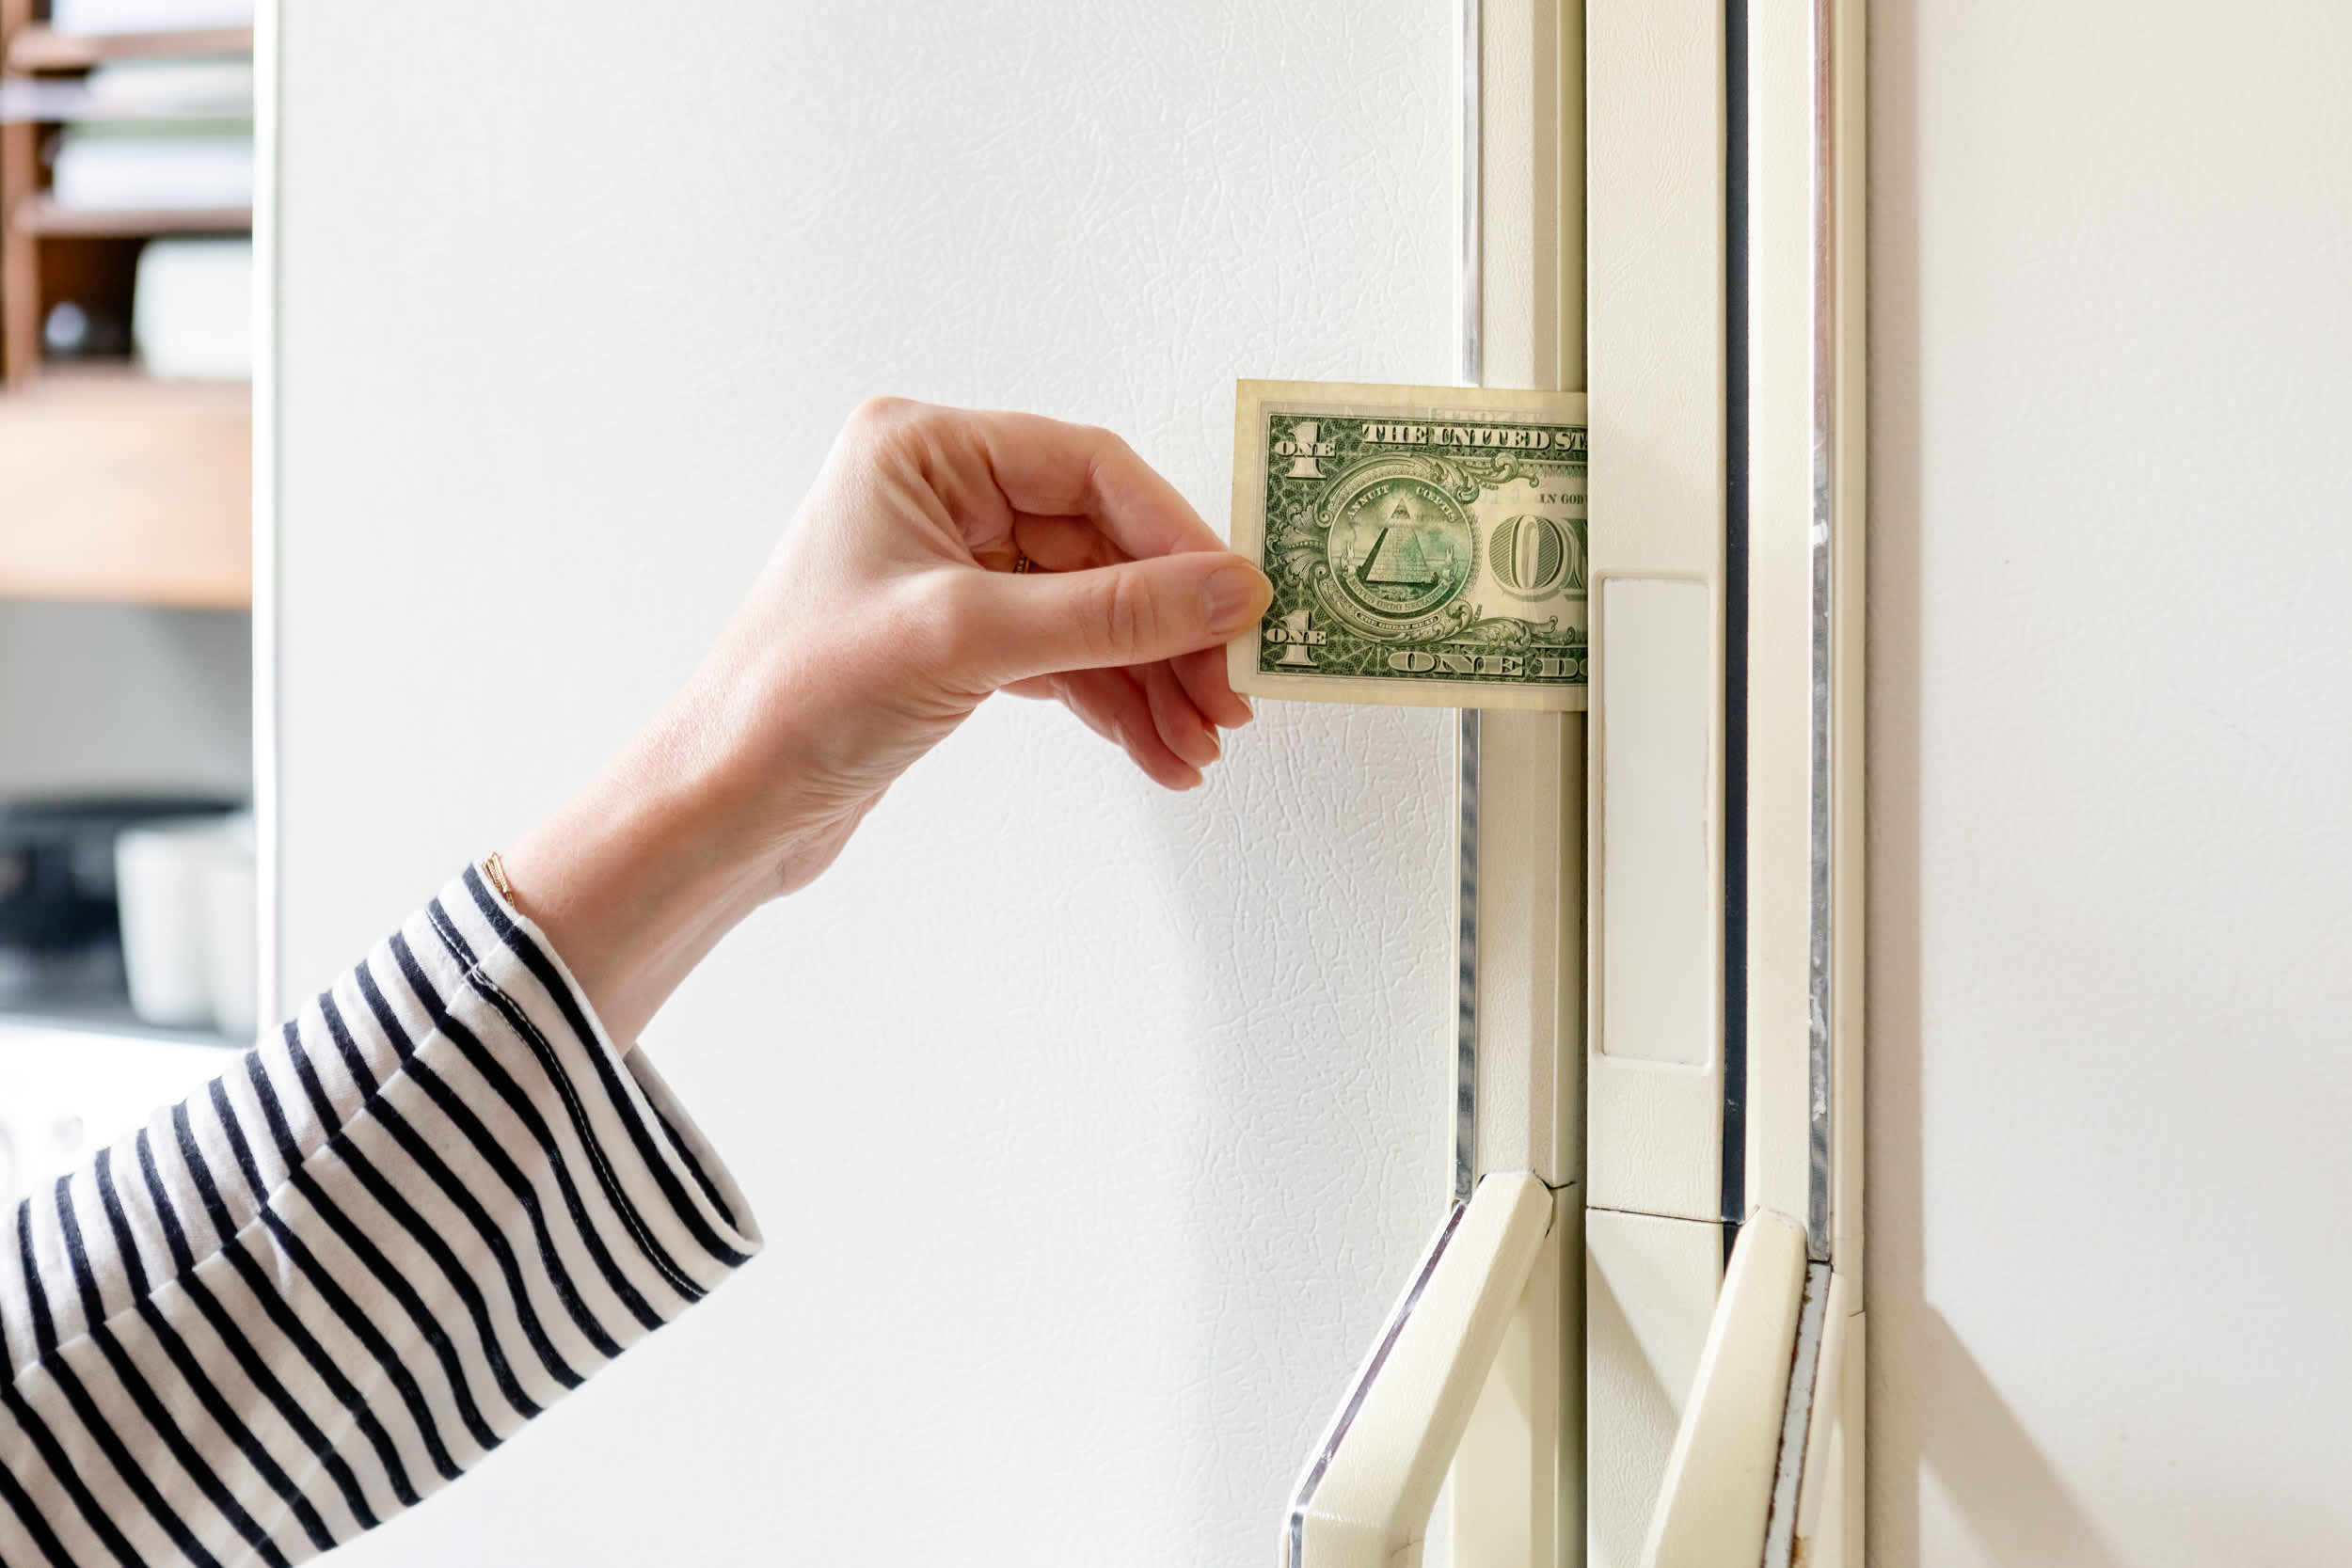
Close a dollar bill or sheet of paper between the seal and the freezer frame at multiple points around the door’s perimeter. Gently pull on the paper while the door remains closed. If you feel significant resistance and the paper doesn’t slide out easily, your seal is functioning properly. However, if the paper glides out with little to no tension, cold air is escaping through that section, and your seal requires attention.
Test several locations along the top, bottom, and sides of the door, noting any sections that fail to grip the paper. These problem areas will guide your troubleshooting and help you determine whether cleaning, adjusting, or replacing the seal is necessary. For best results, repeat this test multiple times as seals sometimes create temporary adhesion after being closed for extended periods.
Level Your Freezer Properly
An unlevel freezer prevents the door from closing completely and evenly, causing the seal to fail at specific points along its perimeter. When the appliance tilts forward, backward, or to either side, the door’s weight distributes incorrectly across the seal, creating gaps despite a perfectly good gasket. Leveling corrects this imbalance and restores proper seal contact.
Locate and Adjust Brake Feet
Find the brake feet at the bottom front of your freezer—these are adjustable legs that raise or lower each corner of the appliance. Using a 1/4-inch hex driver or wrench, turn both front brake feet clockwise the same number of turns to raise the front of the freezer. Several rotations may be necessary, so work in small increments and test the door after each adjustment. The goal is achieving even pressure across the entire seal when the door closes, with no visible gaps along any edge.
Use Smartphone as Level Guide
Modern smartphones include built-in accelerometer sensors that function as accurate level indicators. Place your phone on top of the freezer or along the side to verify orientation in two directions. This free tool eliminates guesswork and ensures your leveling adjustments actually achieve the proper orientation. After adjusting the brake feet, re-test the door seal using the paper dollar method to confirm that problem areas have improved. Most manufacturers recommend a slight forward tilt (about 1/4 inch) to help the door close automatically.
Remove Interior Obstructions

Internal components that interfere with door closure create seal failures even when the gasket itself is in perfect condition. Shelves, baskets, and food items positioned incorrectly can prevent the door from making complete contact with the seal at certain points. This obstruction creates gaps that look like seal problems but resolve simply by rearranging contents.
Check Shelves and Baskets
Inspect how your storage components sit within the freezer. Baskets and shelves sometimes slip out of their designated tracks or slide forward past their intended positions. When this happens, protruding edges can push against the door from inside, preventing full closure. Remove each component, check that it’s seated correctly in its track or slot, and verify that nothing extends beyond the proper boundaries before replacing it. Pay special attention to the corners where misalignment most commonly occurs.
Rearrange Food Items
Food packages positioned too close to the door edges commonly cause closure problems, especially with large or oddly-shaped containers. Items that have shifted during opening and closing can protrude into the door’s closing path. Consolidate your contents to reduce the overall footprint inside the freezer, and ensure nothing sits within one inch of the door edges. This simple rearrangement often resolves seal issues that seemed to develop mysteriously. Consider using stackable containers to maximize space efficiency while maintaining proper clearance.
Clear Shipping Materials from New Freezers
New freezers arrive with packaging components designed to prevent damage during transport, and these materials frequently interfere with proper door operation after installation. If your seal problem began shortly after purchasing the appliance, shipping materials are the most likely cause and require immediate removal.
Inspect the door edges, lid areas, and door tracks for any plastic clips, foam blocks, or cardboard inserts that may have remained in place after unpacking. These materials often nestle into gaps or sit behind components where they’re not immediately visible. Remove all protective materials from the door areas, check that nothing remains in the hinge mechanisms, and verify that the door closes smoothly before loading contents. New appliance owners should perform this check during initial setup to prevent frustration later.
Verify Installation Requirements
Environmental factors and placement significantly impact seal performance and longevity. Even a perfectly functioning seal degrades faster when exposed to inappropriate conditions, and insufficient clearance causes the condenser to overheat, reducing cooling efficiency and potentially warping the gasket from temperature fluctuations.
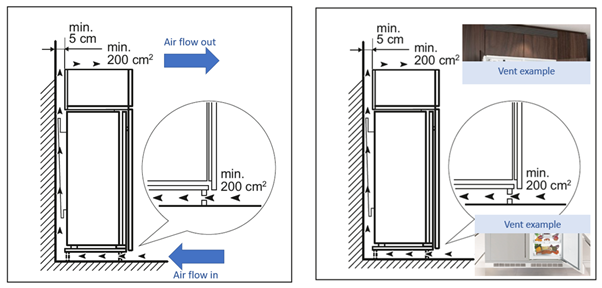
Maintain Proper Clearances
Your freezer needs adequate ventilation to operate efficiently and protect the seal from heat damage. Keep at least three inches of space at the top and on both sides of the appliance, with one inch between the rear of the unit and the wall. On the hinge side, increase clearance to allow the door to open fully for proper access and complete closure. These dimensions allow hot air from the condenser to dissipate properly, preventing the temperature fluctuations that damage seals over time. Many homeowners unknowingly place their freezers too close to walls, unknowingly creating a heat trap that accelerates seal degradation.
Avoid Heat Sources and Direct Sunlight
Positioning your freezer near ovens, radiators, heating vents, or areas of direct sunlight exposes the seal to excessive heat that causes warping and degradation. Similarly, installing the freezer in spaces where ambient temperature falls below 40°F compromises the seal’s flexibility and effectiveness. Choose a location that remains within normal room temperature ranges and sits away from heat-generating appliances to maximize seal lifespan. Garages are particularly problematic for many freezer models, as temperature extremes can cause the rubber gasket to become brittle and crack.
When to Call for Service
If your door seal still isn’t sticking after working through all previous troubleshooting steps, the gasket itself may be damaged, cracked, or degraded beyond repair. Persistent problems despite proper leveling, clear obstructions, and adequate clearance indicate that the seal requires professional replacement rather than adjustment.
Contact the manufacturer’s customer support for diagnosis assistance or to schedule service. If your appliance is still within the first 30 days of purchase, inquire about extended service plans that may cover seal replacement and provide long-term protection for your investment. Professional technicians can source the correct replacement part for your specific model and ensure proper installation that restores your freezer’s efficiency and extends its operational lifespan.
Regular inspection of your door seal, prompt removal of any frost buildup, and maintenance of proper freezer leveling will prevent future seal problems and ensure reliable performance for years to come. Set a reminder to test your seal every three months using the paper dollar method—this simple habit can save you hundreds in energy costs and prevent costly food spoilage. Remember that a properly functioning freezer door seal should create an audible “whoosh” sound when opened, indicating a perfect vacuum seal that’s keeping your food safe and your energy bills low.