Compressor Running But Freezer Not Cooling? Fix It Fast
You open your freezer after grocery shopping only to find thawing meat and melting ice cream. The compressor hums steadily beneath the unit, yet warm air greets you inside. This frustrating scenario affects 1 in 3 households annually according to appliance repair surveys. When your refrigerator’s compressor runs but the freezer won’t cool, it signals a critical breakdown in the cooling cycle despite power reaching the system. Unlike complete compressor failures, this specific malfunction means your appliance is trying – but failing – to maintain temperatures. In this guide, you’ll discover exactly why cold air vanishes even with an active compressor and learn proven troubleshooting steps to diagnose and fix the problem yourself before calling a technician. Most solutions require under $20 in parts and less than an hour of your time.
Frozen Evaporator Coils Choking Your Cooling System

When ice completely blankets the evaporator coils behind your freezer wall, it physically blocks cold air circulation. This occurs when the defrost system fails, allowing frost to accumulate until it seals off airflow like a frozen dam. You’ll notice thick ice buildup (over ¼ inch) covering the metal fins when you remove the rear panel. The compressor keeps running because the thermostat senses warm temperatures, but the ice barrier prevents cold transfer.
How to Defrost Coils Without Damaging Components
- Unplug the refrigerator and remove all food
- Locate the evaporator coil access panel (typically inside the freezer compartment)
- Place towels in the bottom to catch meltwater
- Never use sharp tools – melt ice naturally with a hairdryer on low setting (hold 12+ inches away)
- Wait 2-3 hours until all ice dissolves completely
- Wipe residual moisture with microfiber cloths before reassembly
Why Your Defrost System Failed
- Defrost heater malfunction: Test for continuity using a multimeter (no beep = broken heater)
- Stuck defrost thermostat: Should click when warmed to 68°F (test by submerging in warm water)
- Faulty defrost timer: Listen for a faint click every 8-10 hours (no sound indicates timer failure)
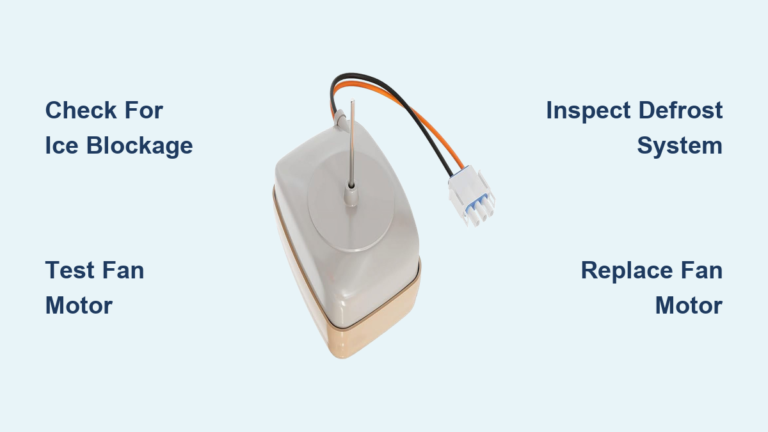
Faulty Evaporator Fan Disrupting Airflow Circulation
The freezer’s evaporator fan must run constantly when the compressor operates. If this fan fails, cold air generated by the coils never reaches your food compartment. Stand quietly near your running refrigerator – you should hear a distinct airflow sound from the freezer vents. No airflow despite compressor noise confirms fan failure.
Diagnosing Fan Motor Failure in 90 Seconds
- Open freezer door while compressor runs
- Press and hold the door switch (simulates closed position)
- Listen for fan hum near rear wall
- Critical check: Shine flashlight into vent openings – visible frost indicates airflow blockage
- Remove fan cover and manually spin blades (stiffness = failing motor)
Pro Tip: Before replacing the $35 fan motor, check for ice jamming the blades. A 10-minute manual defrost often resolves temporary freezes.
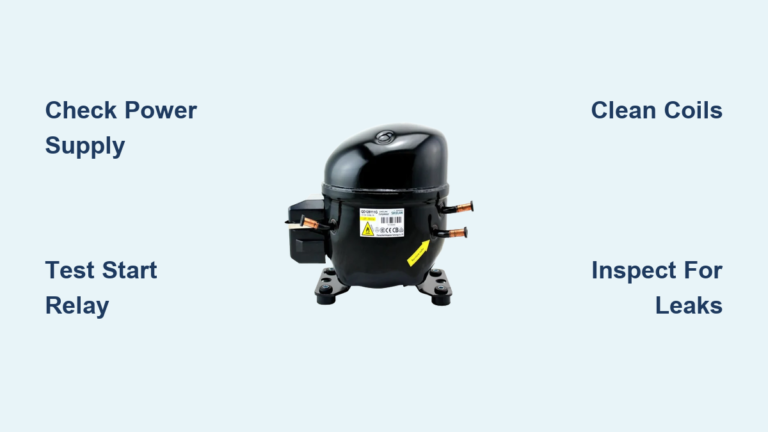
Condenser Coil Contamination Overheating the System
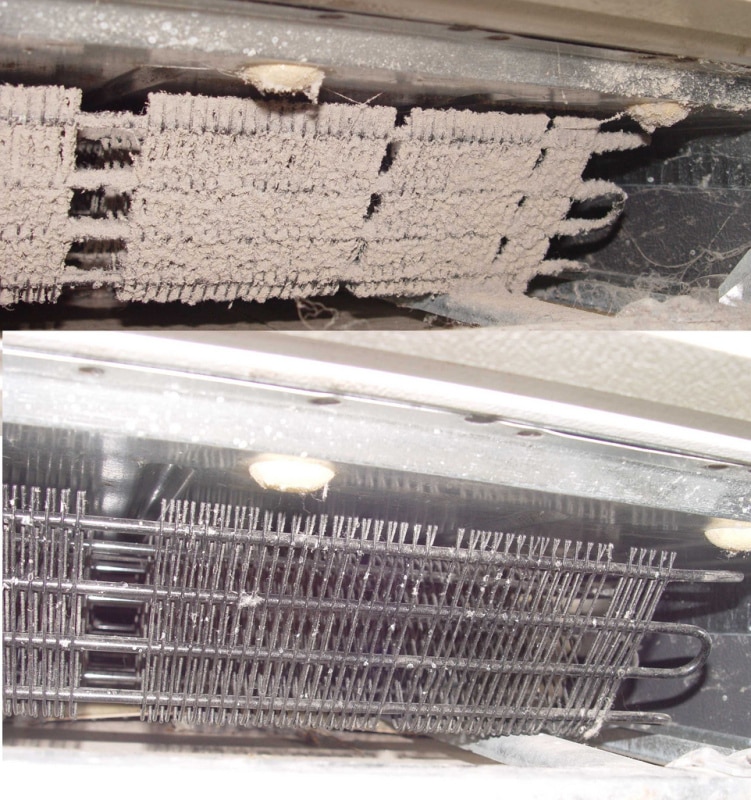
Dirty condenser coils force your compressor to work 30% harder while failing to dissipate heat. Located either behind the unit or along the base grille, these coils become clogged with pet hair and dust. When blocked, the system can’t complete the refrigeration cycle properly – warm freezer air is the first symptom.
High-Efficiency Coil Cleaning Protocol
- Unplug refrigerator and pull unit away from wall
- Remove base grille (usually snaps off)
- Use a coil brush to dislodge embedded debris (avoid bending fins)
- Vacuum loosened particles with crevice tool
- Critical step: Clean floor area behind unit where dust accumulates
- Allow 24 hours for full cooling recovery after cleaning
Warning: Never skip unplugging the unit – capacitors can deliver dangerous shocks even when off.
Refrigerant Leaks Breaking the Cooling Cycle

When refrigerant levels drop below 70% capacity, the compressor runs continuously but can’t achieve proper cooling. Unlike other issues, refrigerant leaks cause both freezer and fridge compartments to warm simultaneously. You’ll notice oily residue around copper lines and hissing sounds near the compressor.
Leak Detection Without Specialized Tools
- Check for greasy spots on refrigerant lines (refrigerant carries oil)
- Listen for faint bubbling sounds near compressor compartment
- Inspect for corrosion on copper tubing (common at door hinge points)
- Professional requirement: Only EPA-certified technicians can legally recharge systems
Important: Never attempt DIY refrigerant repairs – improper handling releases ozone-depleting chemicals and violates federal regulations.
Faulty Thermostat Misreading Internal Temperatures
A malfunctioning thermostat sends incorrect signals to the control board, preventing cooling cycles from activating properly. Your compressor runs, but the system doesn’t recognize when temperatures rise. Test by adjusting the thermostat to its coldest setting – if the freezer doesn’t gradually cool over 4 hours, the sensor has failed.
Quick Thermostat Verification Test
- Set freezer control to minimum temperature
- Place thermometer in center of compartment
- Monitor readings hourly for 4 hours
- Failure indicator: Temperature remains above 10°F despite compressor running
- Bypass test: Temporarily connect thermostat wires (consult manual) – if cooling resumes, replace thermostat
Cost Saver: Thermostat replacements cost $15-$25 and take 20 minutes to install – far cheaper than service calls.
Blocked Air Vents Restricting Cold Transfer
Modern refrigerators use a single evaporator system where freezer air circulates to the fridge compartment. When vents between compartments freeze or get blocked by food containers, the freezer may cool normally while the fridge warms. But if the freezer itself won’t cool despite compressor operation, vent blockages inside the freezer are the culprit.
Vent Clearance Procedure
- Remove all freezer contents
- Locate vents (typically on rear wall and top shelf area)
- Clear obstructions like ice cream containers or frozen bags
- Check for internal ice dams using flashlight
- Prevention tip: Leave 2-inch clearance around all vent openings
Pro Insight: Models with dual evaporators (like high-end Samsungs) avoid this issue but develop separate cooling failures.
Start Relay Failure Preventing Compressor Activation
The start relay provides the initial power surge needed to engage the compressor. When faulty, the compressor may hum or click without actually running. However, in some failure modes, the compressor runs but can’t maintain proper pressure – causing warm freezer temperatures despite apparent operation.
Relay Diagnostic Steps
- Locate relay on compressor (usually black cube-shaped component)
- Unplug refrigerator and shake relay gently
- Audible test: You should hear a rattle (no sound = stuck contacts)
- Visual inspection: Look for burnt marks or bulging casing
- Continuity check: Use multimeter on ohms setting (infinite resistance = bad relay)
Critical Note: Relay replacement costs under $20 and takes 15 minutes – the most cost-effective DIY fix for cooling failures.
When to Call a Professional Immediately
Certain symptoms require expert intervention to prevent total system failure:
– Oil pooling beneath the unit (indicates compressor seal failure)
– Persistent clicking sounds from relay compartment
– Burning smells near electrical components
– Temperature fluctuations exceeding 10°F hourly
Most technicians charge $100-$150 for diagnostics, but this fee often applies toward repairs. For units under 7 years old, professional repair typically costs 40% less than replacement.
Preventing Future Cooling Failures: Monthly Maintenance Checklist
Avoid freezer disasters with these 5-minute monthly habits:
– Vacuum condenser coils every 30 days (reduces energy use by 15%)
– Check door seals with dollar bill test (should resist pulling when closed)
– Set freezer to 0°F – colder temps accelerate ice buildup
– Leave space behind unit (minimum 2-inch clearance for airflow)
– Defrost manual-freezers when ice exceeds ¼ inch thickness
Pro Tip: Place a thermometer in your freezer – sudden temperature rises warn of developing problems before food spoils.
Final Note: When your compressor runs but freezer won’t cool, 80% of cases stem from defrost system failures or airflow blockages solvable in under an hour. Start with evaporator coil inspection and fan testing before progressing to complex components. Immediate action prevents $300+ repair bills and food loss – most fixes require only basic tools and under $50 in parts. For persistent issues after completing these steps, consult an appliance specialist before your warranty expires. Remember: consistent maintenance extends refrigerator lifespan by 4-7 years, making these quick checks your most valuable investment.